
Doc2X MCP: Cherry Studio
Back: Doc2X MCP Guide
Cherry Studio is a GUI client. Setup is straightforward, but dependency installation and local file permissions are the most common failure points.
What You Need
- Node.js (LTS recommended) and
npx DOC2X_API_KEY(looks likesk-xxx)- (Optional) other Doc2X MCP config (for example
DOC2X_BASE_URL/ timeouts / polling): see “Environment Variables” in the Doc2X MCP Guide - (Optional) if the network is unstable: a working proxy or npm registry mirror
Add MCP Configuration
In Cherry Studio, go to Settings → MCP Servers and configure doc2x-mcp:
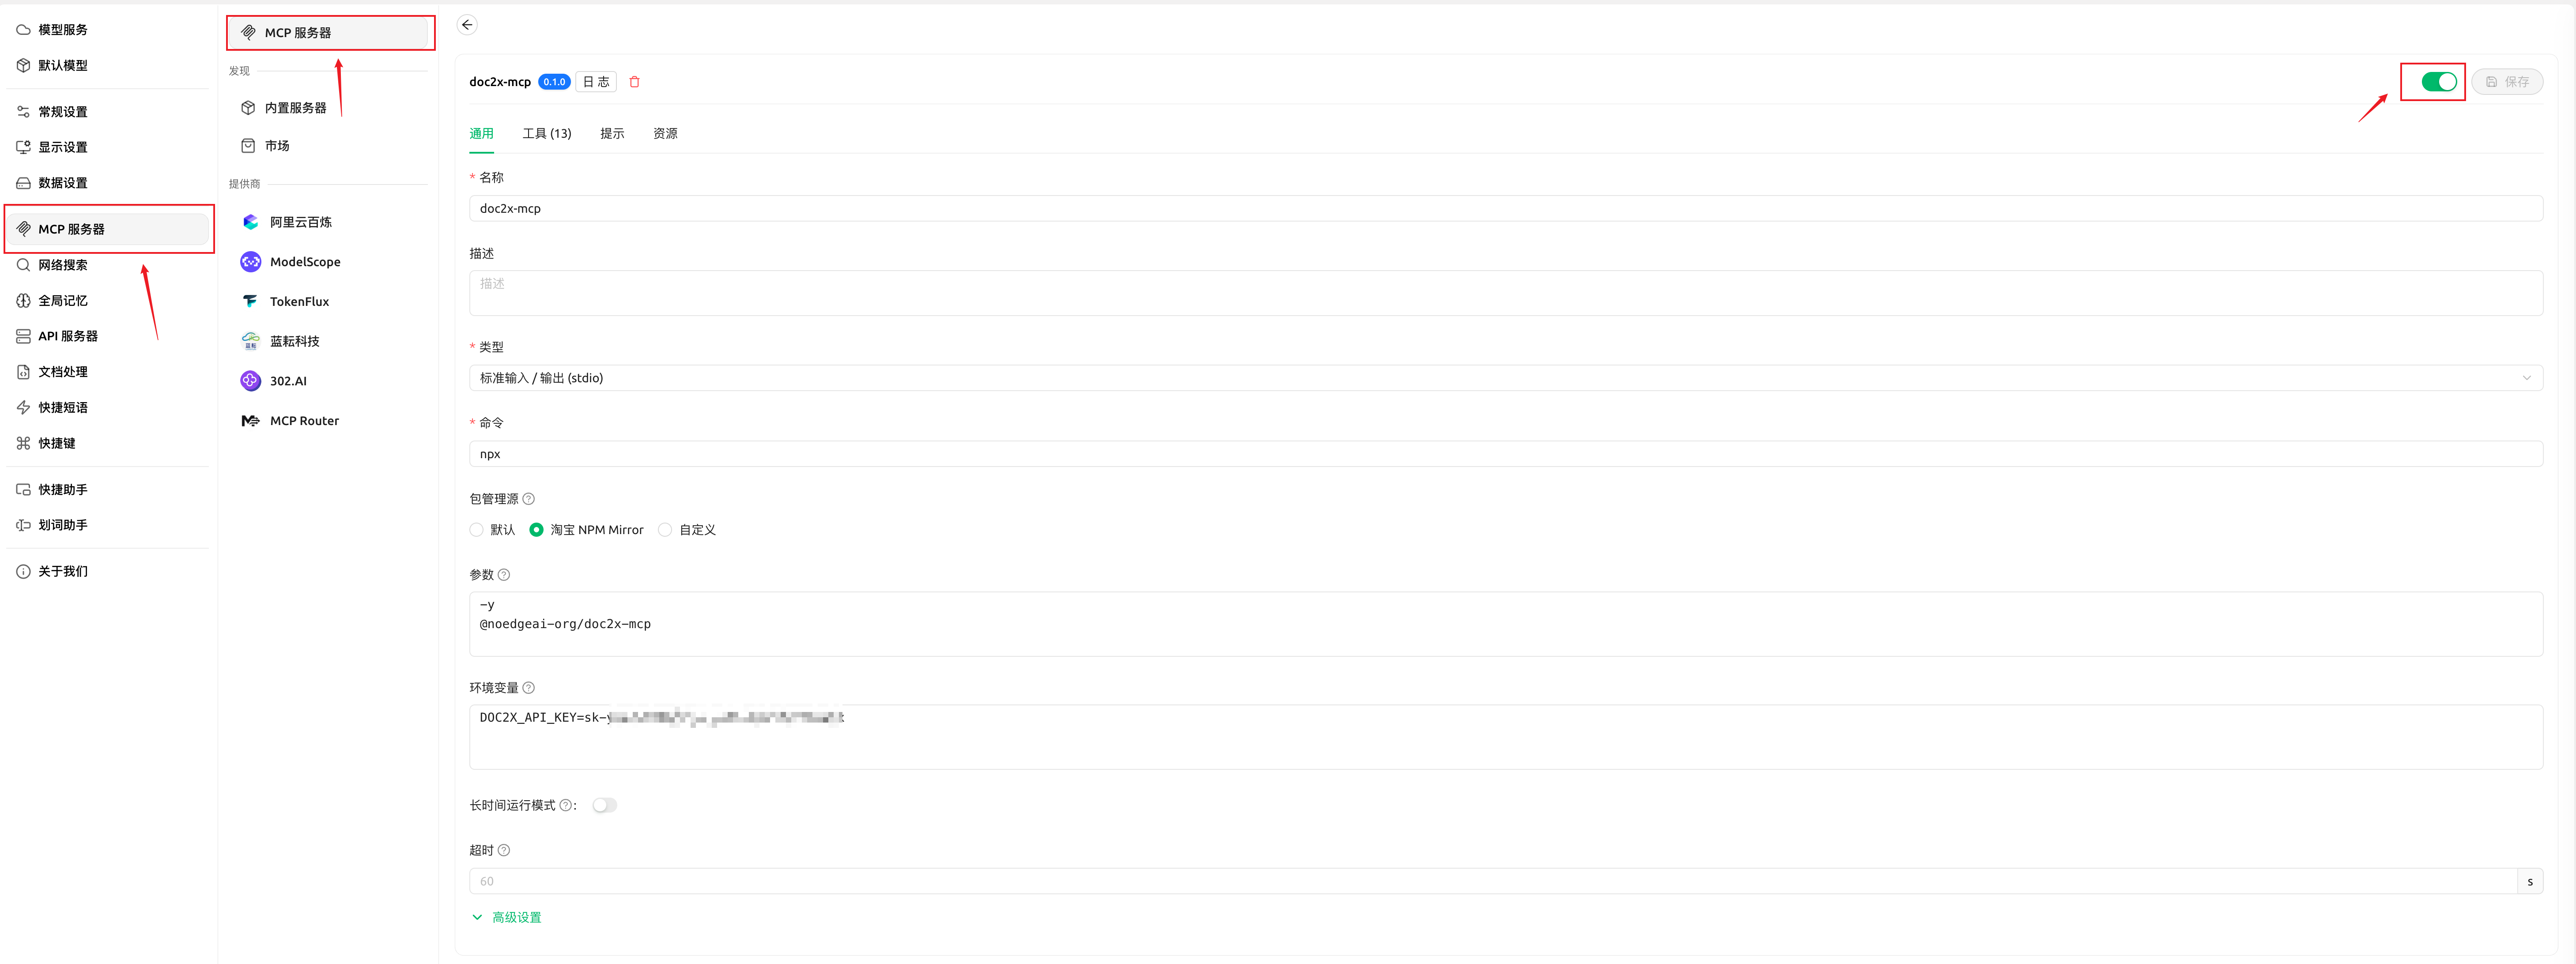
One generic example (fill the fields in Cherry Studio):
command:npxargs:-y @noedgeai-org/doc2x-mcp@0.1.0env:DOC2X_API_KEY=sk-xxx- (Optional) add other env vars like
DOC2X_BASE_URL=...; see “Environment Variables” in the Doc2X MCP Guide
- (Optional) add other env vars like
Check MCP
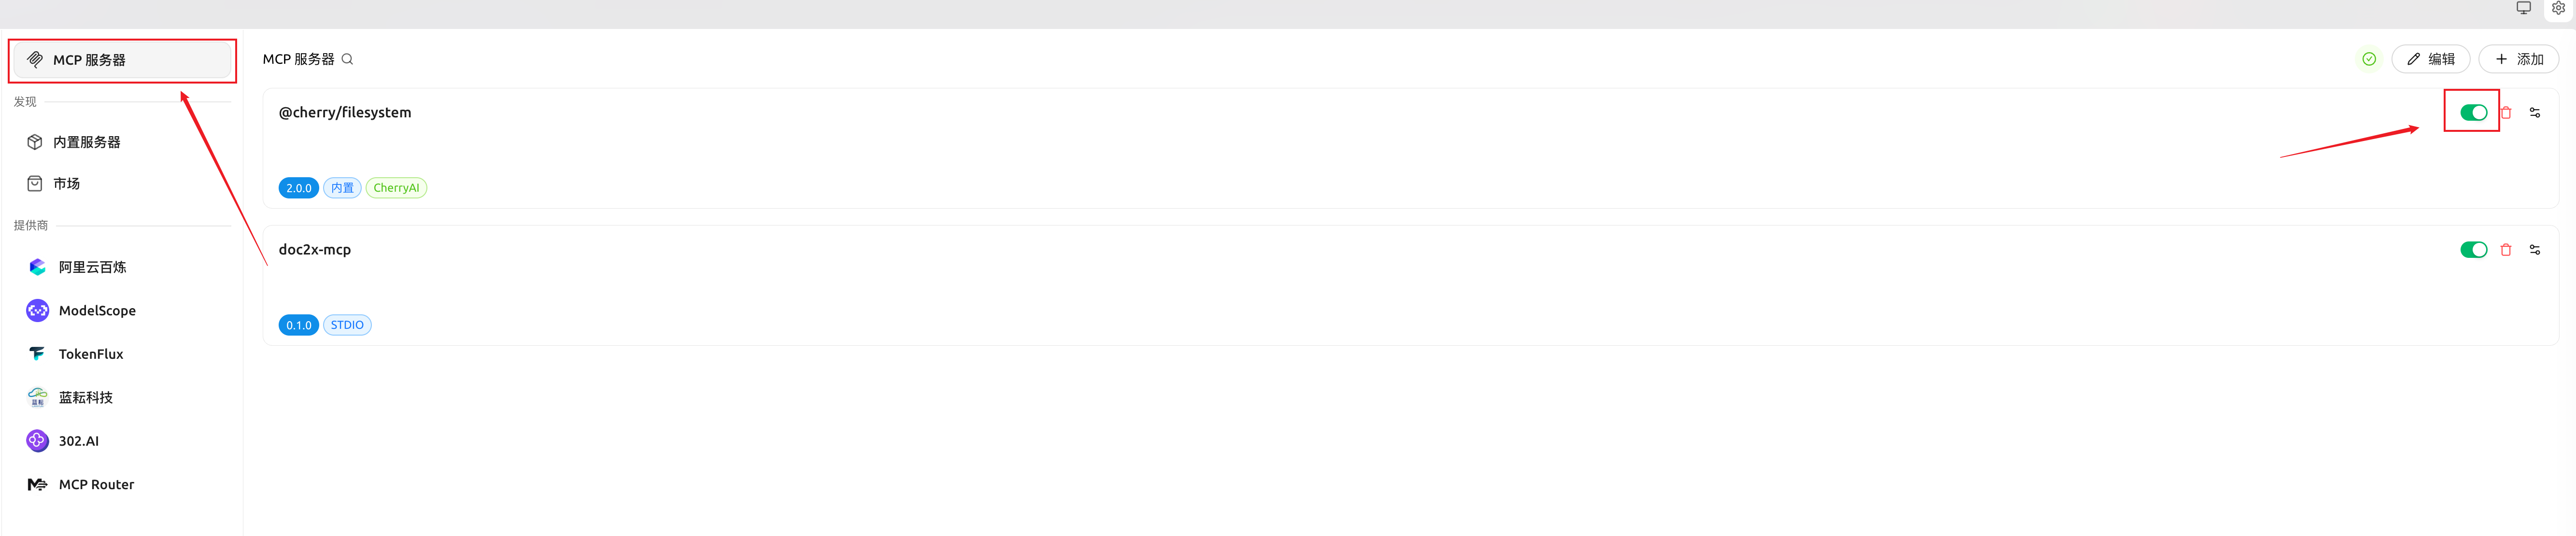
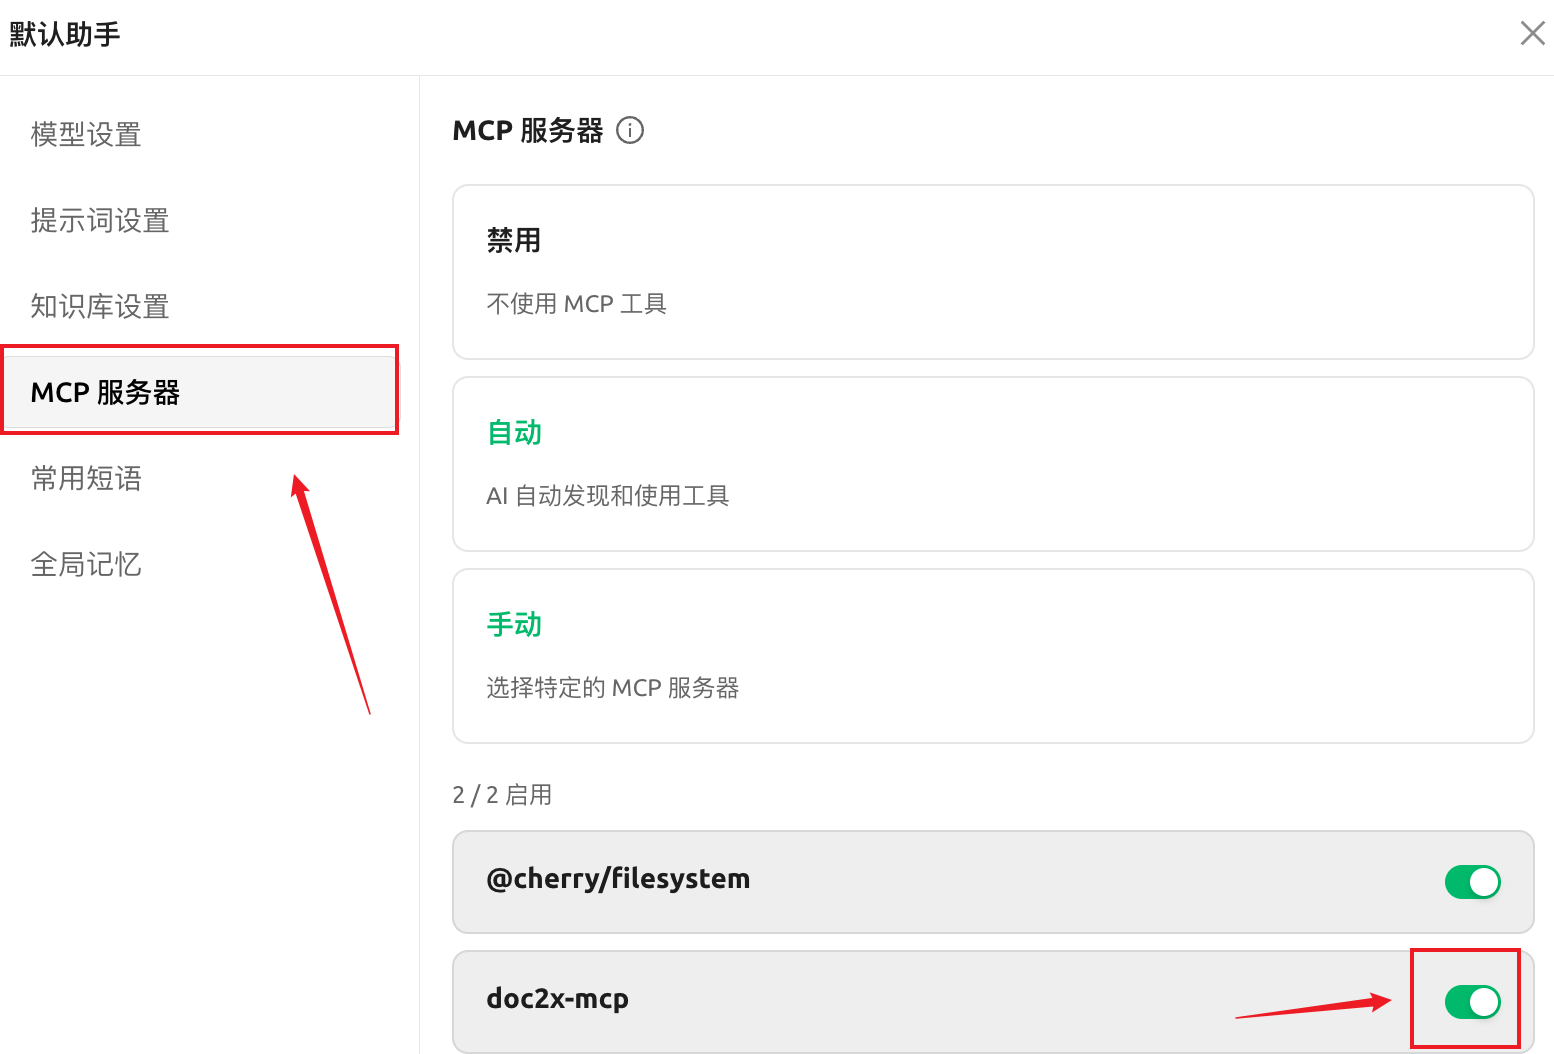
After saving the configuration, go back to Settings → MCP Servers:
- Ensure
doc2x-mcpis enabled - If there is a status/log entry, verify it started successfully (no errors)
Enable Local File Capability
To parse local files, enable @cherry/filesystem:
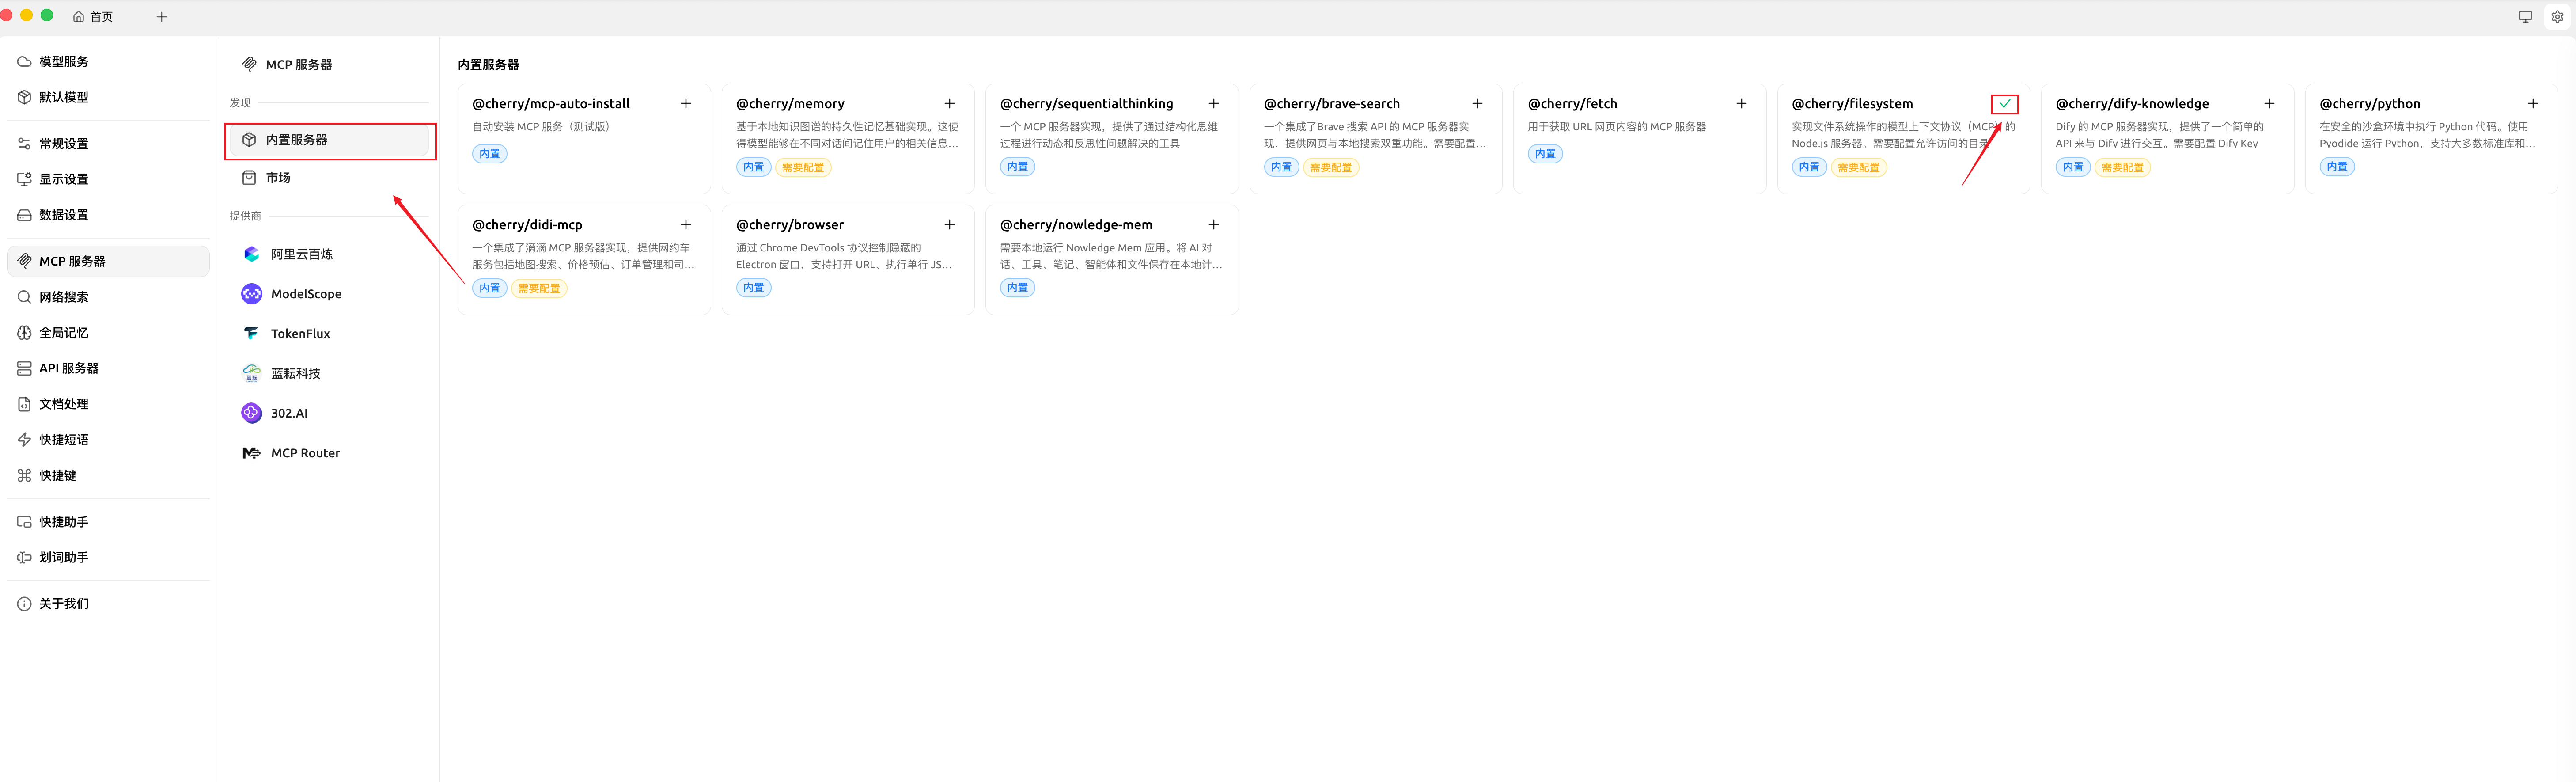
Note: you usually need to explicitly allow which directories Cherry Studio can access.
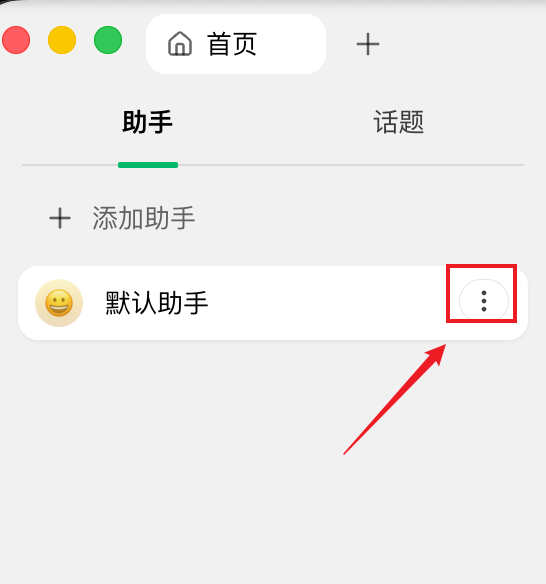
Enable doc2x-mcp in Chat
Use doc2x-mcp
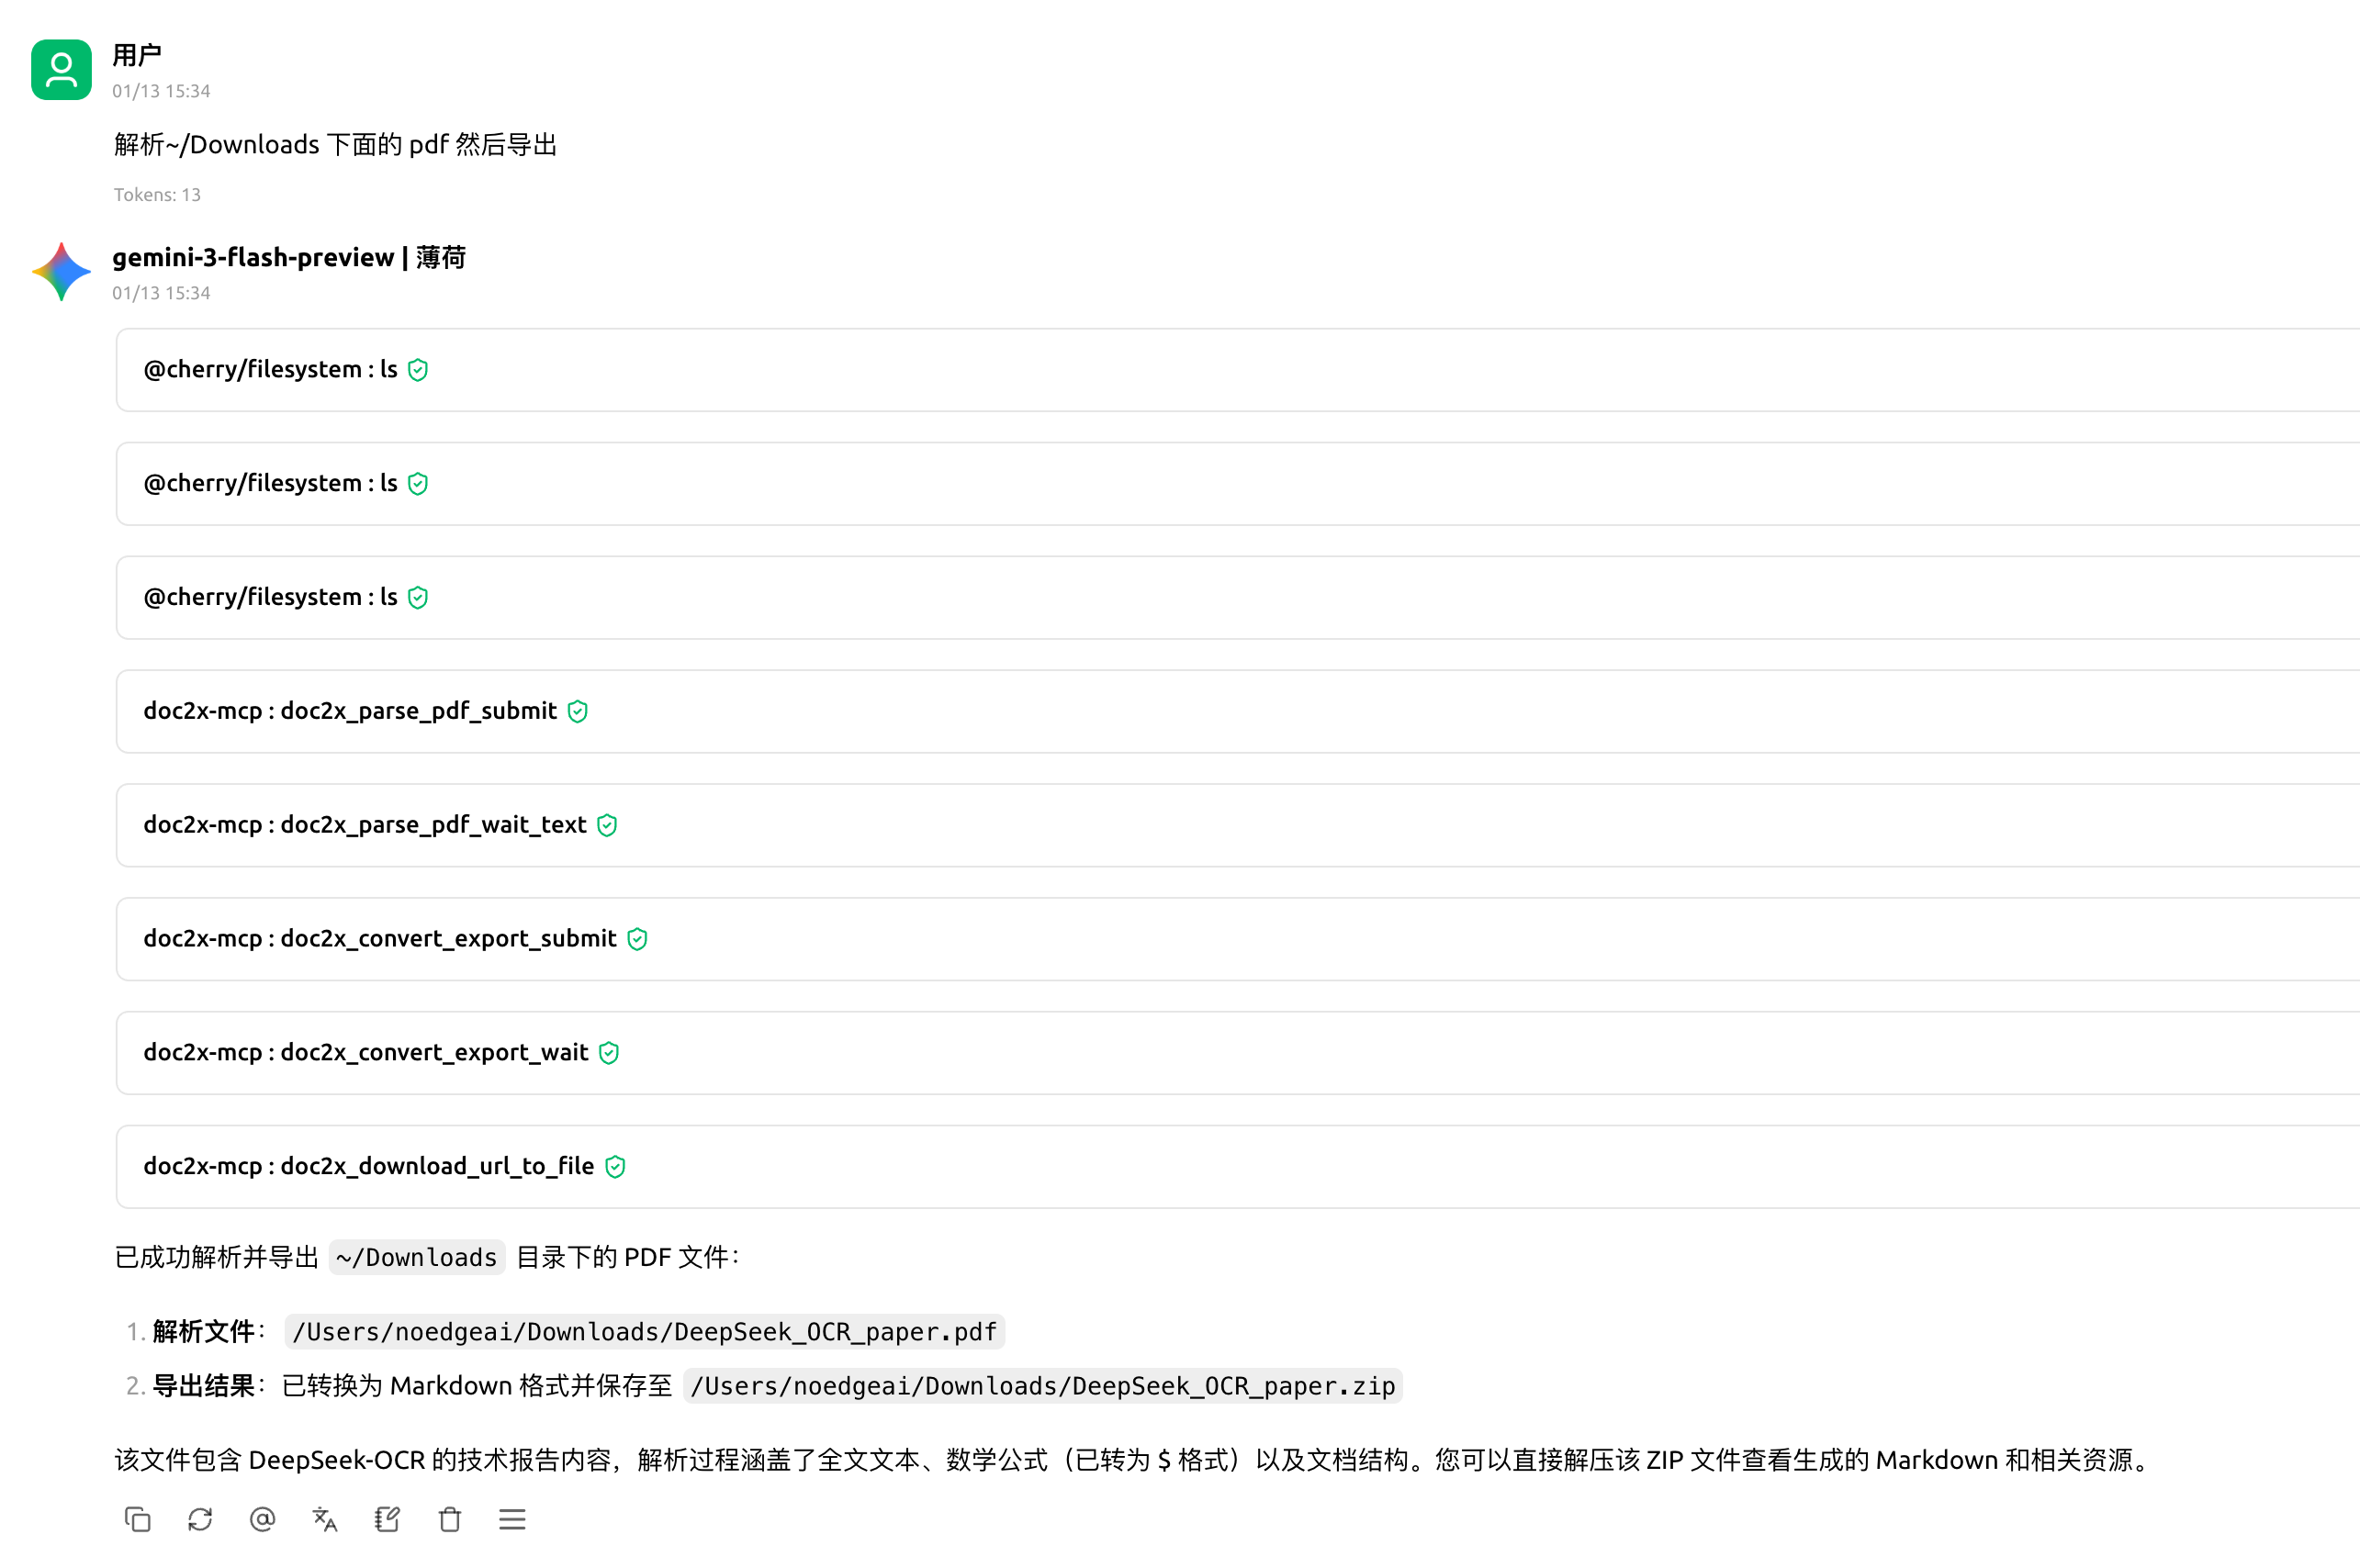
Start with a minimal flow:
- Enable
doc2x-mcpin the chat (as shown above) - Ask the model to parse a specific target file (for local files, ensure filesystem permissions cover the path)
Example prompts:
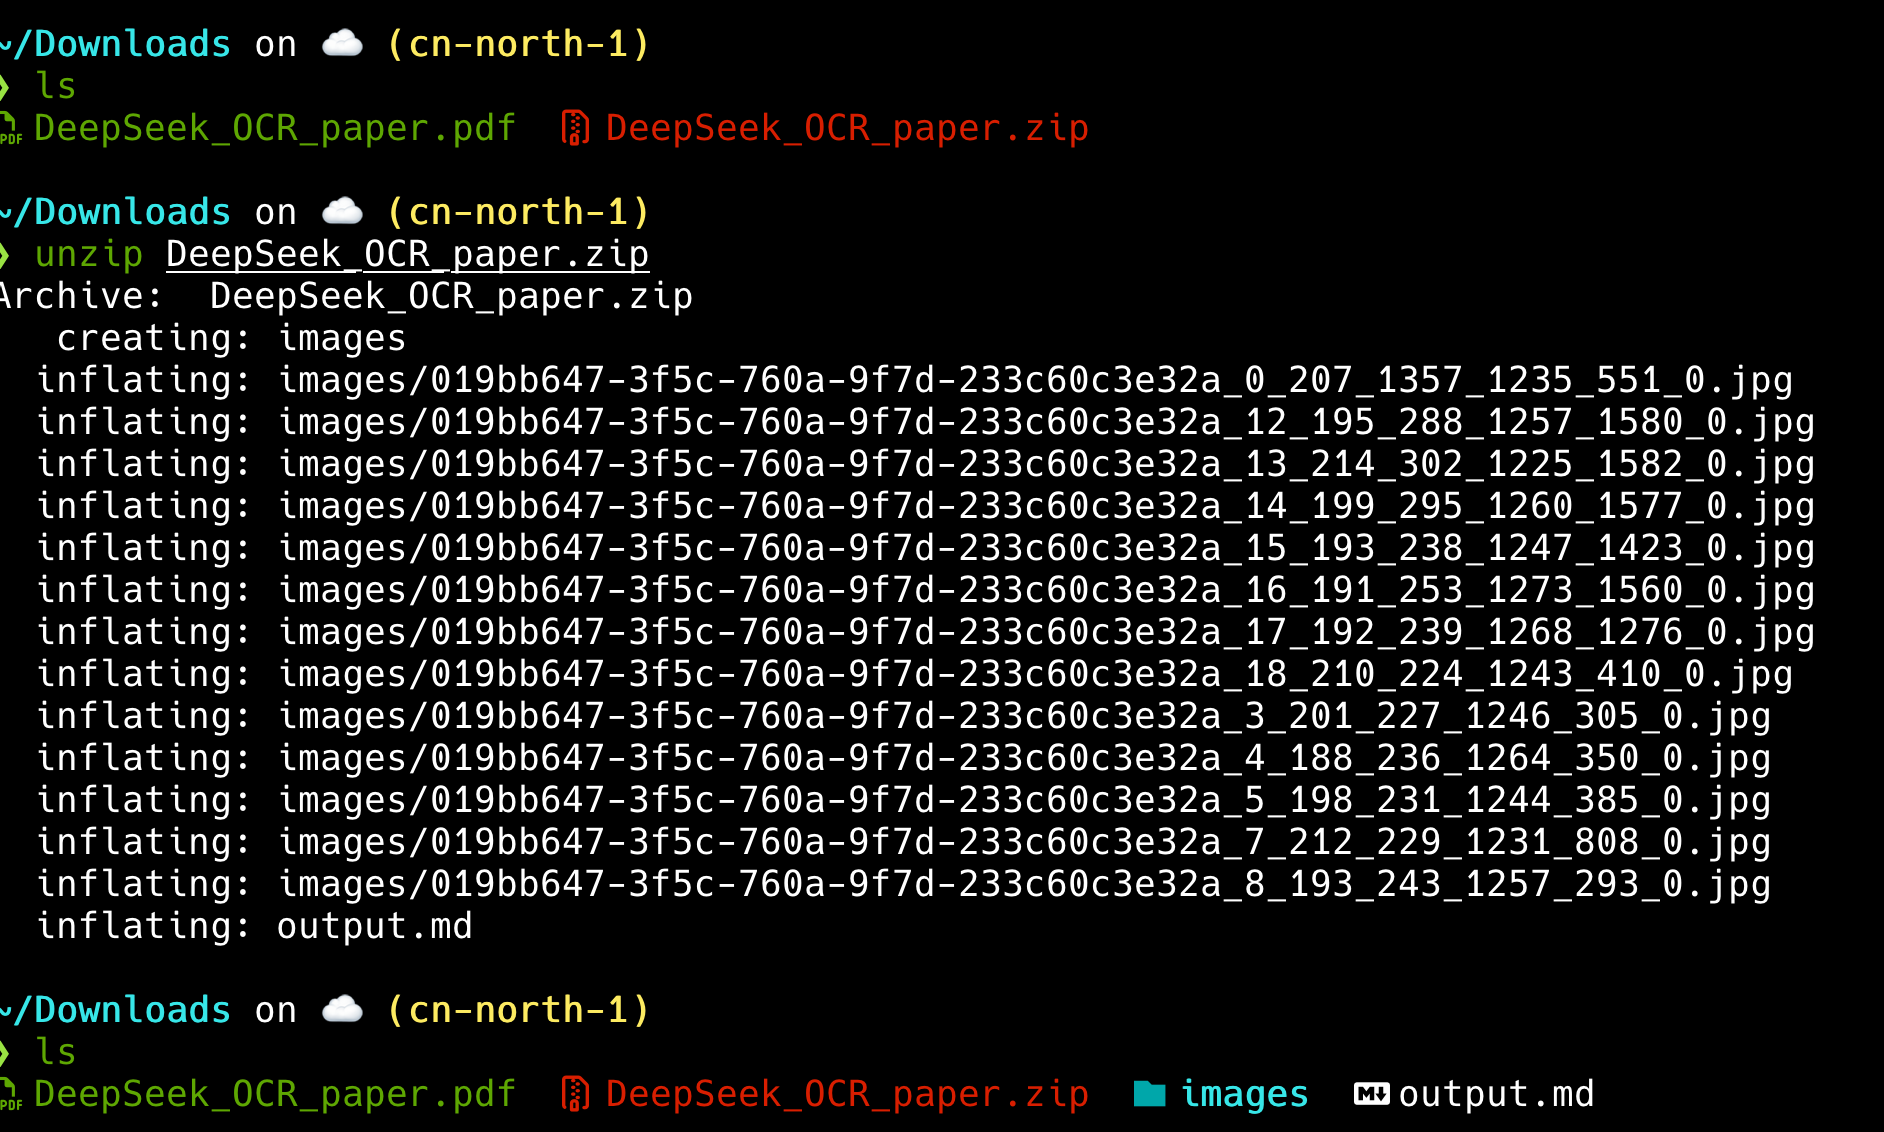
Use doc2x-mcp to parse the selected PDF and export it as Markdown.Use doc2x-mcp to parse this PDF and tell me where I can view/download the exported result.
Troubleshooting
- If installation fails, check network/proxy and consider switching npm registry (
npm_config_registry) and pinning a known-good version. - If local files can’t be read, ensure
@cherry/filesystemis enabled and the allowed directory scope includes your target files.