Doc2X Client Batch Processing System
This document introduces the batch processing functionality and usage methods of the Doc2X client, helping you efficiently handle large-scale document parsing and translation tasks.
System Introduction
Doc2X has added a batch processing system in the client version, enabling users to process large batches of files for parsing/translation and export results for local storage.

Usage Tips
- Before first use, please set up work configuration to select the directory for saving processing results.
- Supports selecting multiple PDF files or entire folders simultaneously.
- Completed files will be automatically saved to corresponding folders in the output directory.
- Supports task interruption and continuation - can continue processing remaining files after unexpected interruption.
- Progress and log information can be viewed at any time during processing.
- Batch processing and direct processing have consistent billing, and the current parsing discount is applied automatically by default.
Parsing Workflow
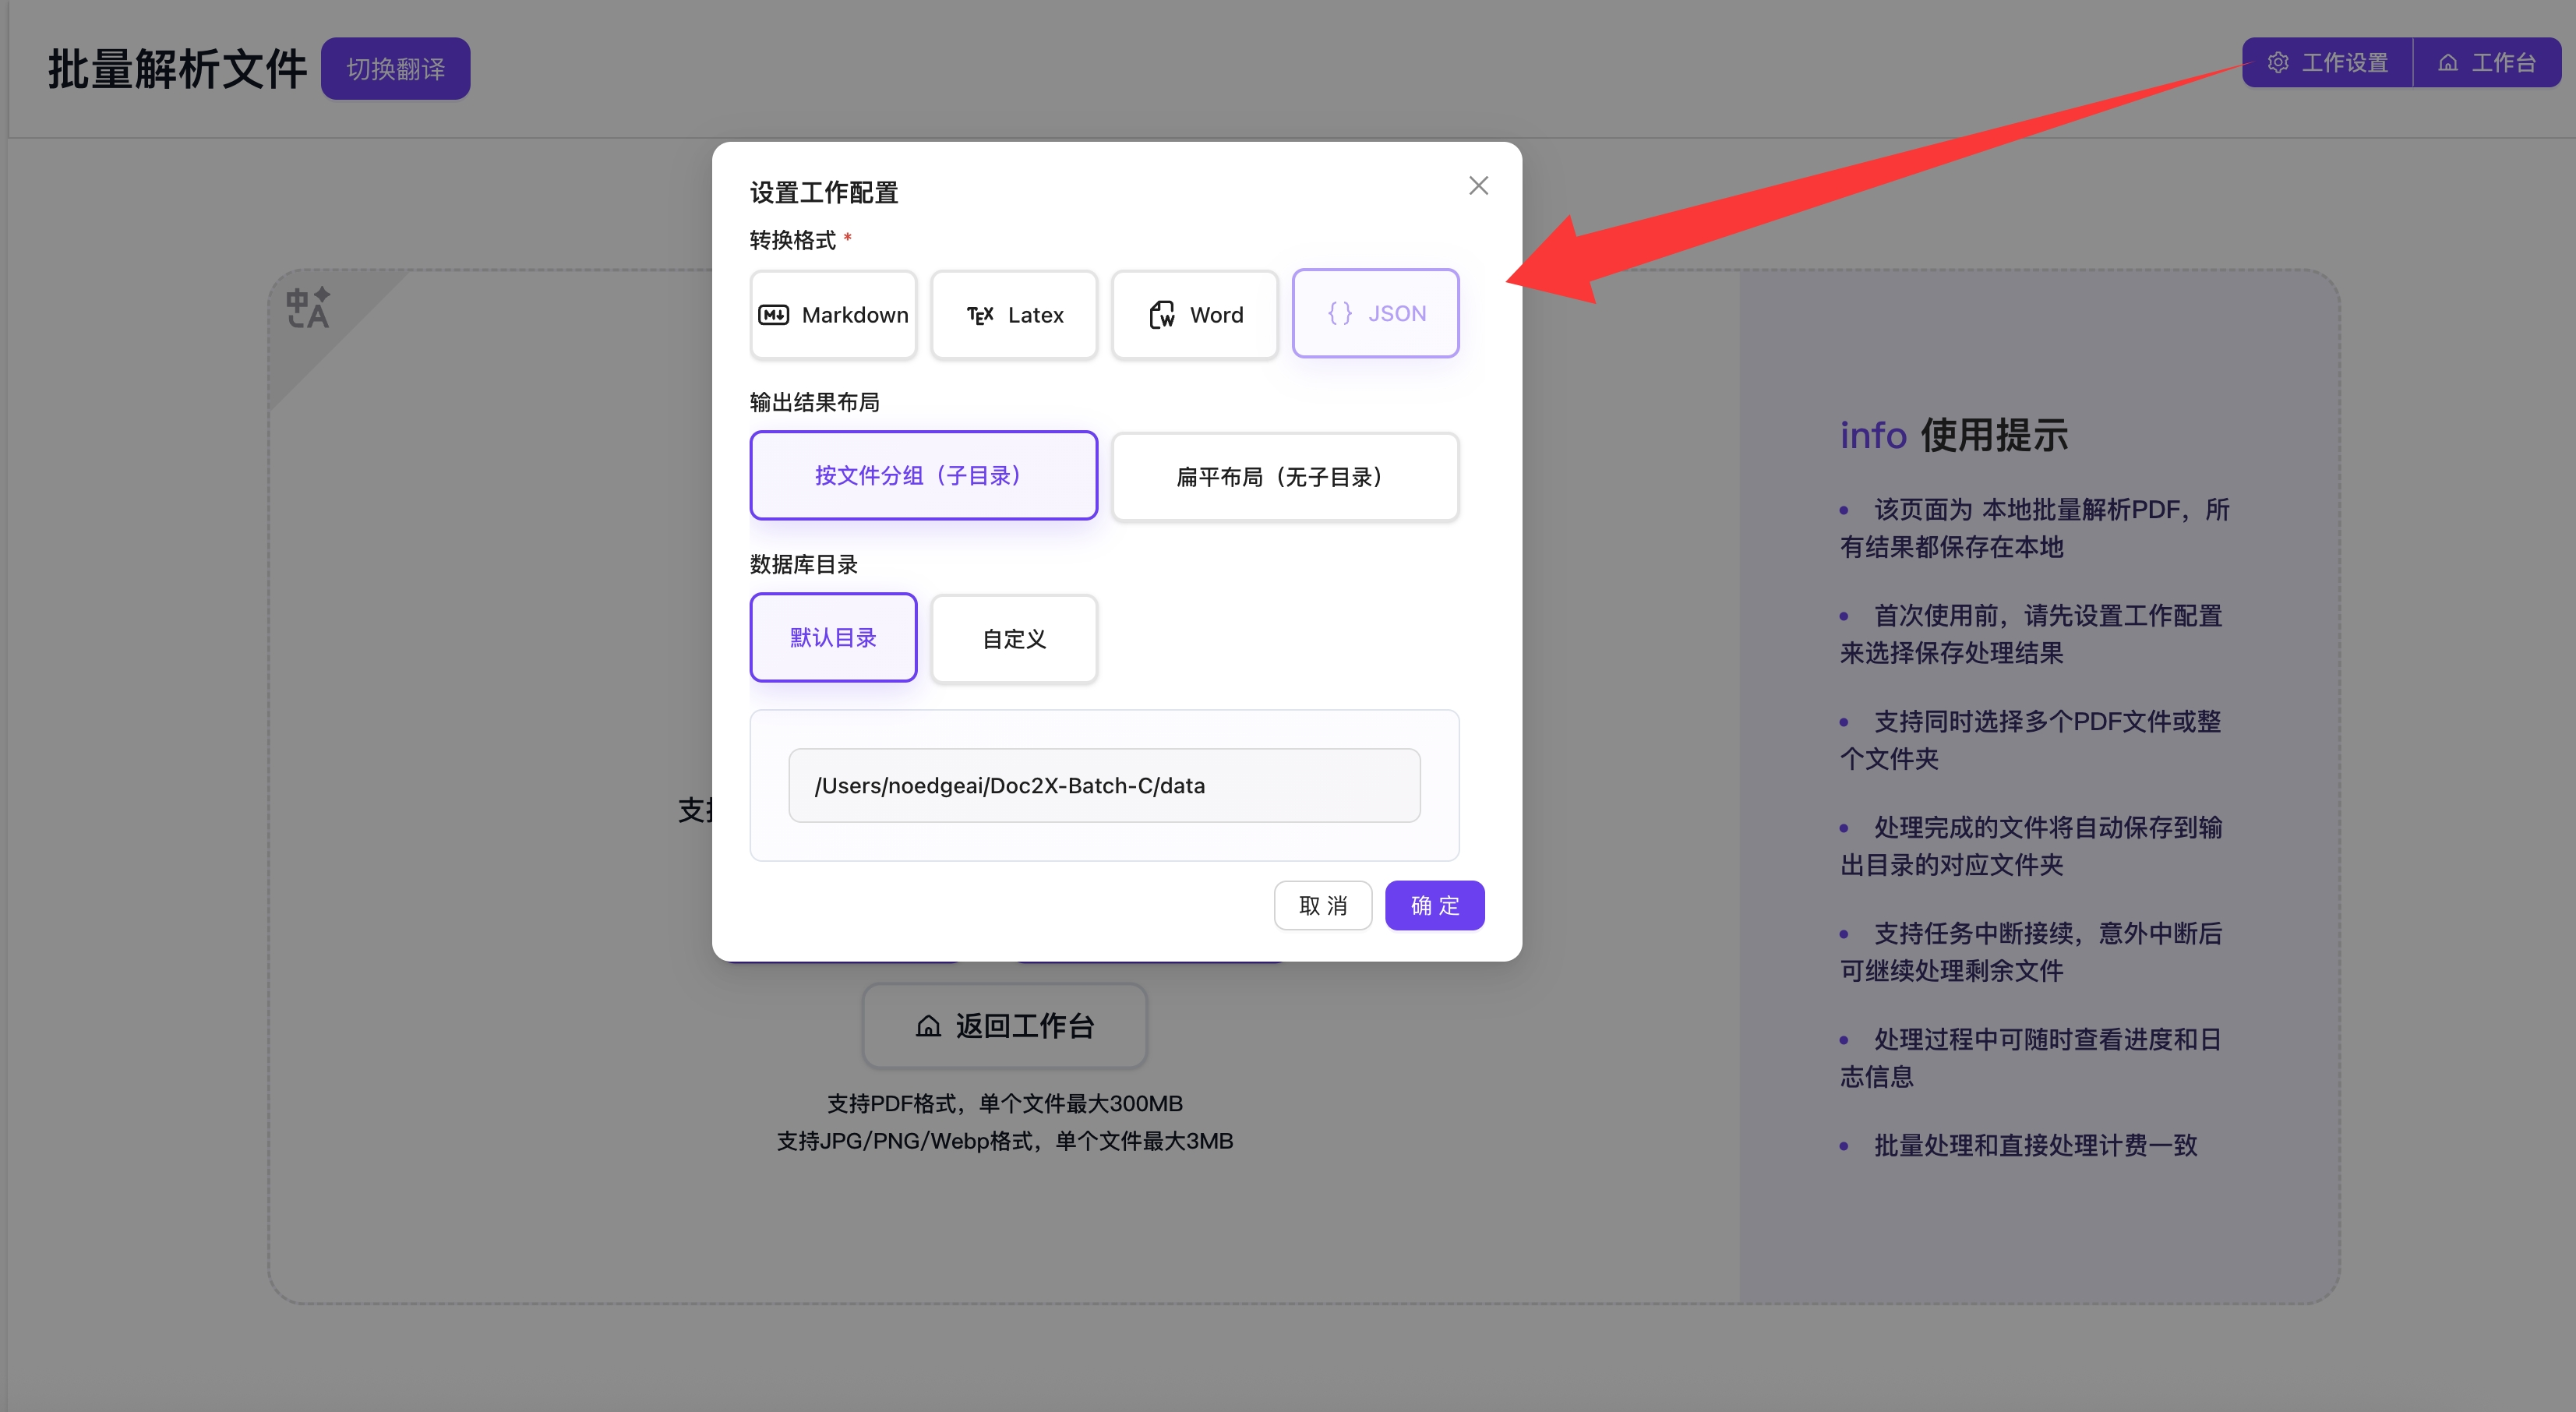
Step 1: Complete Work Settings
Before starting batch parsing, configure the following settings:
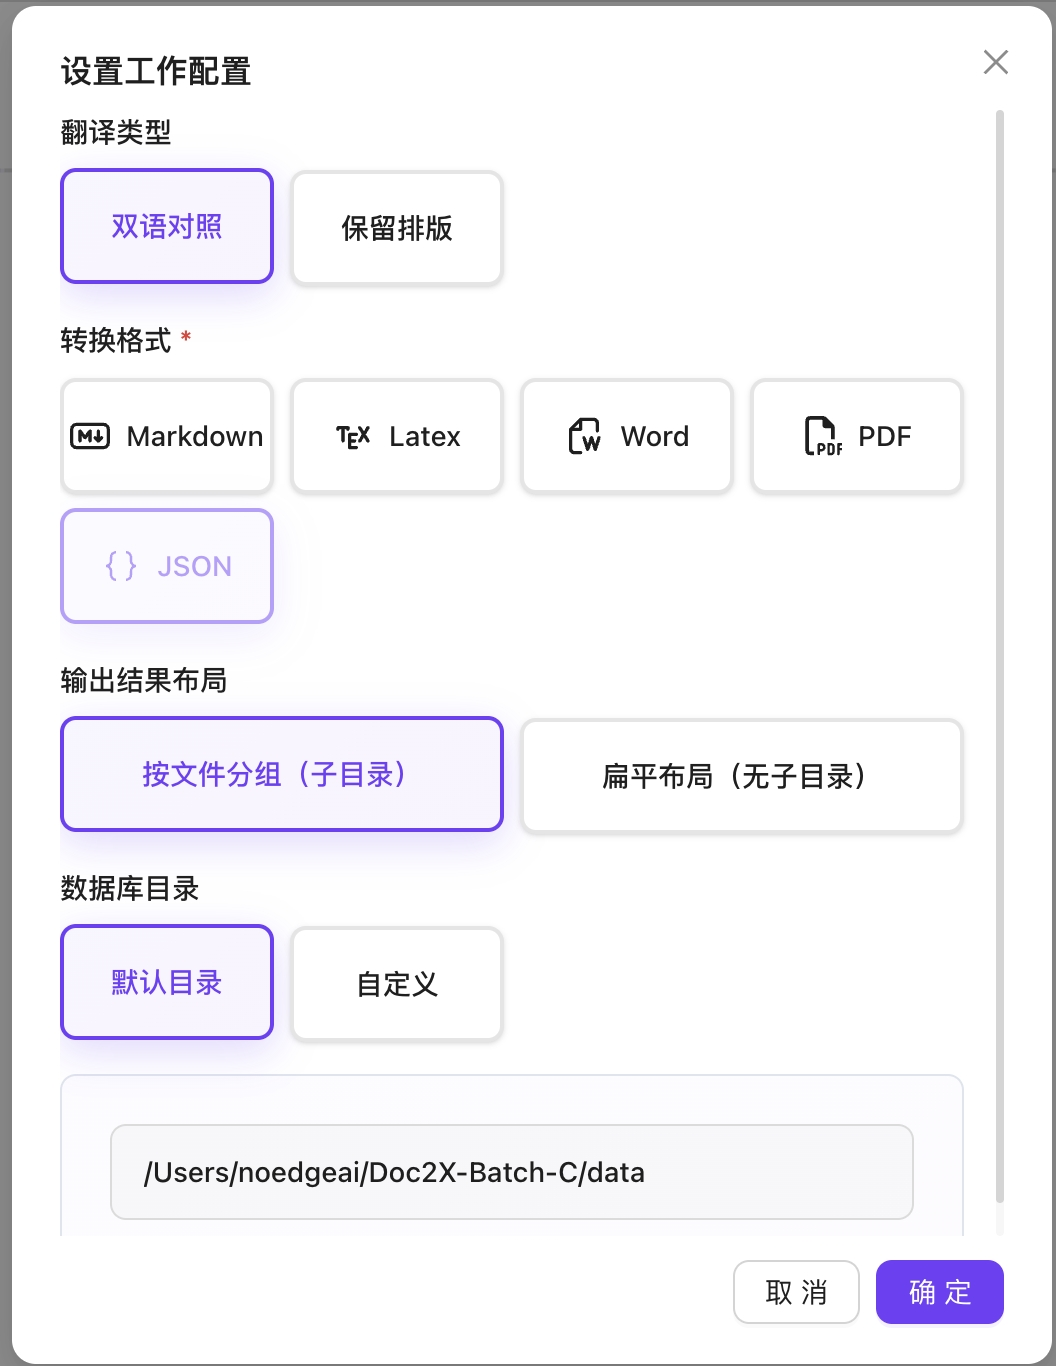
Conversion Format (Parsing)
- Output Format: Choose export format (Markdown, Word, LaTeX, JSON, etc.)
Output Result Layout (Parsing)
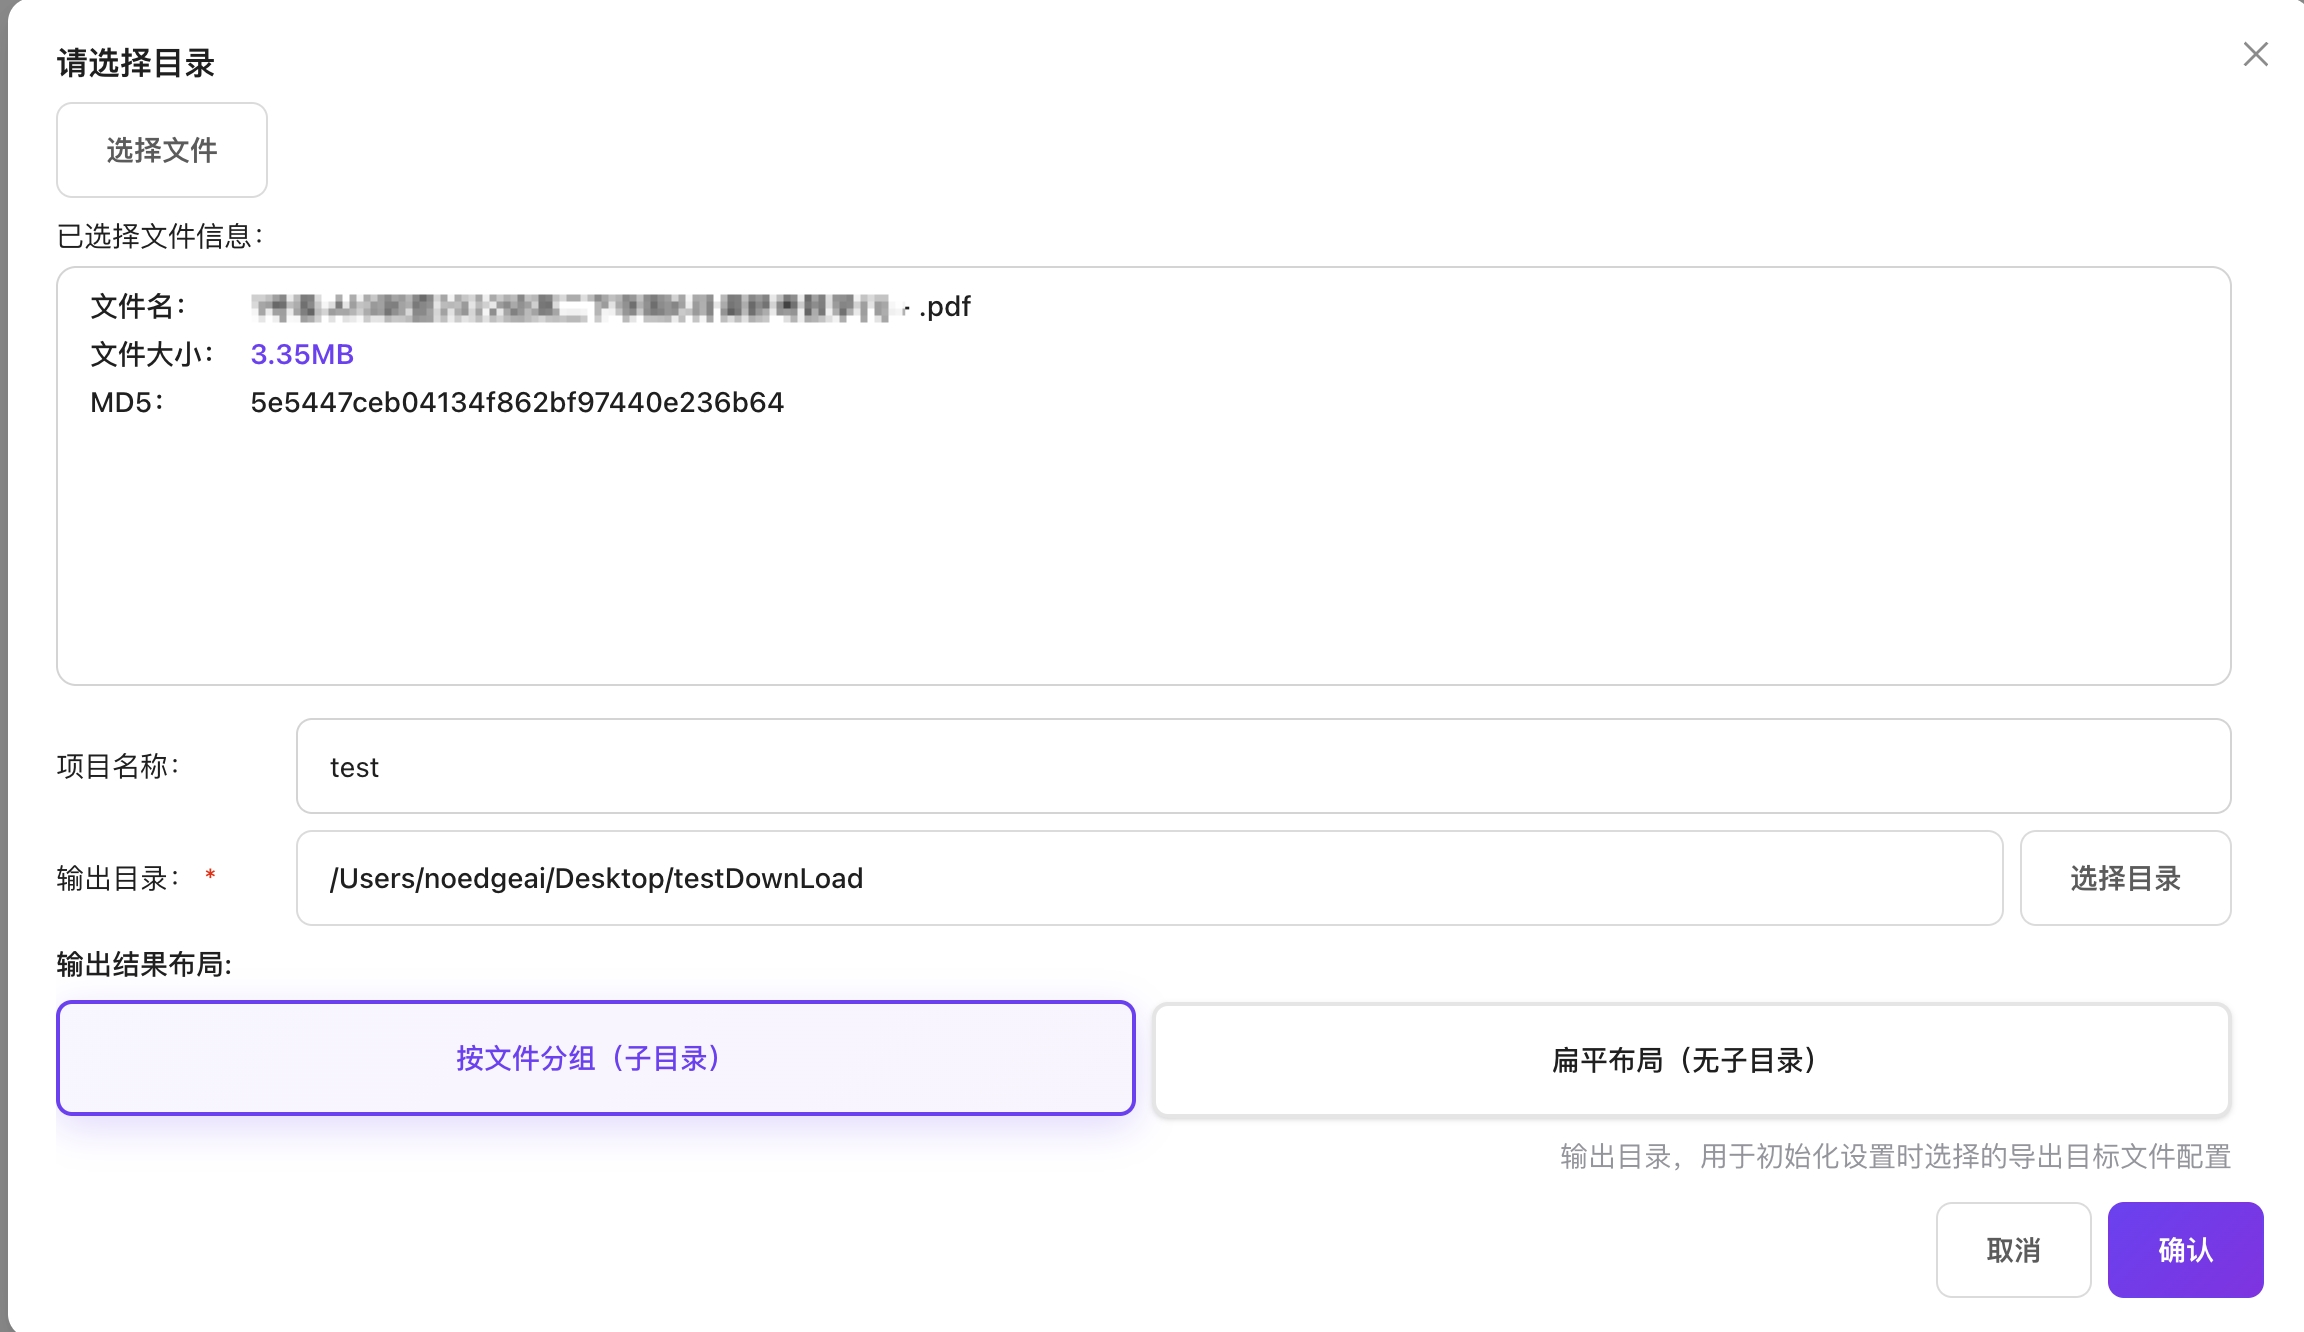
- Group by File: Place all exports related to a file in a subdirectory organized by filename
- Flat Layout: No subdirectories, sequential export
Step 2: Select Files/Folders
Supports multiple file selection methods:
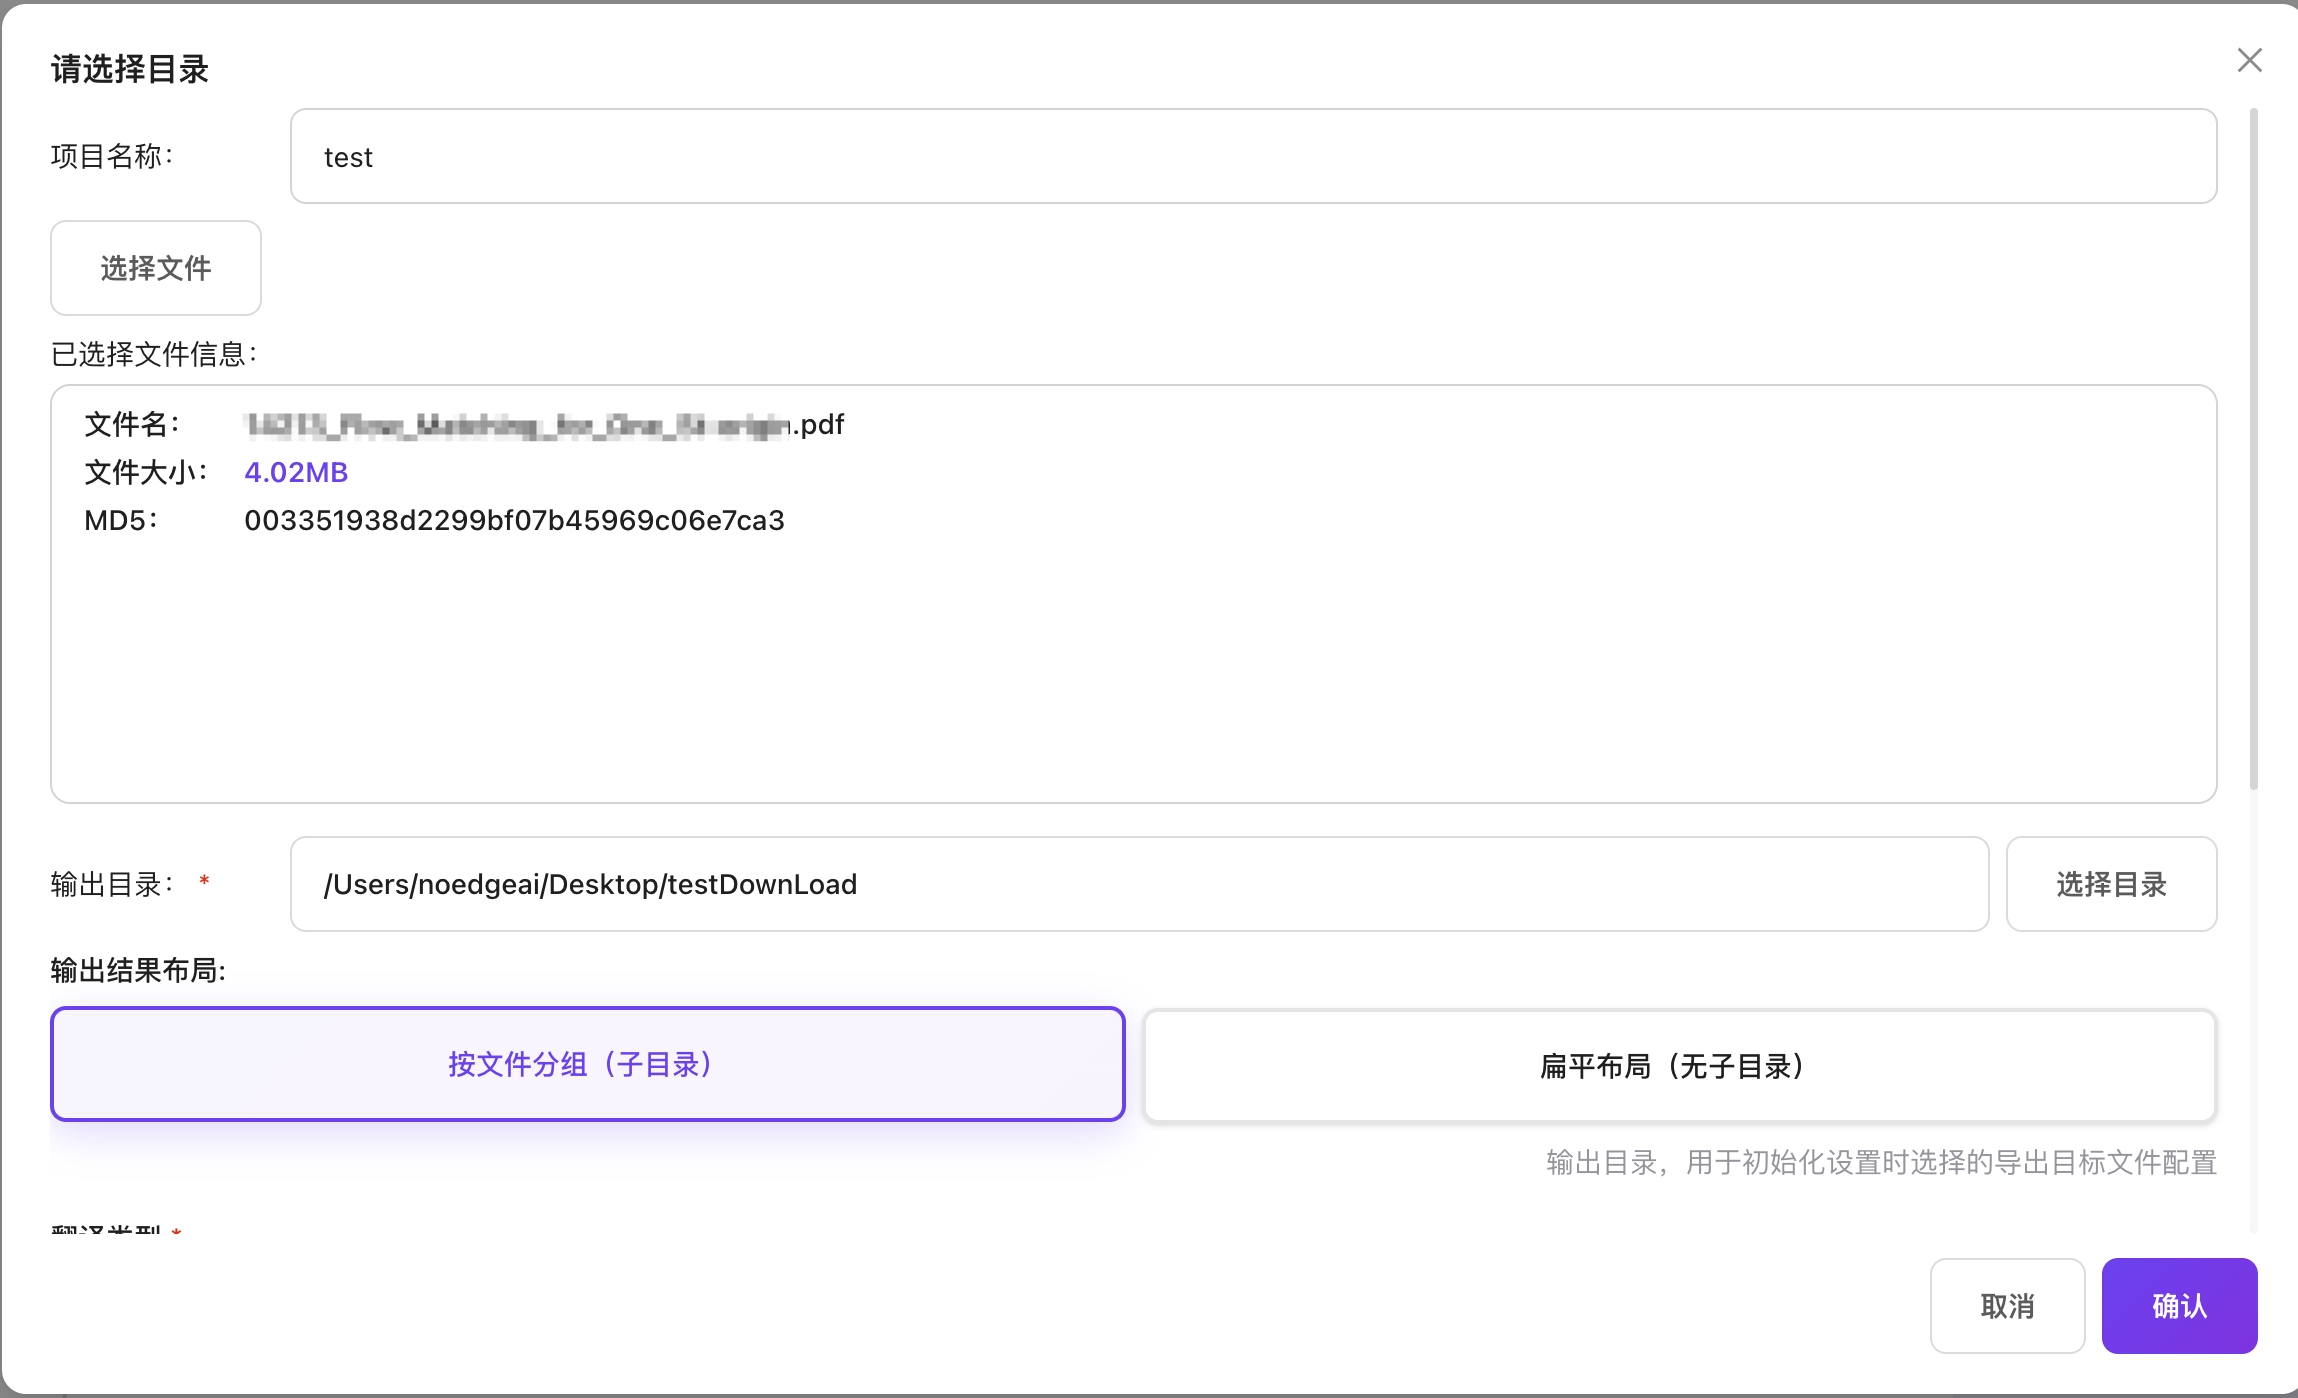
Single File Selection (Parsing)
- Click the "Upload File" button
- Enter project name
- Select output directory
- Supports PDF/image formats
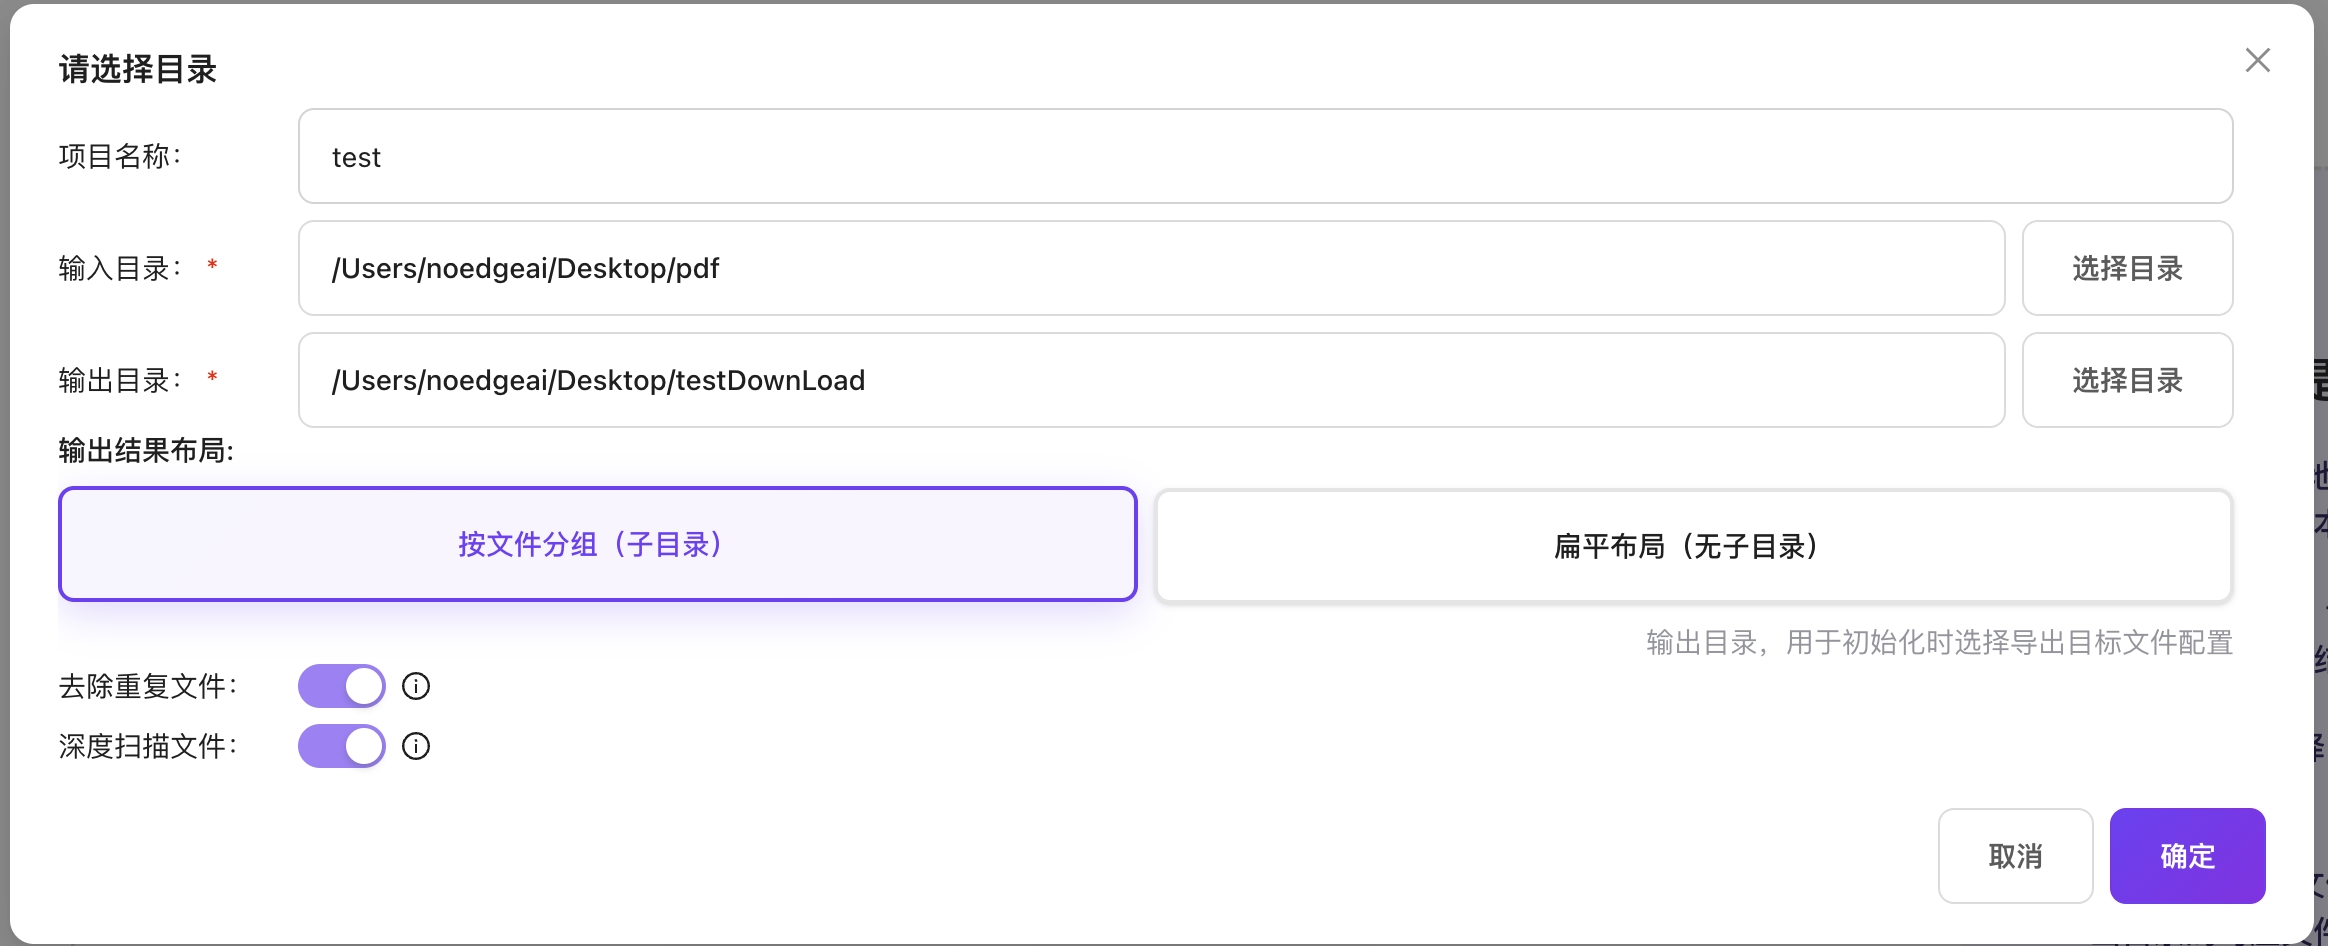
Entire Folder Selection (Parsing)
- Select "Upload Folder" option
- Enter project name
- Select input directory
- Select output directory
- Can set duplicate file removal: Will remove files with duplicate MD5 values in the folder based on scanned file MD5.
- Can set deep scan files: Will recursively scan all subfolders within the folder.
Step 3: Start Processing
- Click the "Confirm" button, the system will automatically process all selected files/folders
- View processing progress in the workspace

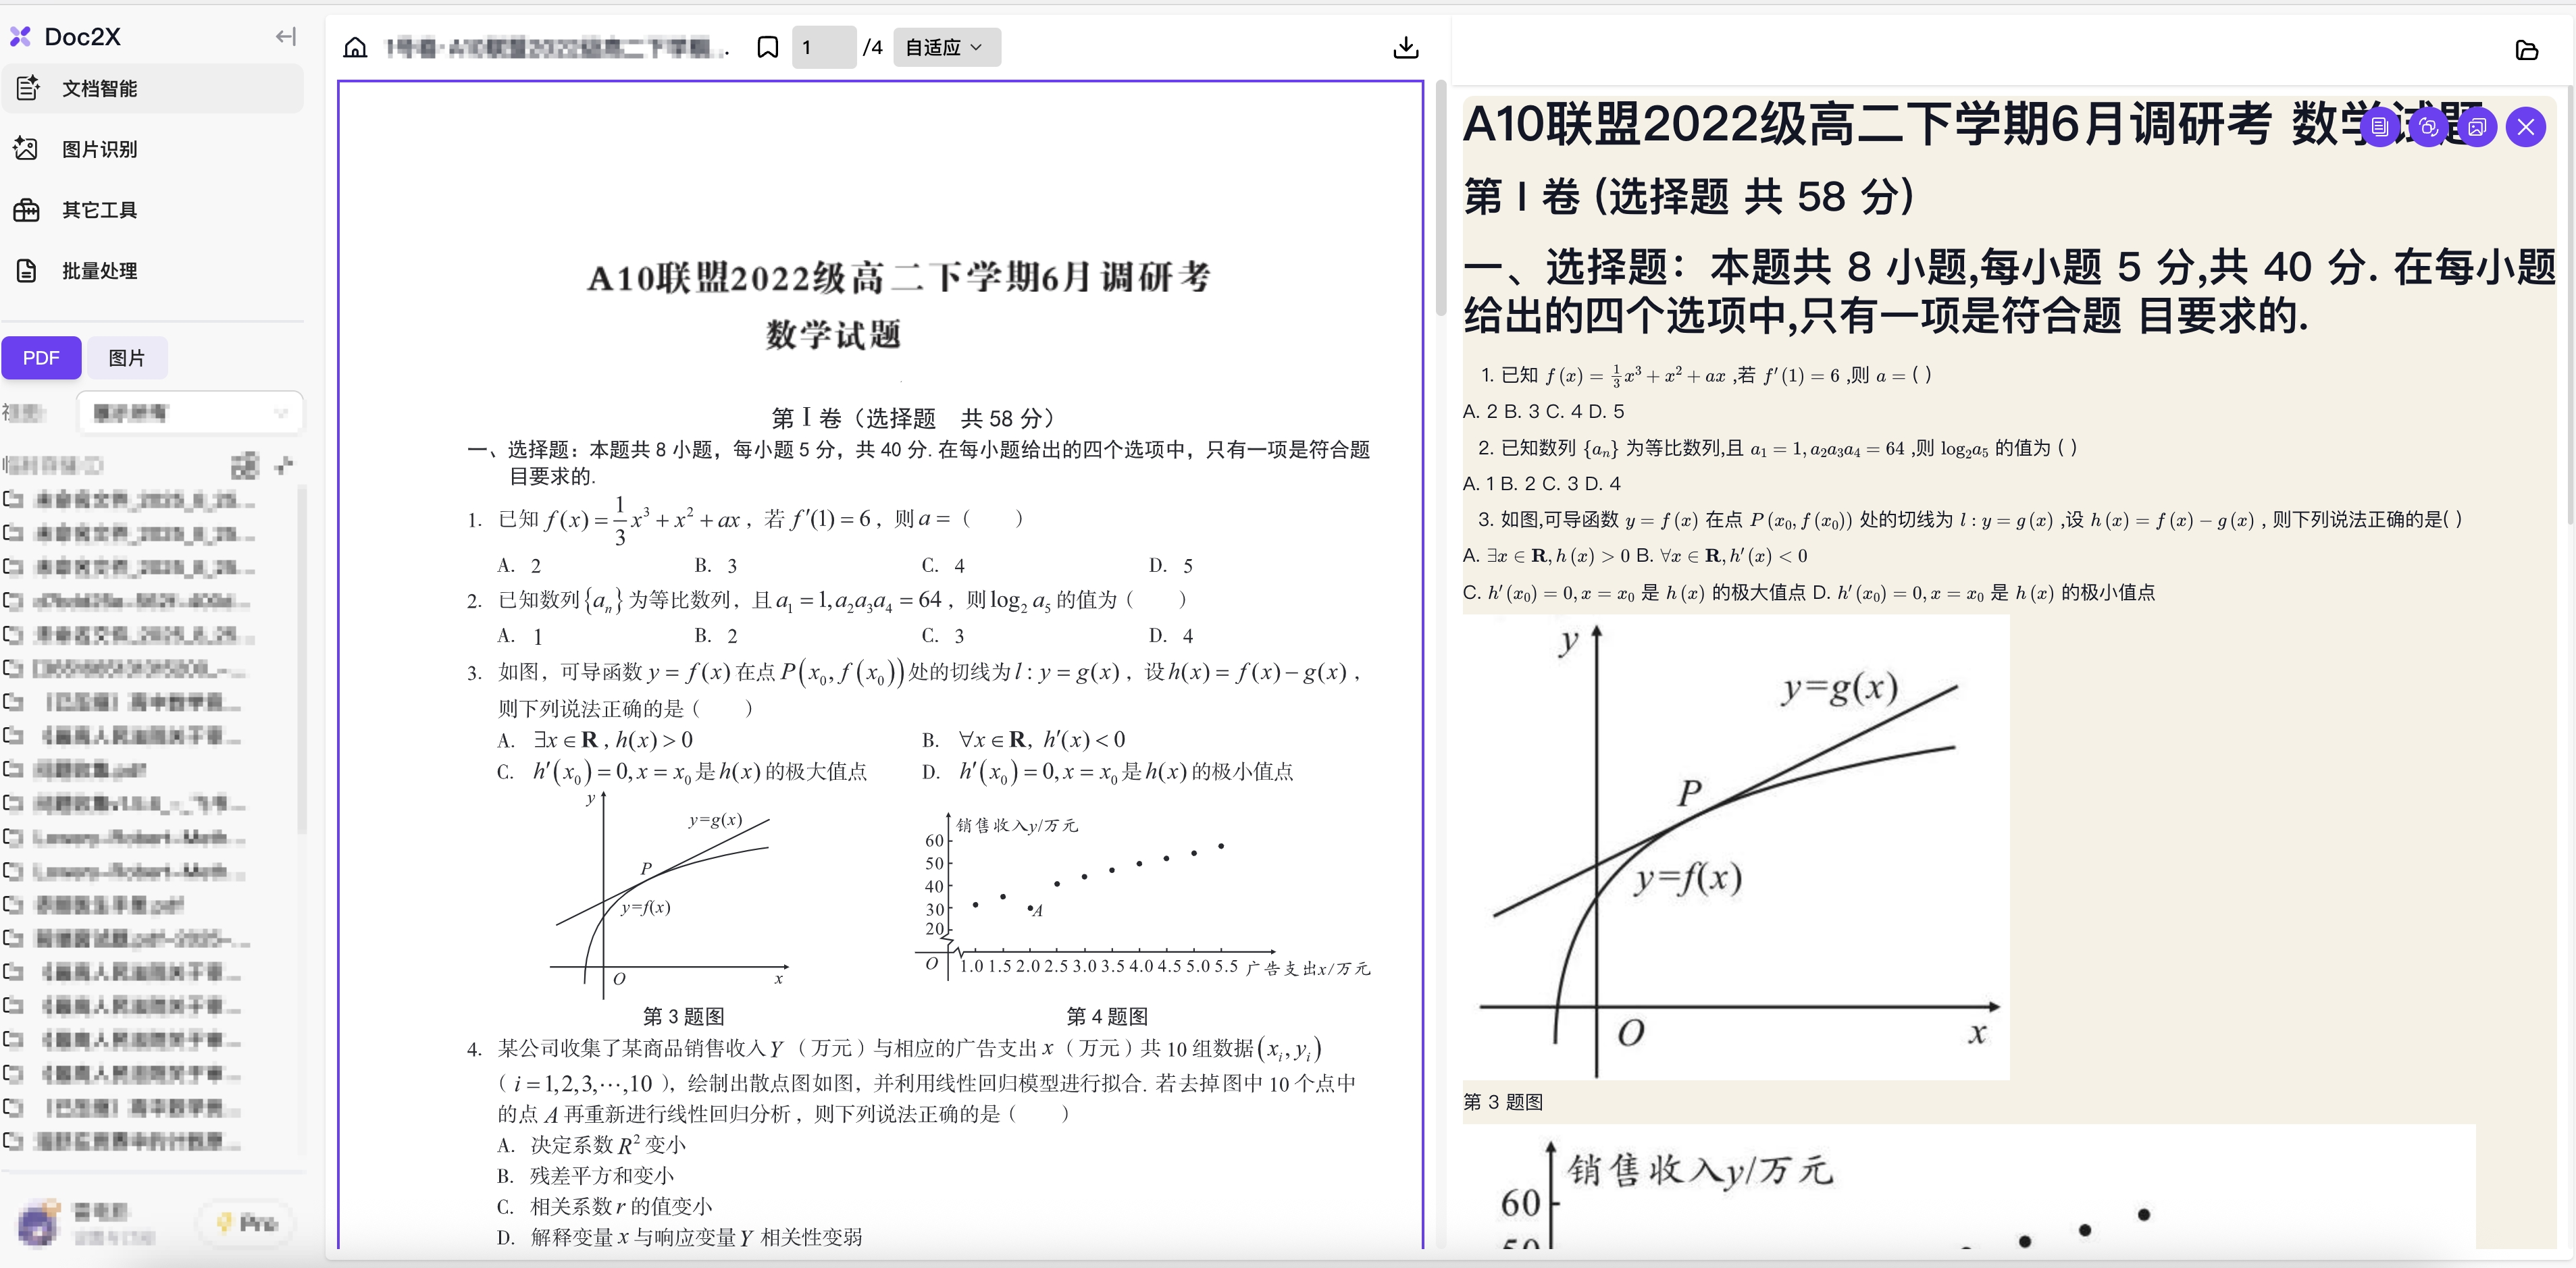
Step 4: View Parsing Results
- After processing is complete, corresponding format files/folders will be generated in the output directory.
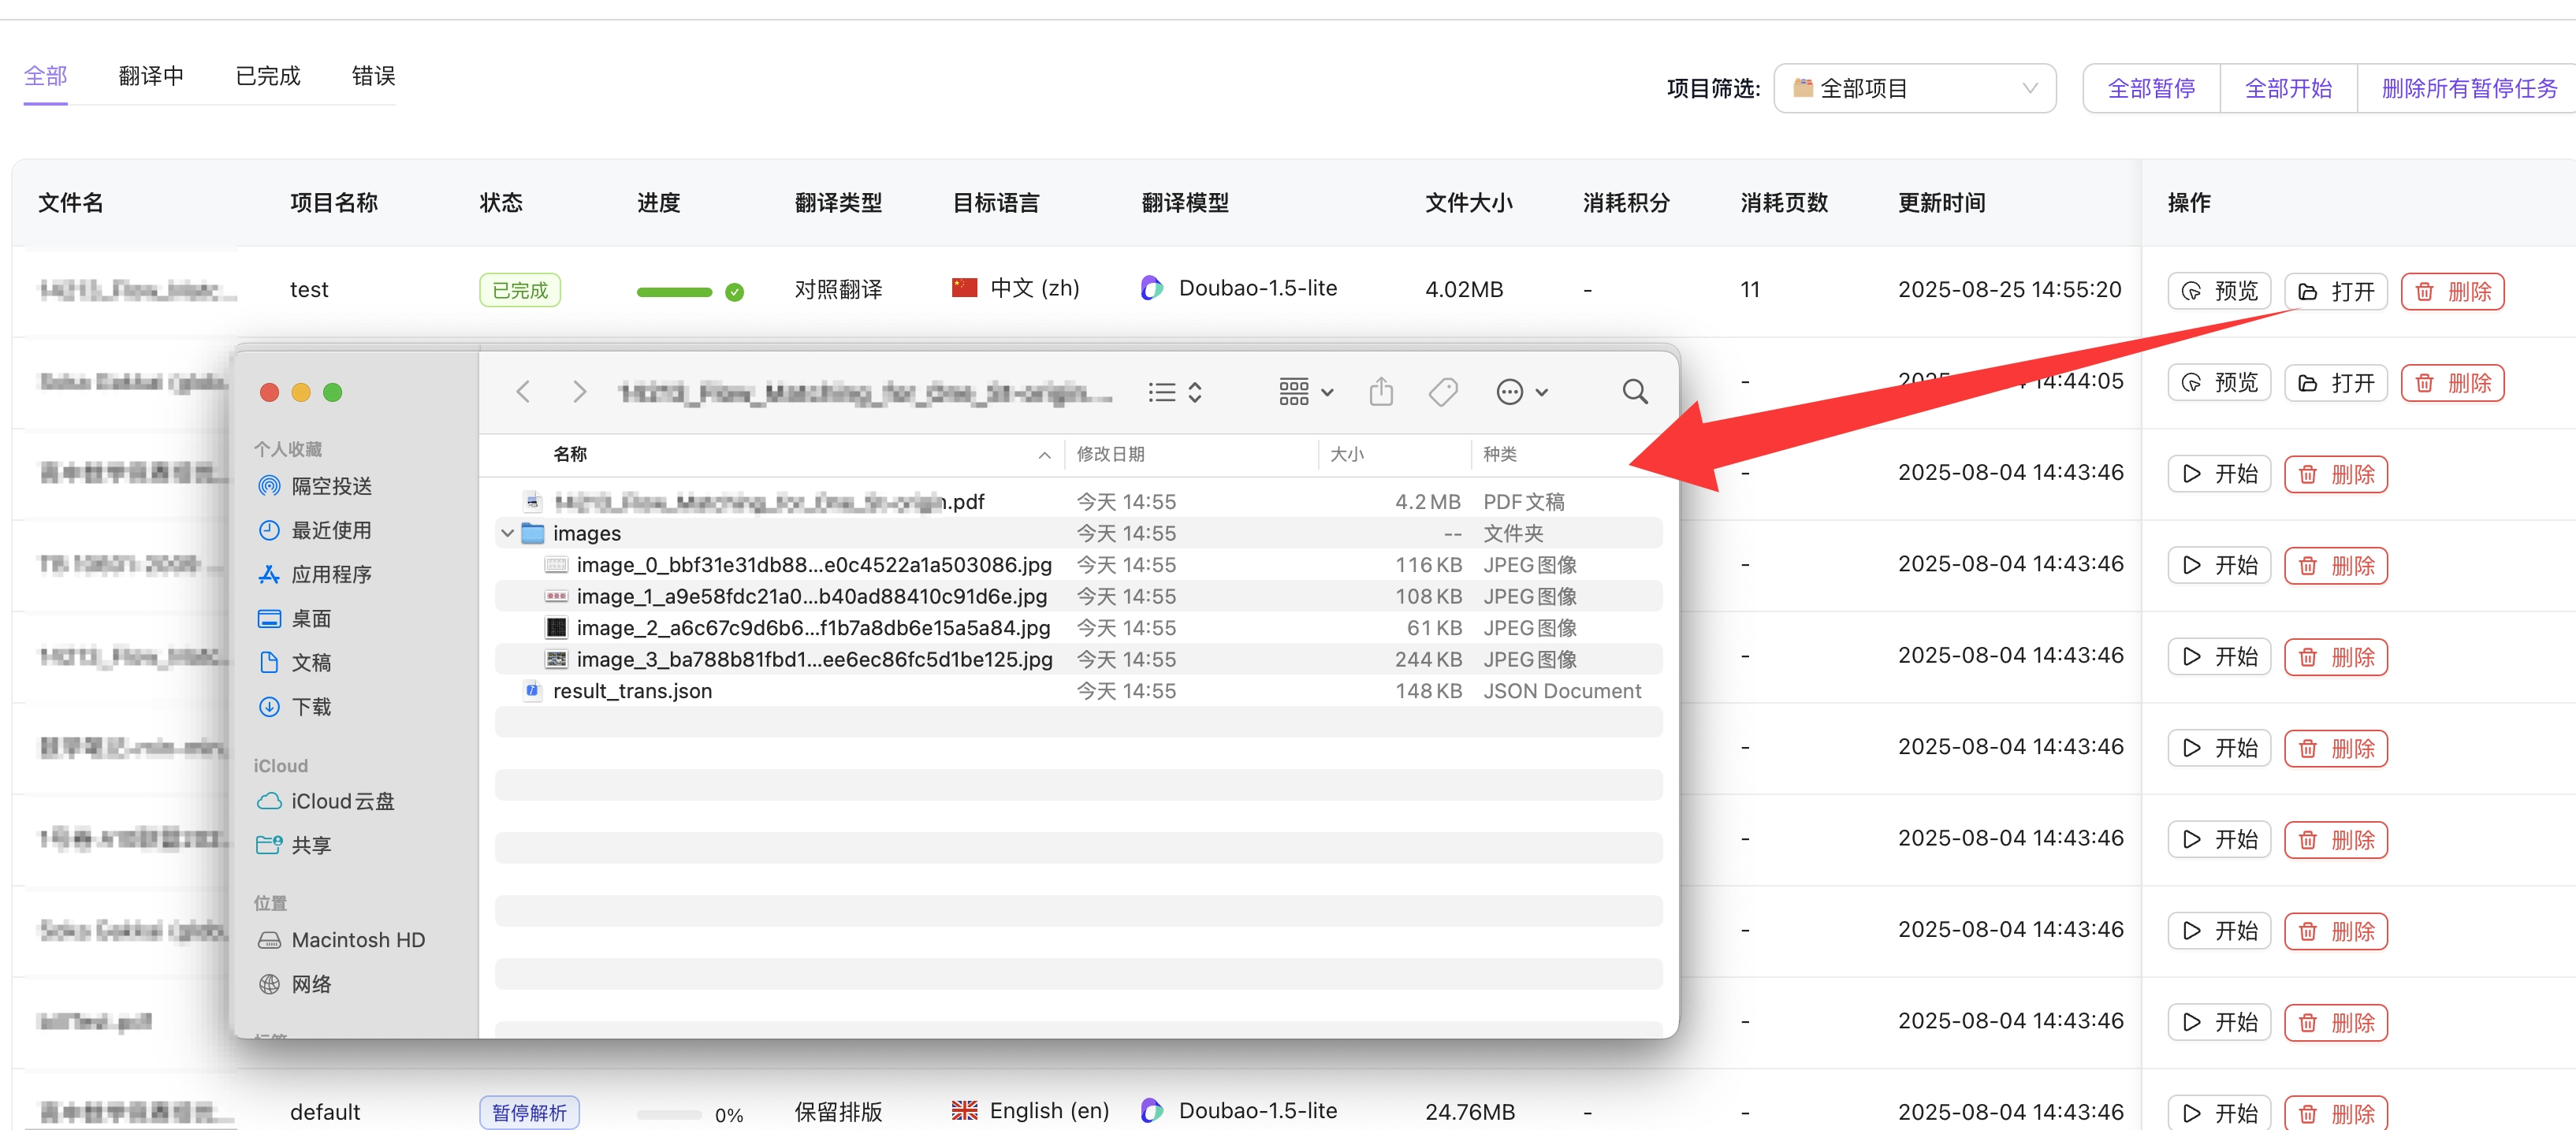
- Click the "Open" button on the right side of the workspace table to view export results.
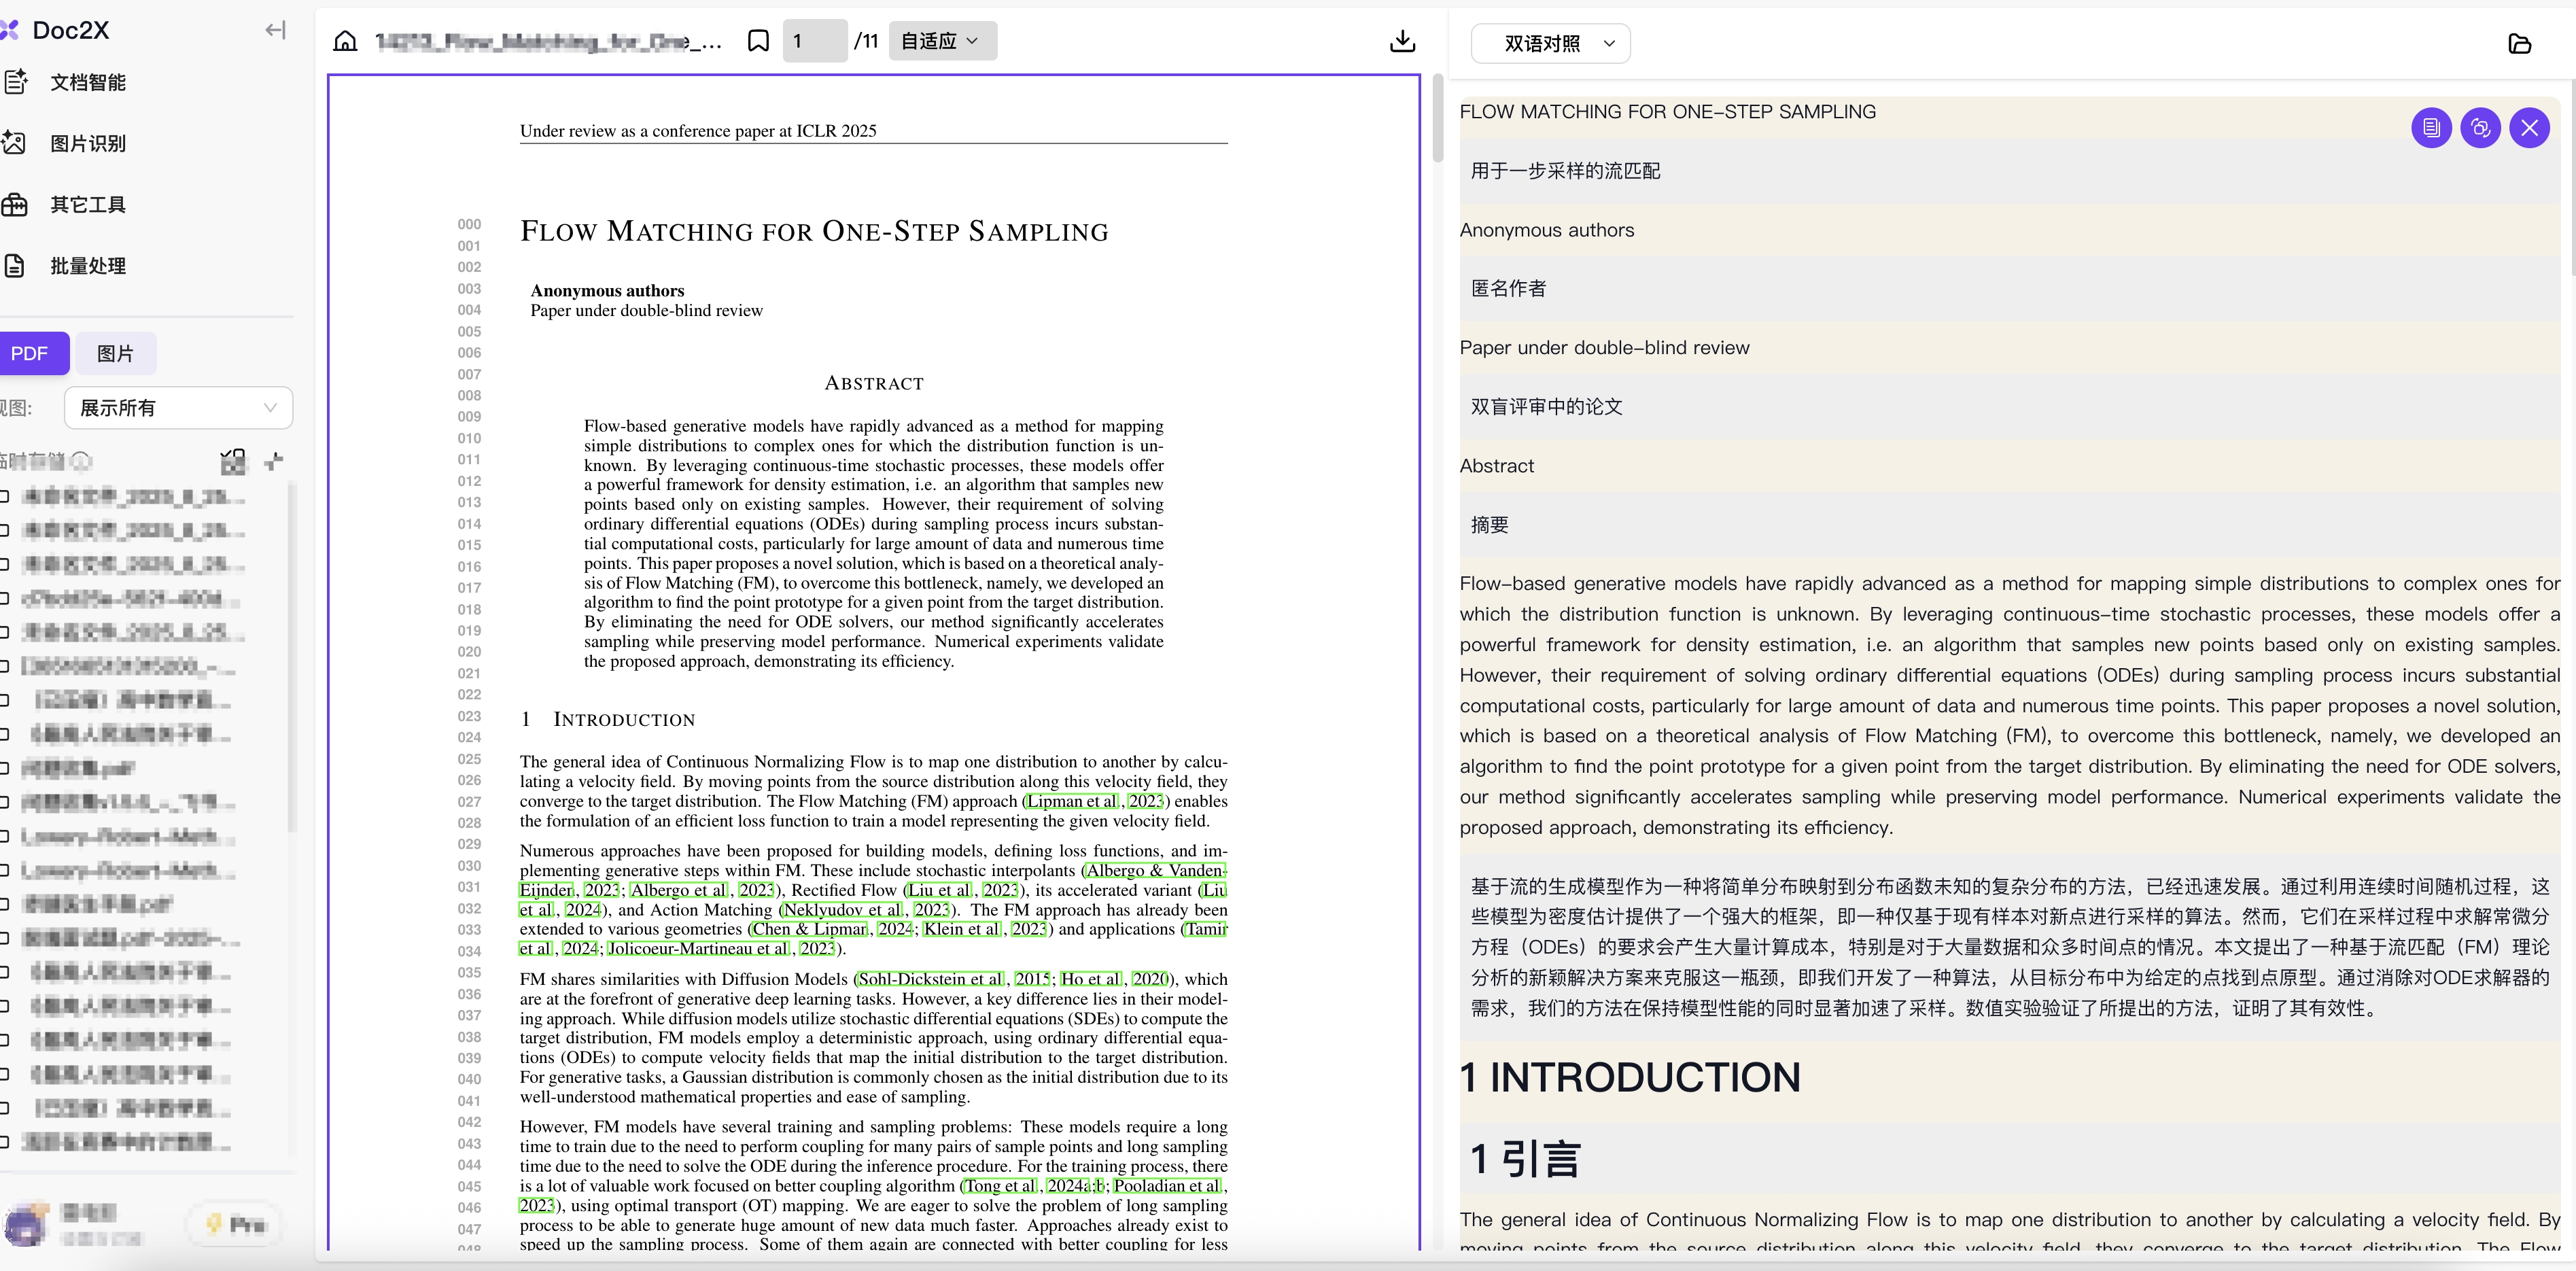
- Click the "Preview" button on the right side of the workspace table to jump to the preview interface.

Translation Workflow
Step 1: Complete Translation Settings
Before starting batch translation, configure the following settings:
Translation Type
- Bilingual Comparison: Bilingual comparative translation, will retain bilingual comparison of the original document in translation results.
- Preserve Layout: Preserve the layout of the original document without any modifications
Conversion Format (Translation)
- Output Format: Choose export format (Markdown, Word, LaTeX, JSON, etc.)
Output Result Layout (Translation)
- Group by File: Place all exports related to a file in a subdirectory organized by filename
- Flat Layout: No subdirectories, sequential export
Step 2: Select Files/Folders
Supports multiple file selection methods:
Single File Selection (Translation)
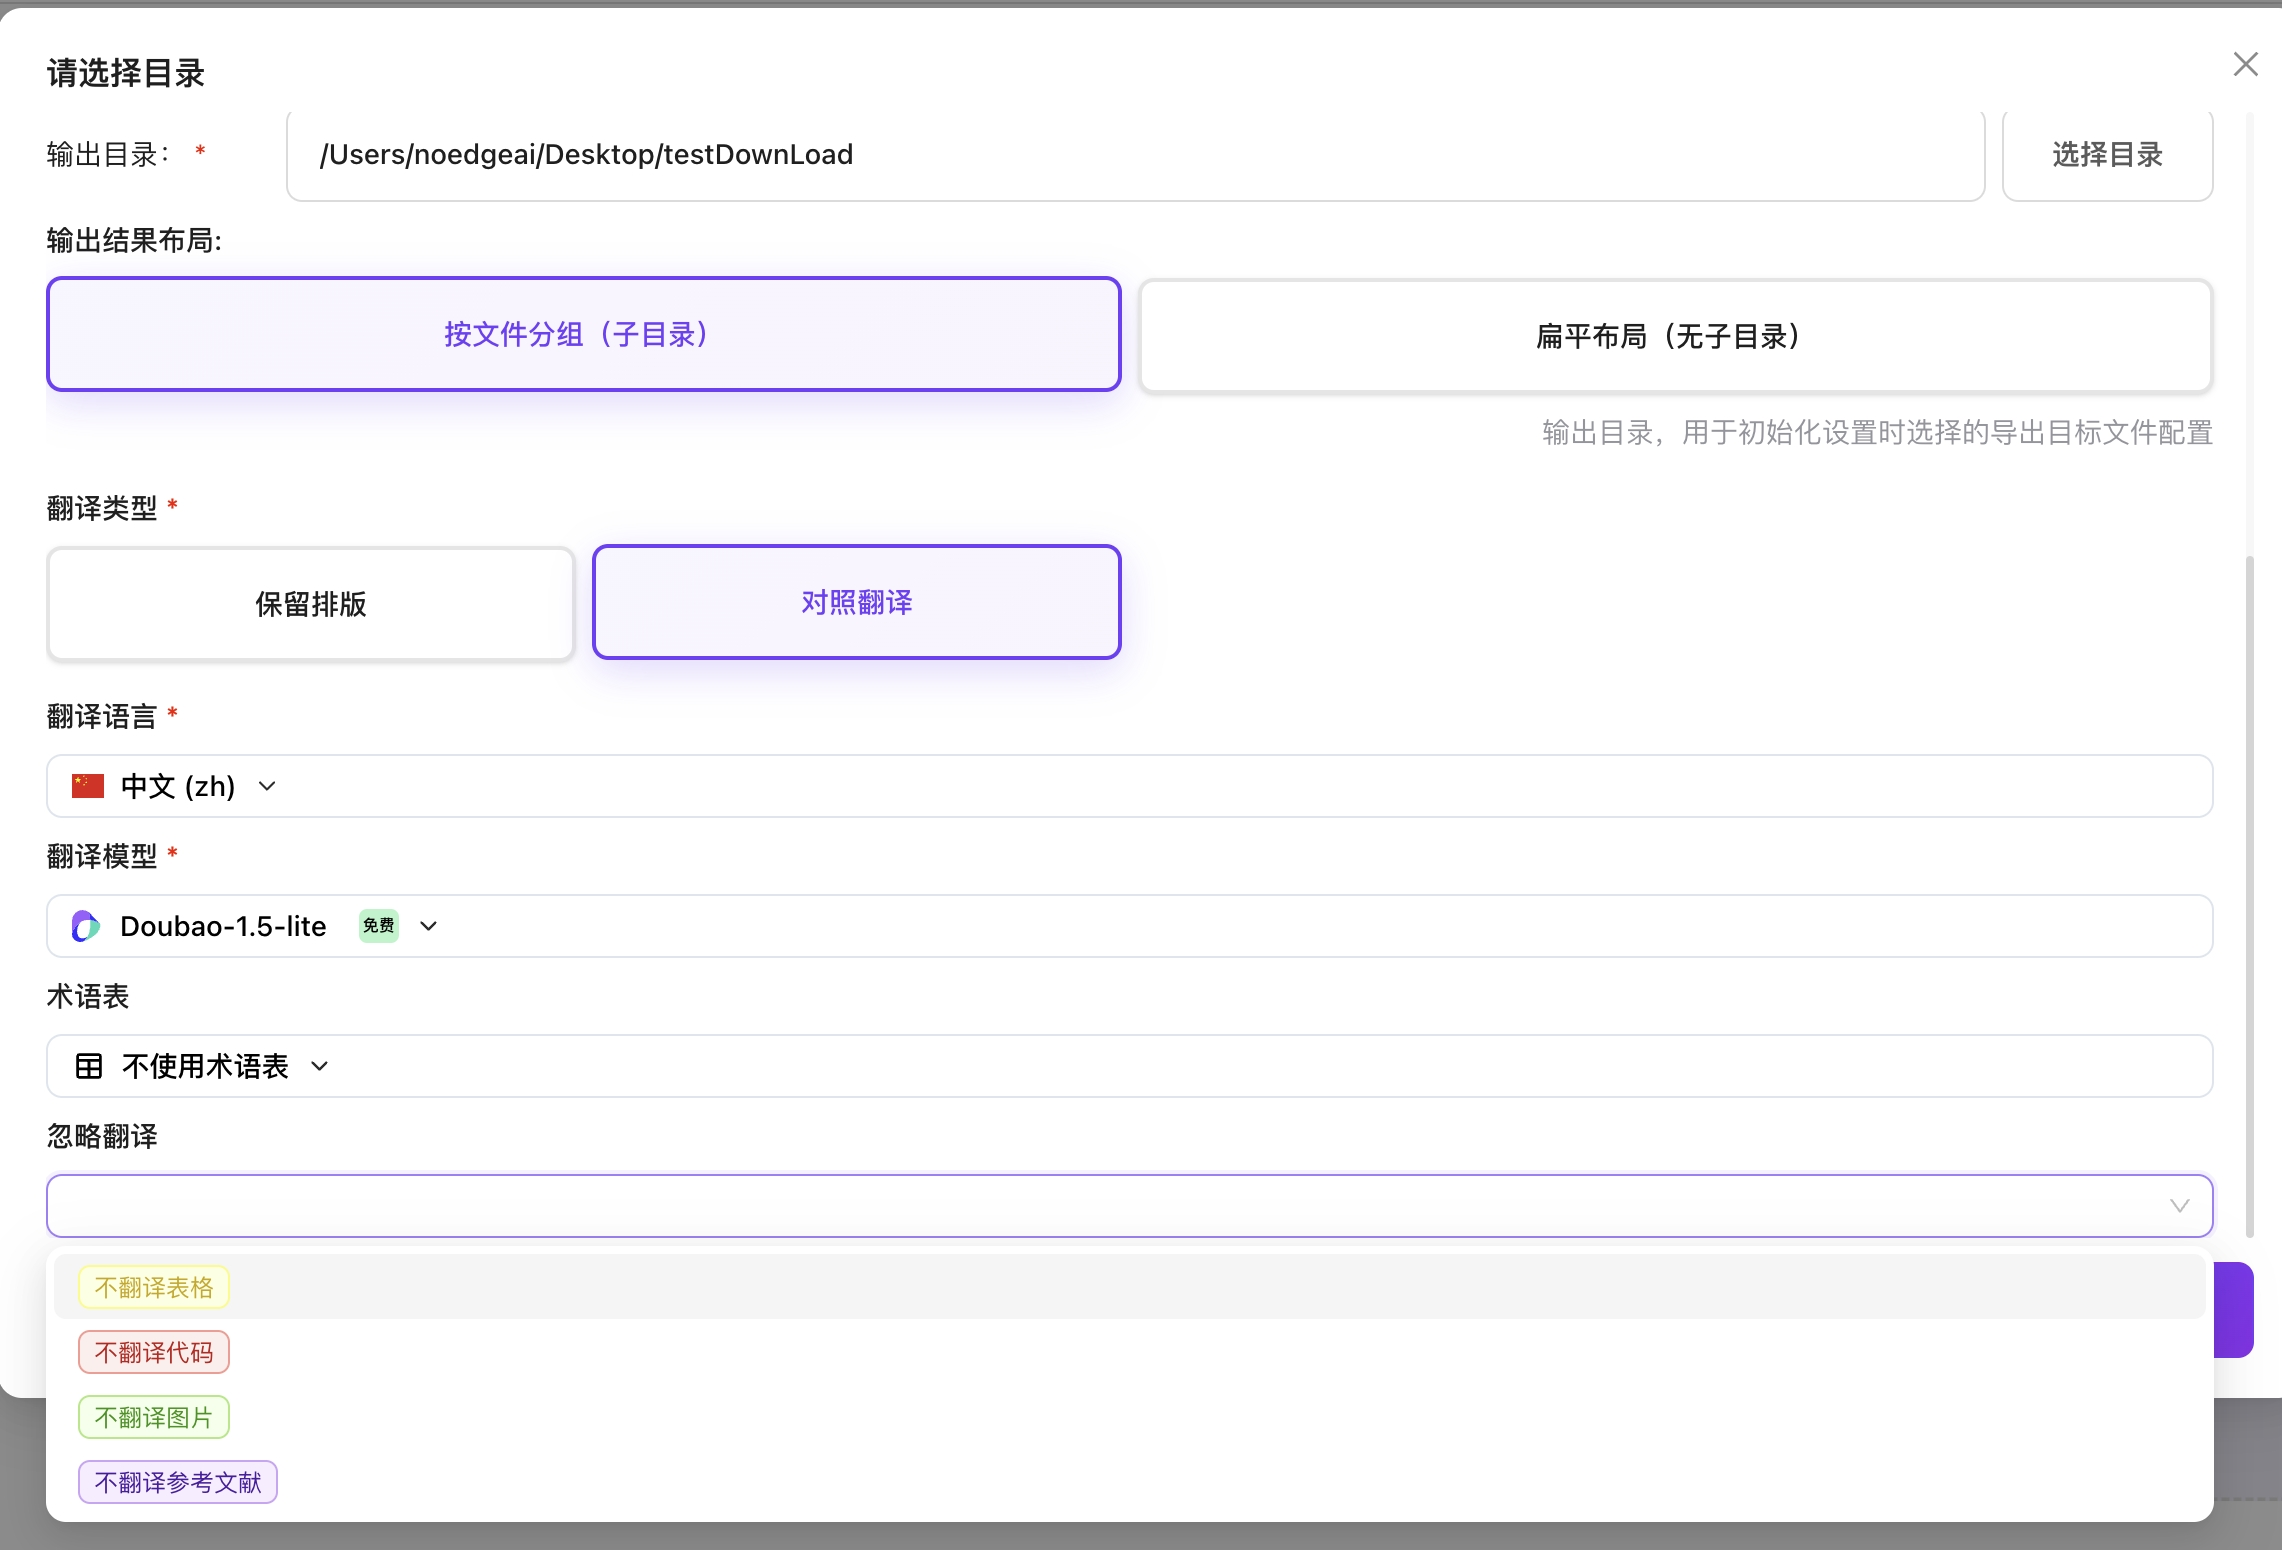
- Click the "Upload File" button
- Enter project name
- Select output directory
- Select translation type (Bilingual Comparison/Preserve Layout)
- Select target translation language
- Select translation model
- Select glossary (optional)
- Select ignore translation (optional): Can skip tables/code/references and other content from translation
Entire Folder Selection (Translation)
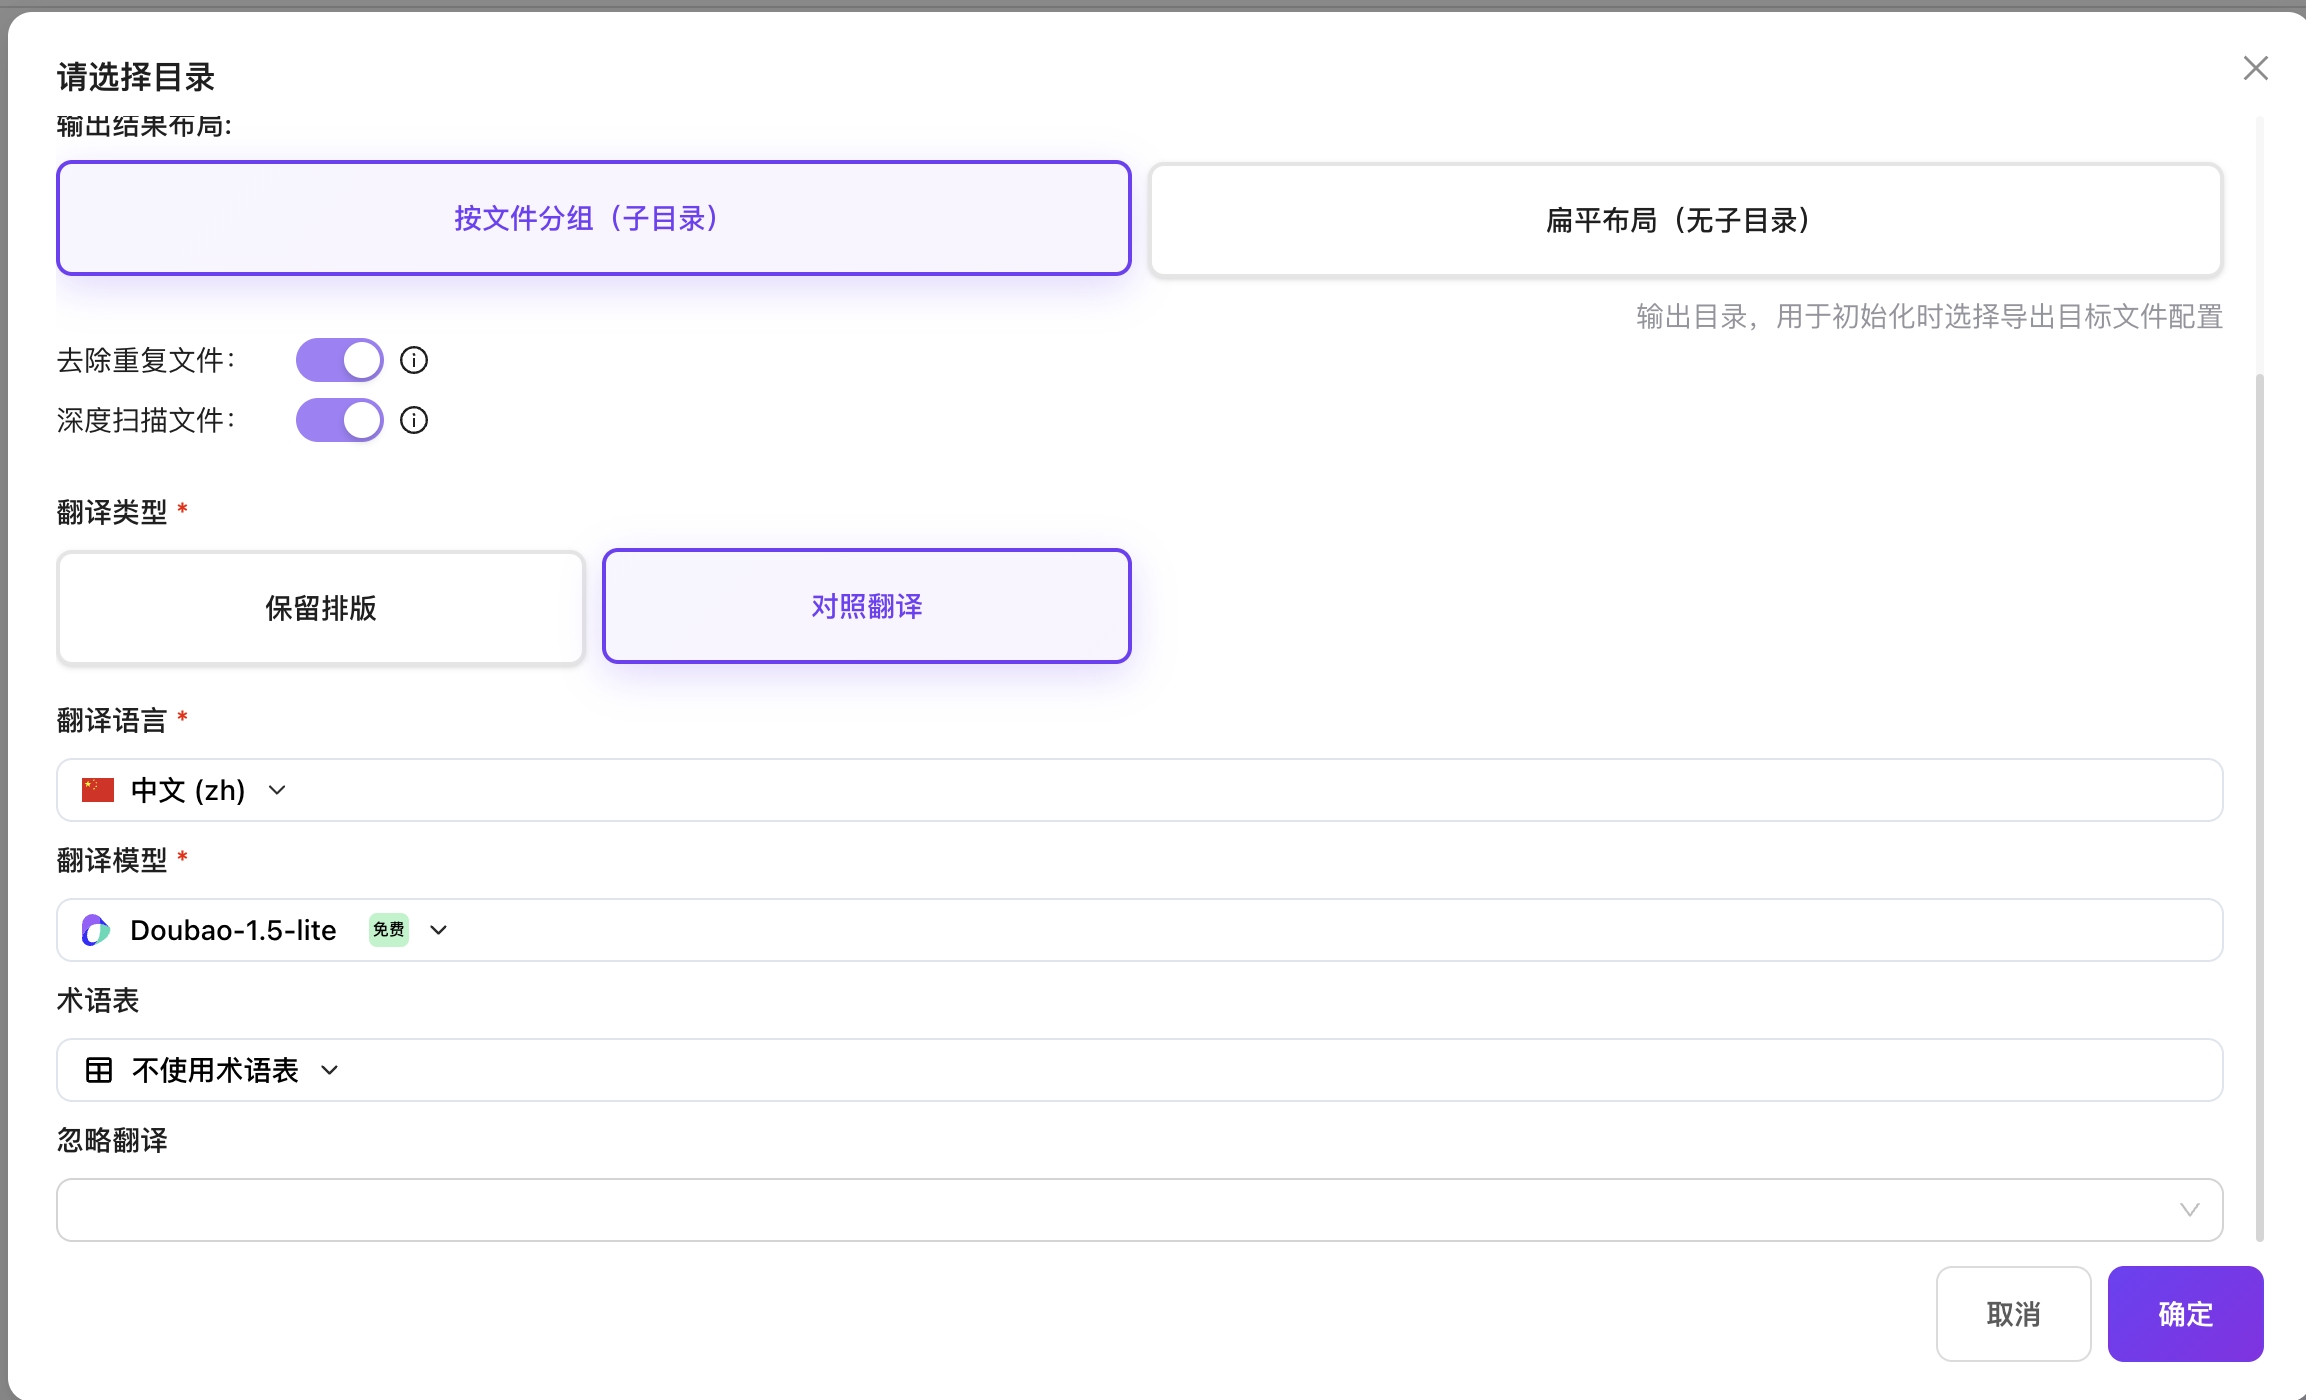
- Select "Upload Folder" option
- Enter project name
- Select input directory
- Select output directory
- Can set duplicate file removal: Will remove files with duplicate MD5 values in the folder based on scanned file MD5.
- Can set deep scan files: Will recursively scan all subfolders within the folder.
- Select translation type (Bilingual Comparison/Preserve Layout)
- Select target translation language
- Select translation model
- Select glossary (optional)
- Select ignore translation (optional): Can skip tables/code/references and other content from translation

Step 3: Start Translation Processing
- Click the "Confirm" button, the system will automatically process all selected files/folders
- View translation progress in the workspace

Step 4: View Translation Results
- After processing is complete, corresponding format files/folders will be generated in the output directory.
- Click the "Open" button on the right side of the workspace table to view export results.
- Click the "Preview" button on the right side of the workspace table to jump to the preview interface.