
Text Selection Translation Feature
Overview
Doc2X Text Selection Translation is an intelligent desktop text selection tool that supports quick translation and processing of selected text in any application. By integrating advanced AI large language models, it provides users with high-quality translation, explanation, summarization, and other text processing services.
Core Features
Multiple Selection Modes
Supports two flexible selection modes to accommodate different usage habits:
- Selection Mode: Automatically displays translation button after selecting text
- Shortcut Mode: Triggers translation by pressing a custom shortcut key after selecting text
AI-Powered Multi-Function Processing
Based on large language models, offering various intelligent text processing functions:
- Translation: Supports 12+ language translations (Chinese, English, Japanese, Korean, Spanish, French, German, Italian, Portuguese, Russian, etc.)
- Explanation: In-depth explanation of technical terms, concepts, or complex sentences
- Summarization: Quickly extract key points from text
- Polish: Optimize text expression and improve language quality
Custom AI Prompts
Users can customize AI prompt configurations according to their needs:
- Add/edit/delete custom prompts
- Set prompt display order
- Customize prompt names and icons
- Support placeholder variables:
(selected text),(target language)
Streaming Response and Flexible Window
- Real-time streaming display of AI-generated results with typewriter effect
- Translation window automatically follows mouse position
- Supports window always-on-top feature to avoid being covered by other windows
- Quick copy results to clipboard
Operation Tutorial
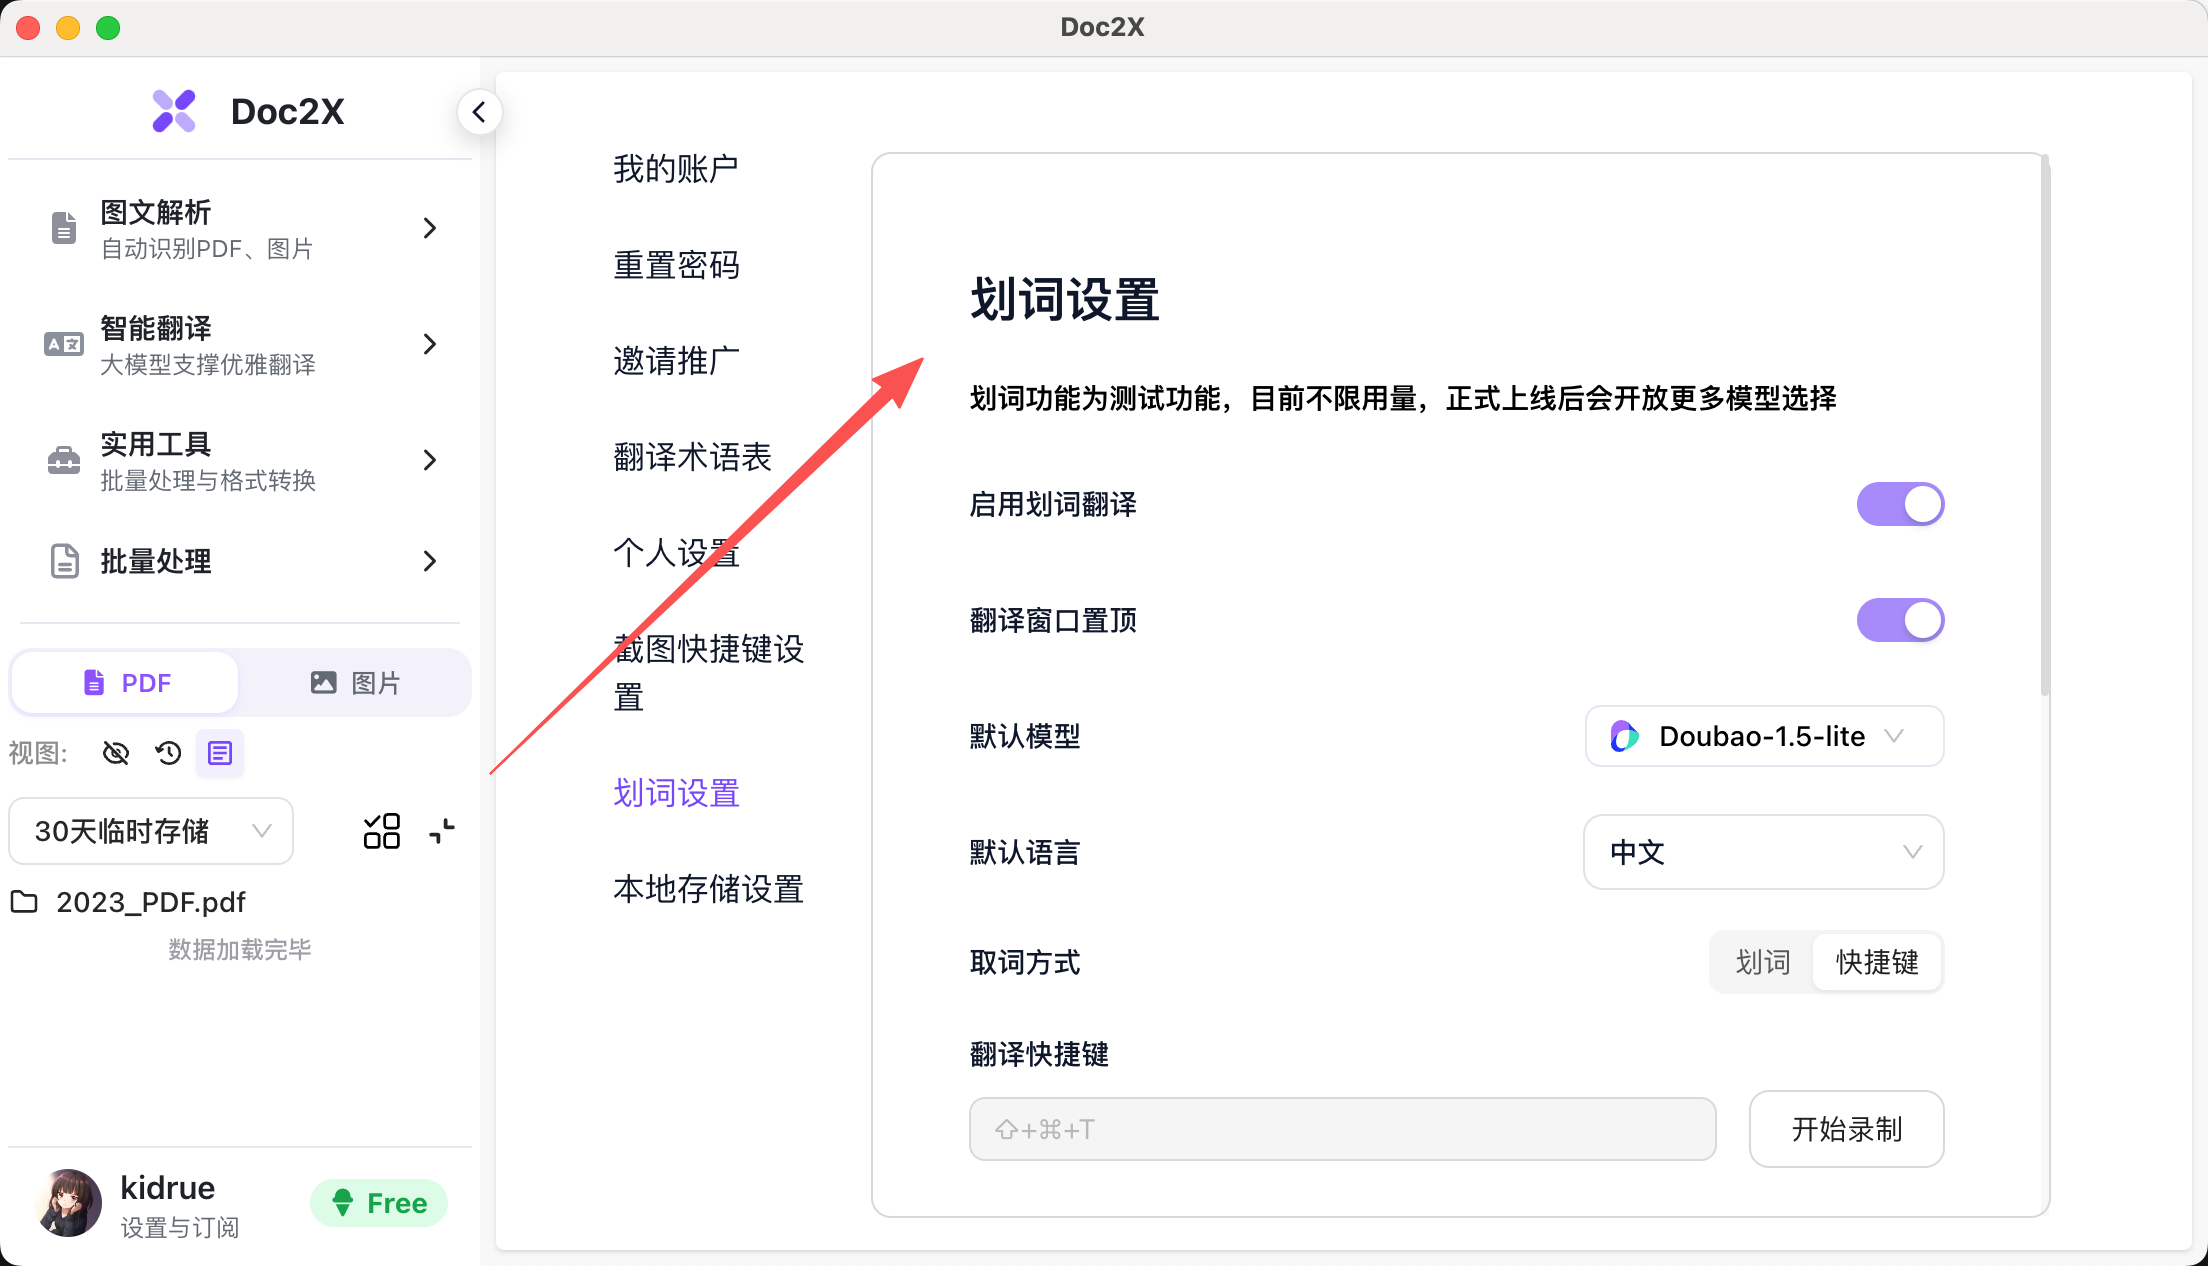
Step 1: Enable Text Selection Translation
Configure basic settings in the "Text Selection Settings" page of the Doc2X main application:
- Enable Text Selection Translation: Turn on the text selection feature
- Translation Window Always on Top: Keep translation window always in front
- Default Model: Choose which AI model to use
- Default Language: Set default translation target language
Permission Requirements
macOS requires granting Accessibility permissions:
- When enabling for the first time, the system will prompt for authorization
- Click "Go to Settings" to jump to system settings
- Grant Doc2X permissions in "Privacy & Security" → "Accessibility"
Windows requires no additional permission settings
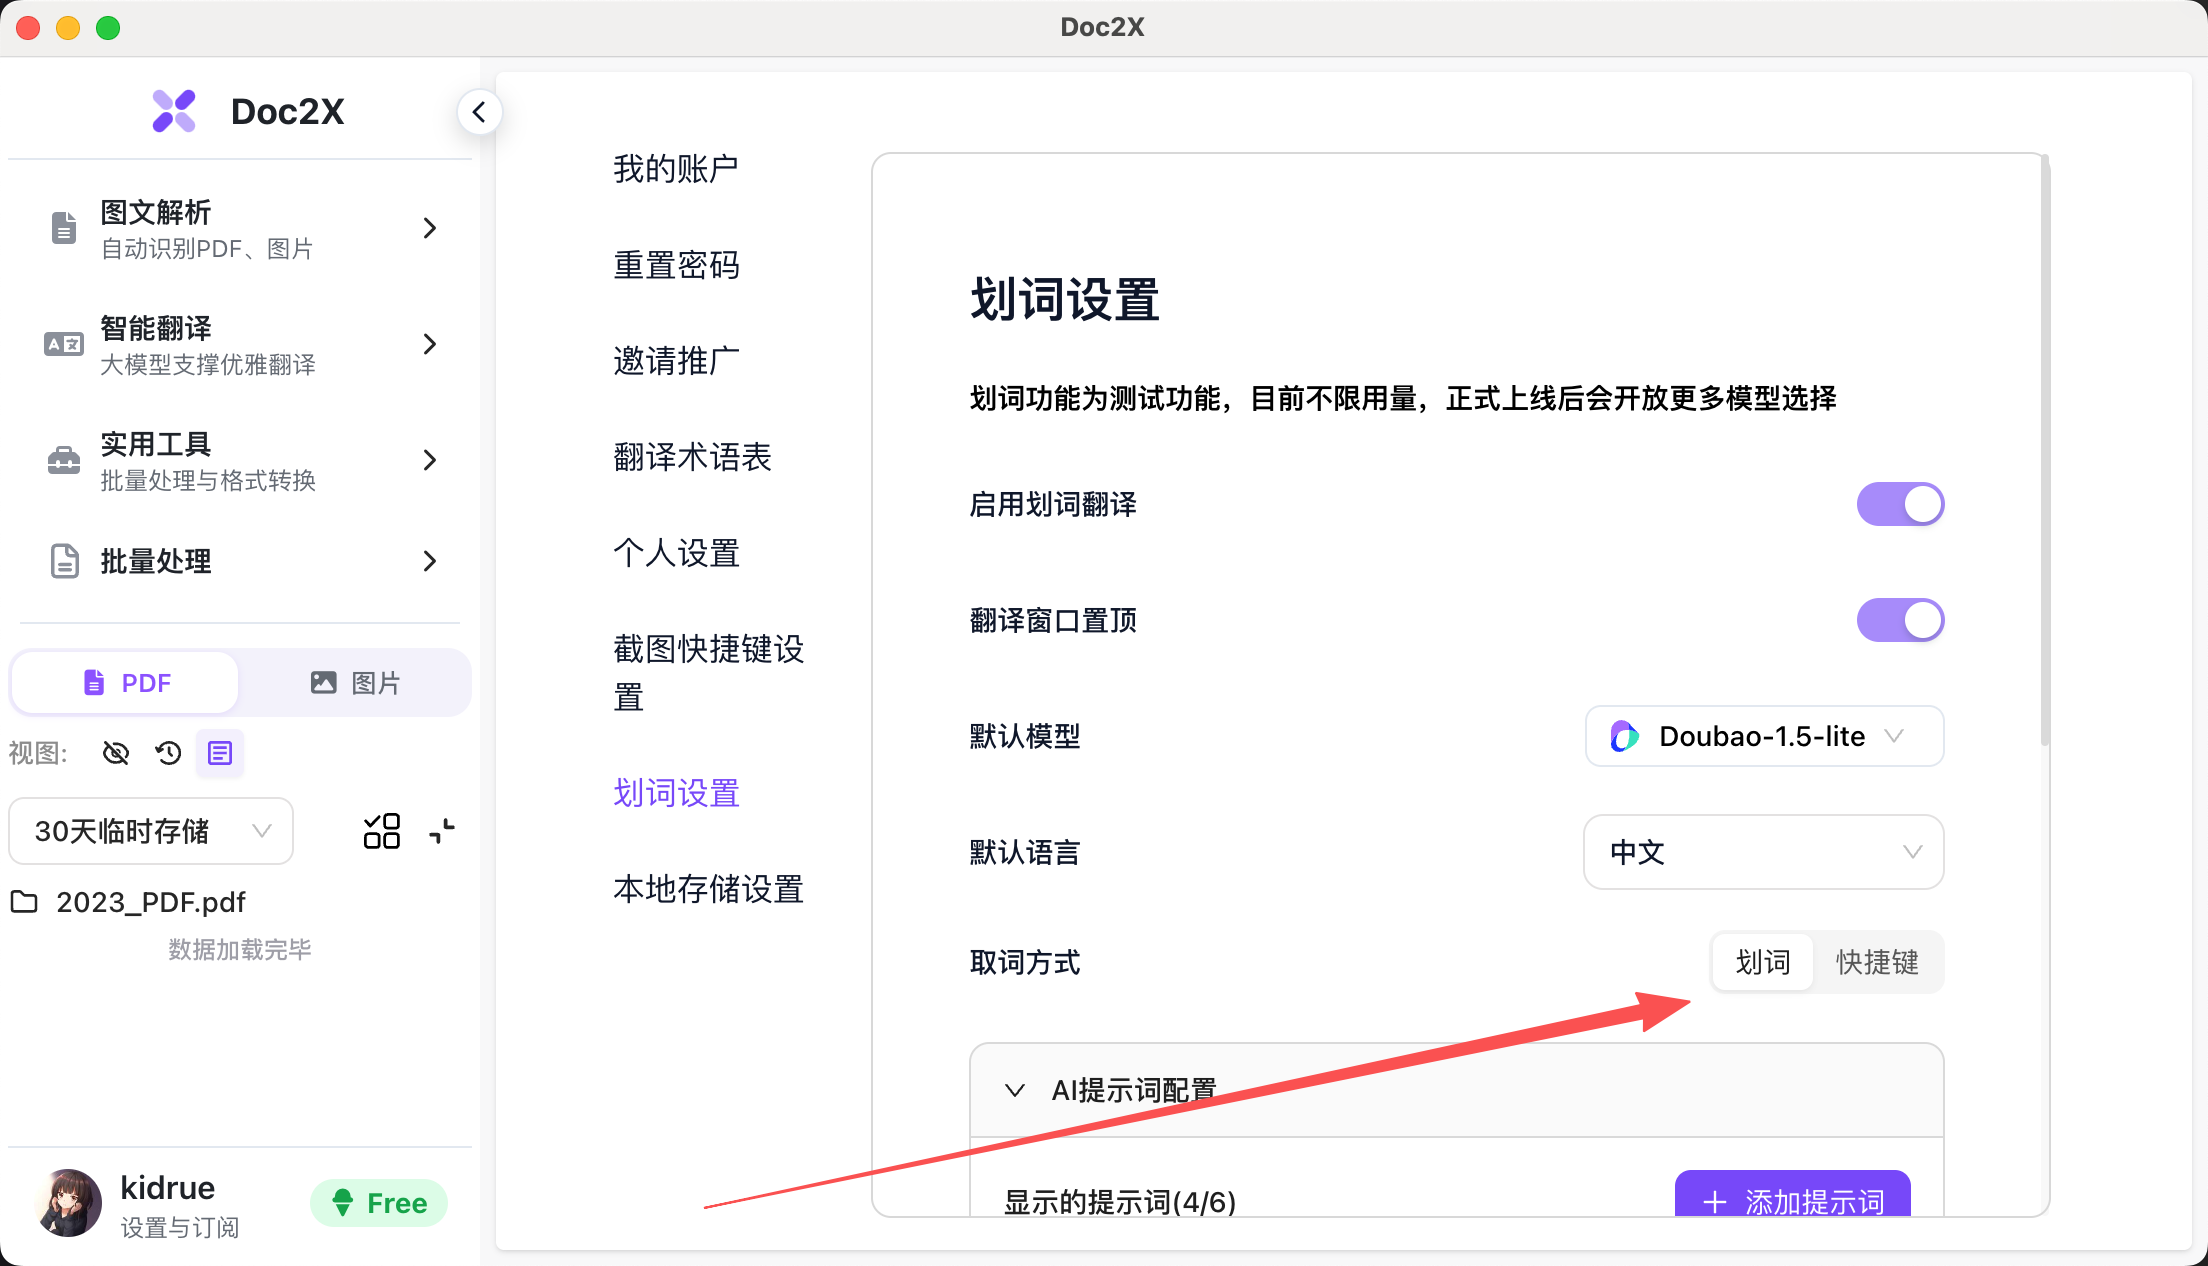
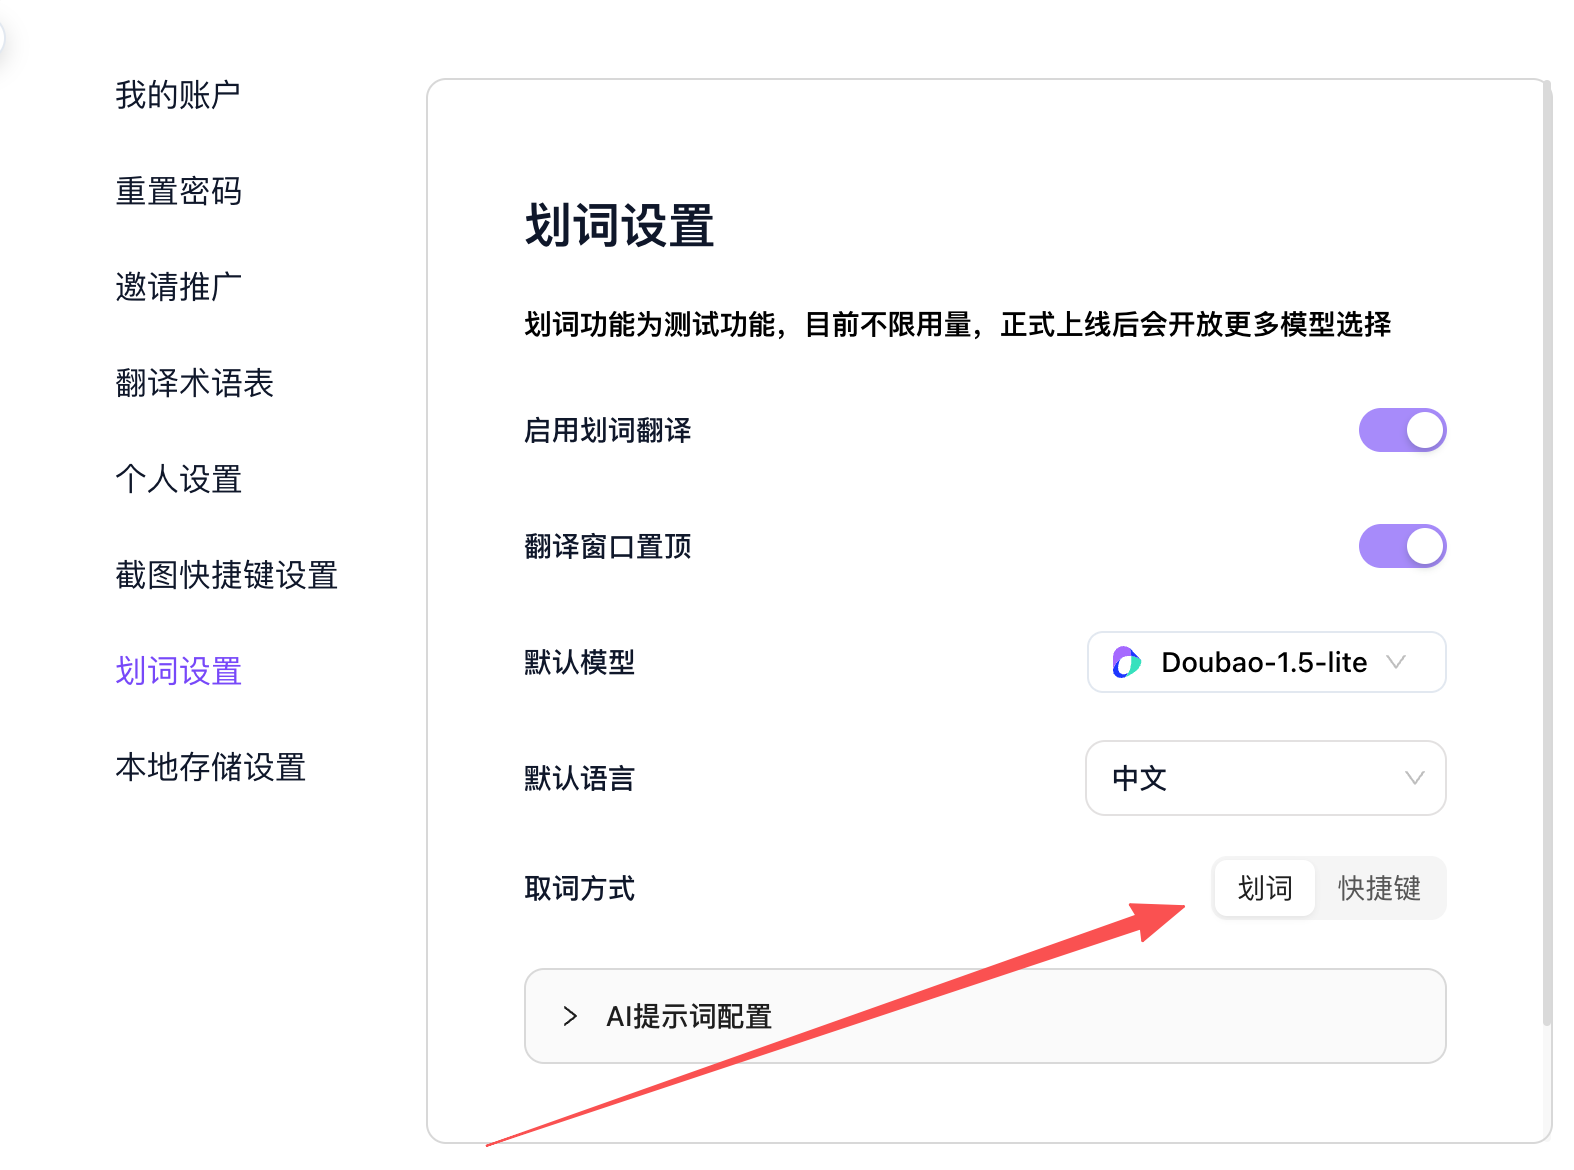
Step 2: Choose Selection Mode
Select the selection mode according to your usage habits:
- Selection Mode: Floating button automatically appears after selecting text
- Shortcut Mode: Trigger by pressing shortcut key (customizable shortcut key)
Step 3: Use Text Selection Translation
Selection Mode Workflow
- Select the text you want to translate in any application
- Doc2X floating button automatically appears near the mouse
- Click the floating button to open the translation panel
- Select target language and processing function at the top of the panel (Translation/Explanation/Summarization/Polish)
- AI outputs processing results in real-time stream
- Use "Copy" button to quickly copy results
Shortcut Mode Workflow
- Select the text you want to translate in any application
- Press the custom shortcut key (e.g.,
Ctrl+Shift+T) - Automatically opens translation panel and starts processing
- AI displays processing results in real-time
- Use "Copy" button to quickly copy results
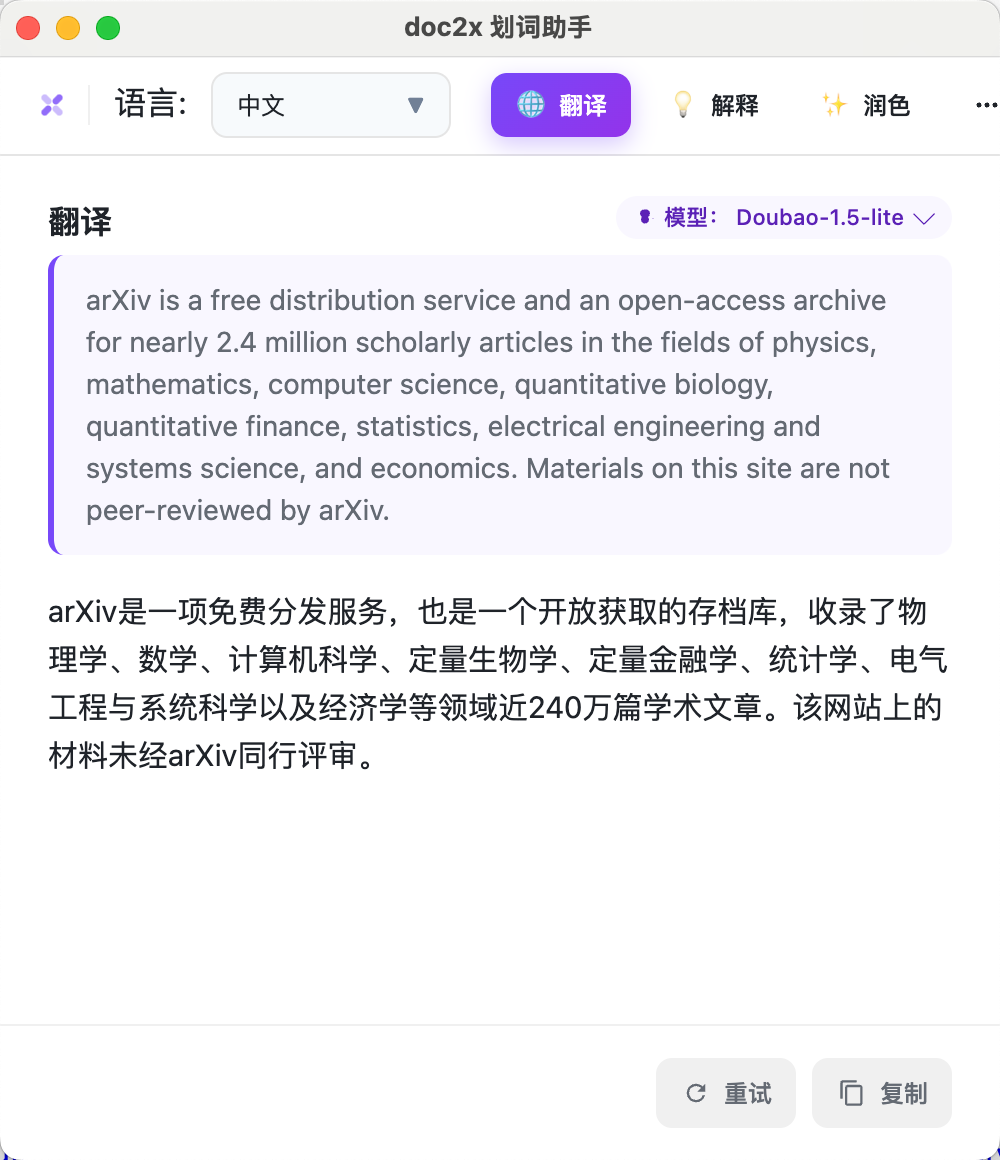
Step 4: View Translation Results
Translation panel displays:
- Original Text Area: Shows selected original text (with purple border)
- Translation Area: Real-time streaming display of AI processing results
- Function Buttons:
- Switch Language: Quickly change target language
- Switch Function: Toggle between Translation/Explanation/Summarization/Polish
- Switch Model: Click model badge in upper right corner to change AI model
- Retry: Reprocess current text
- Copy: Copy results to clipboard
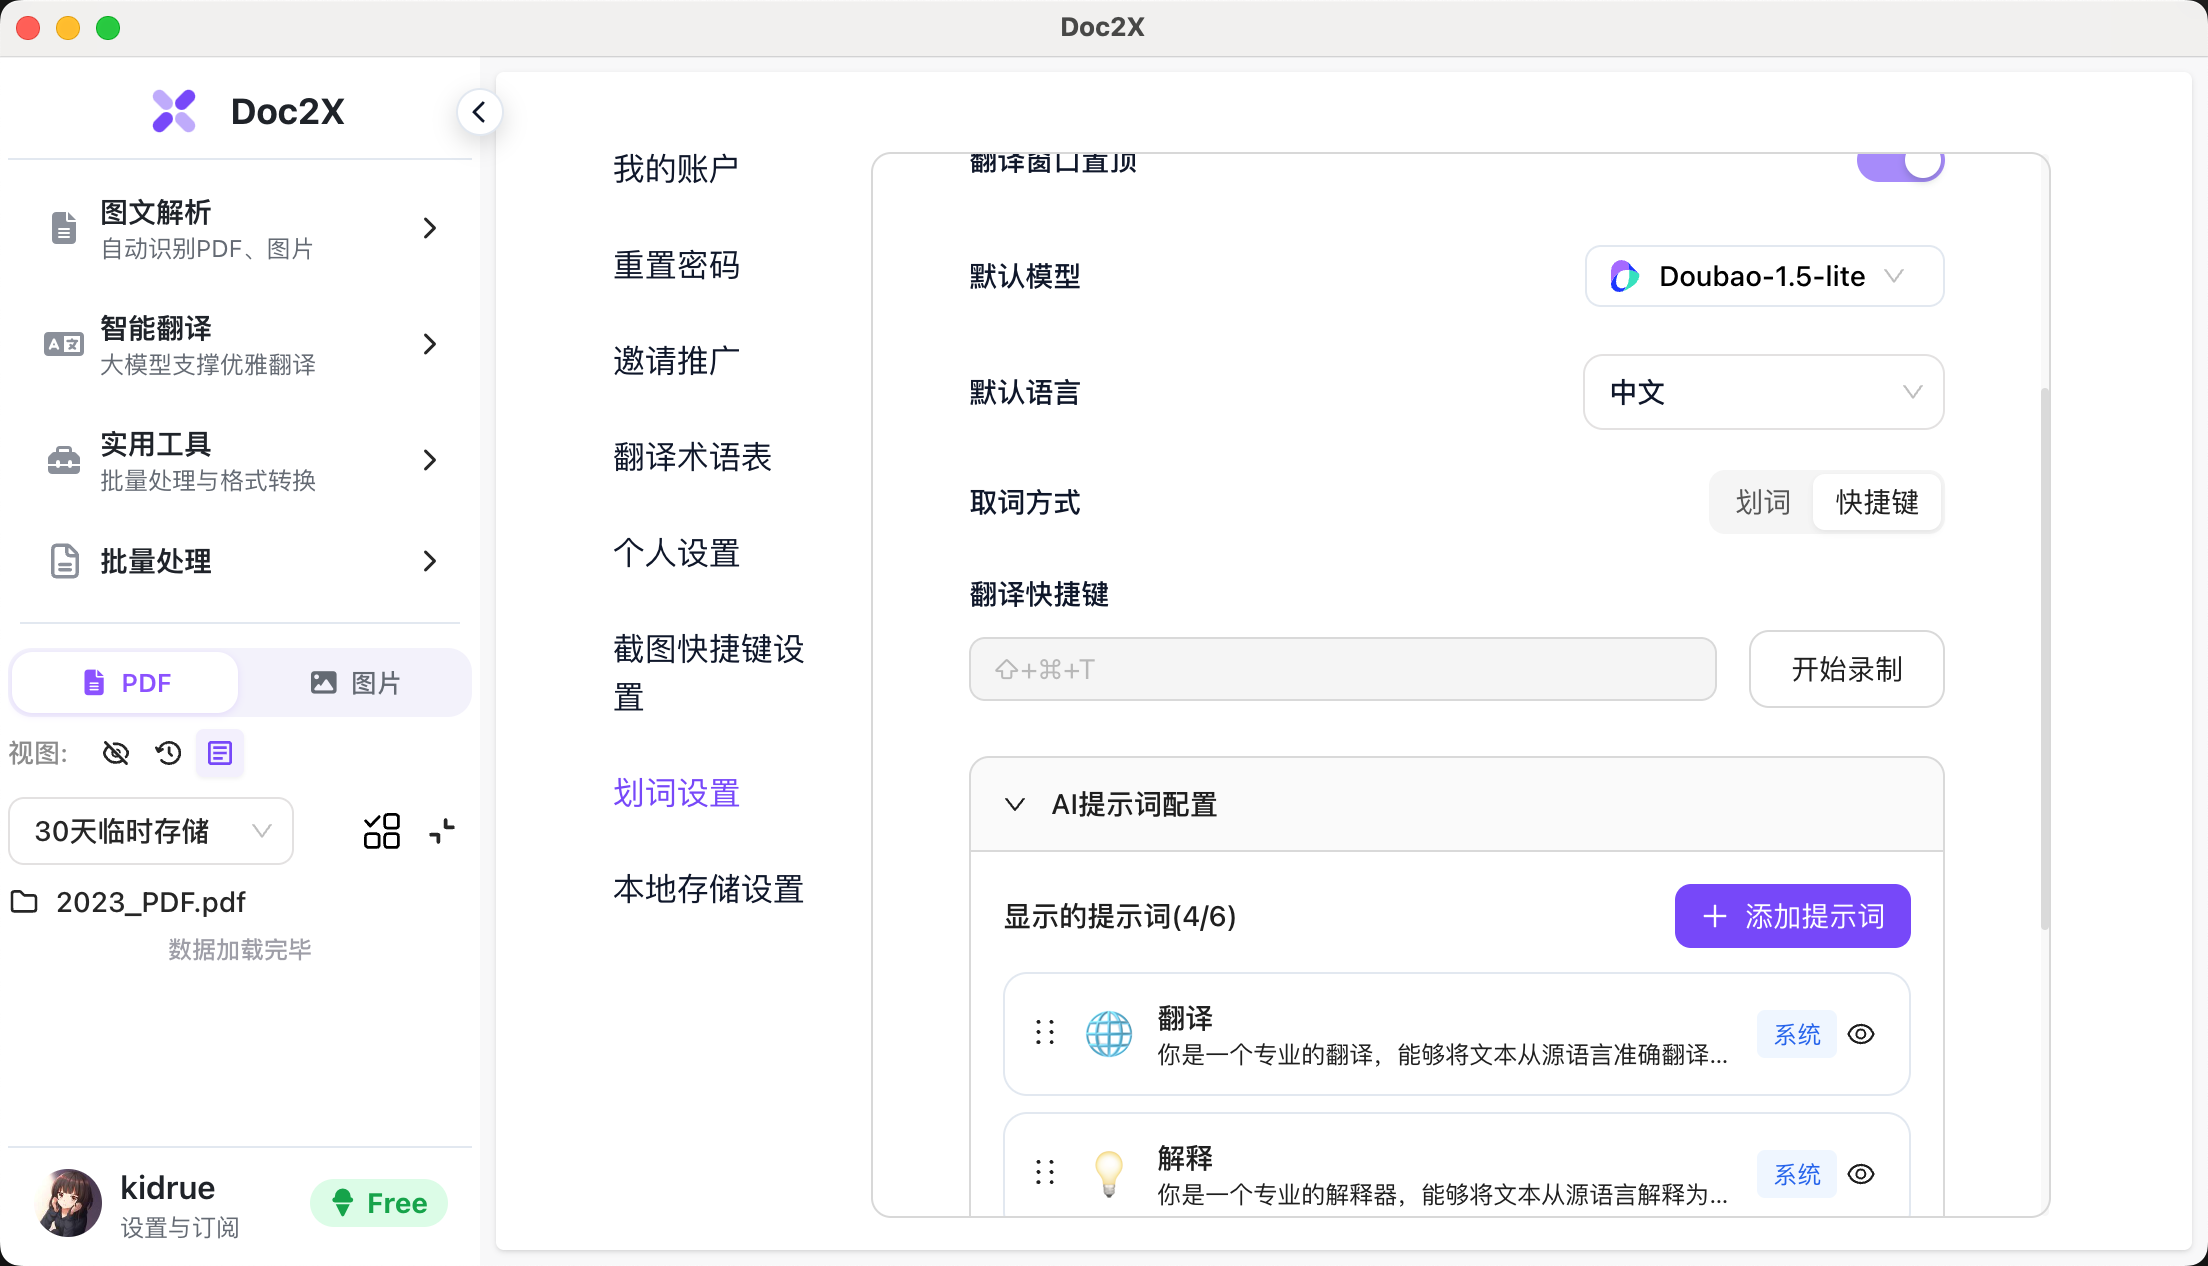
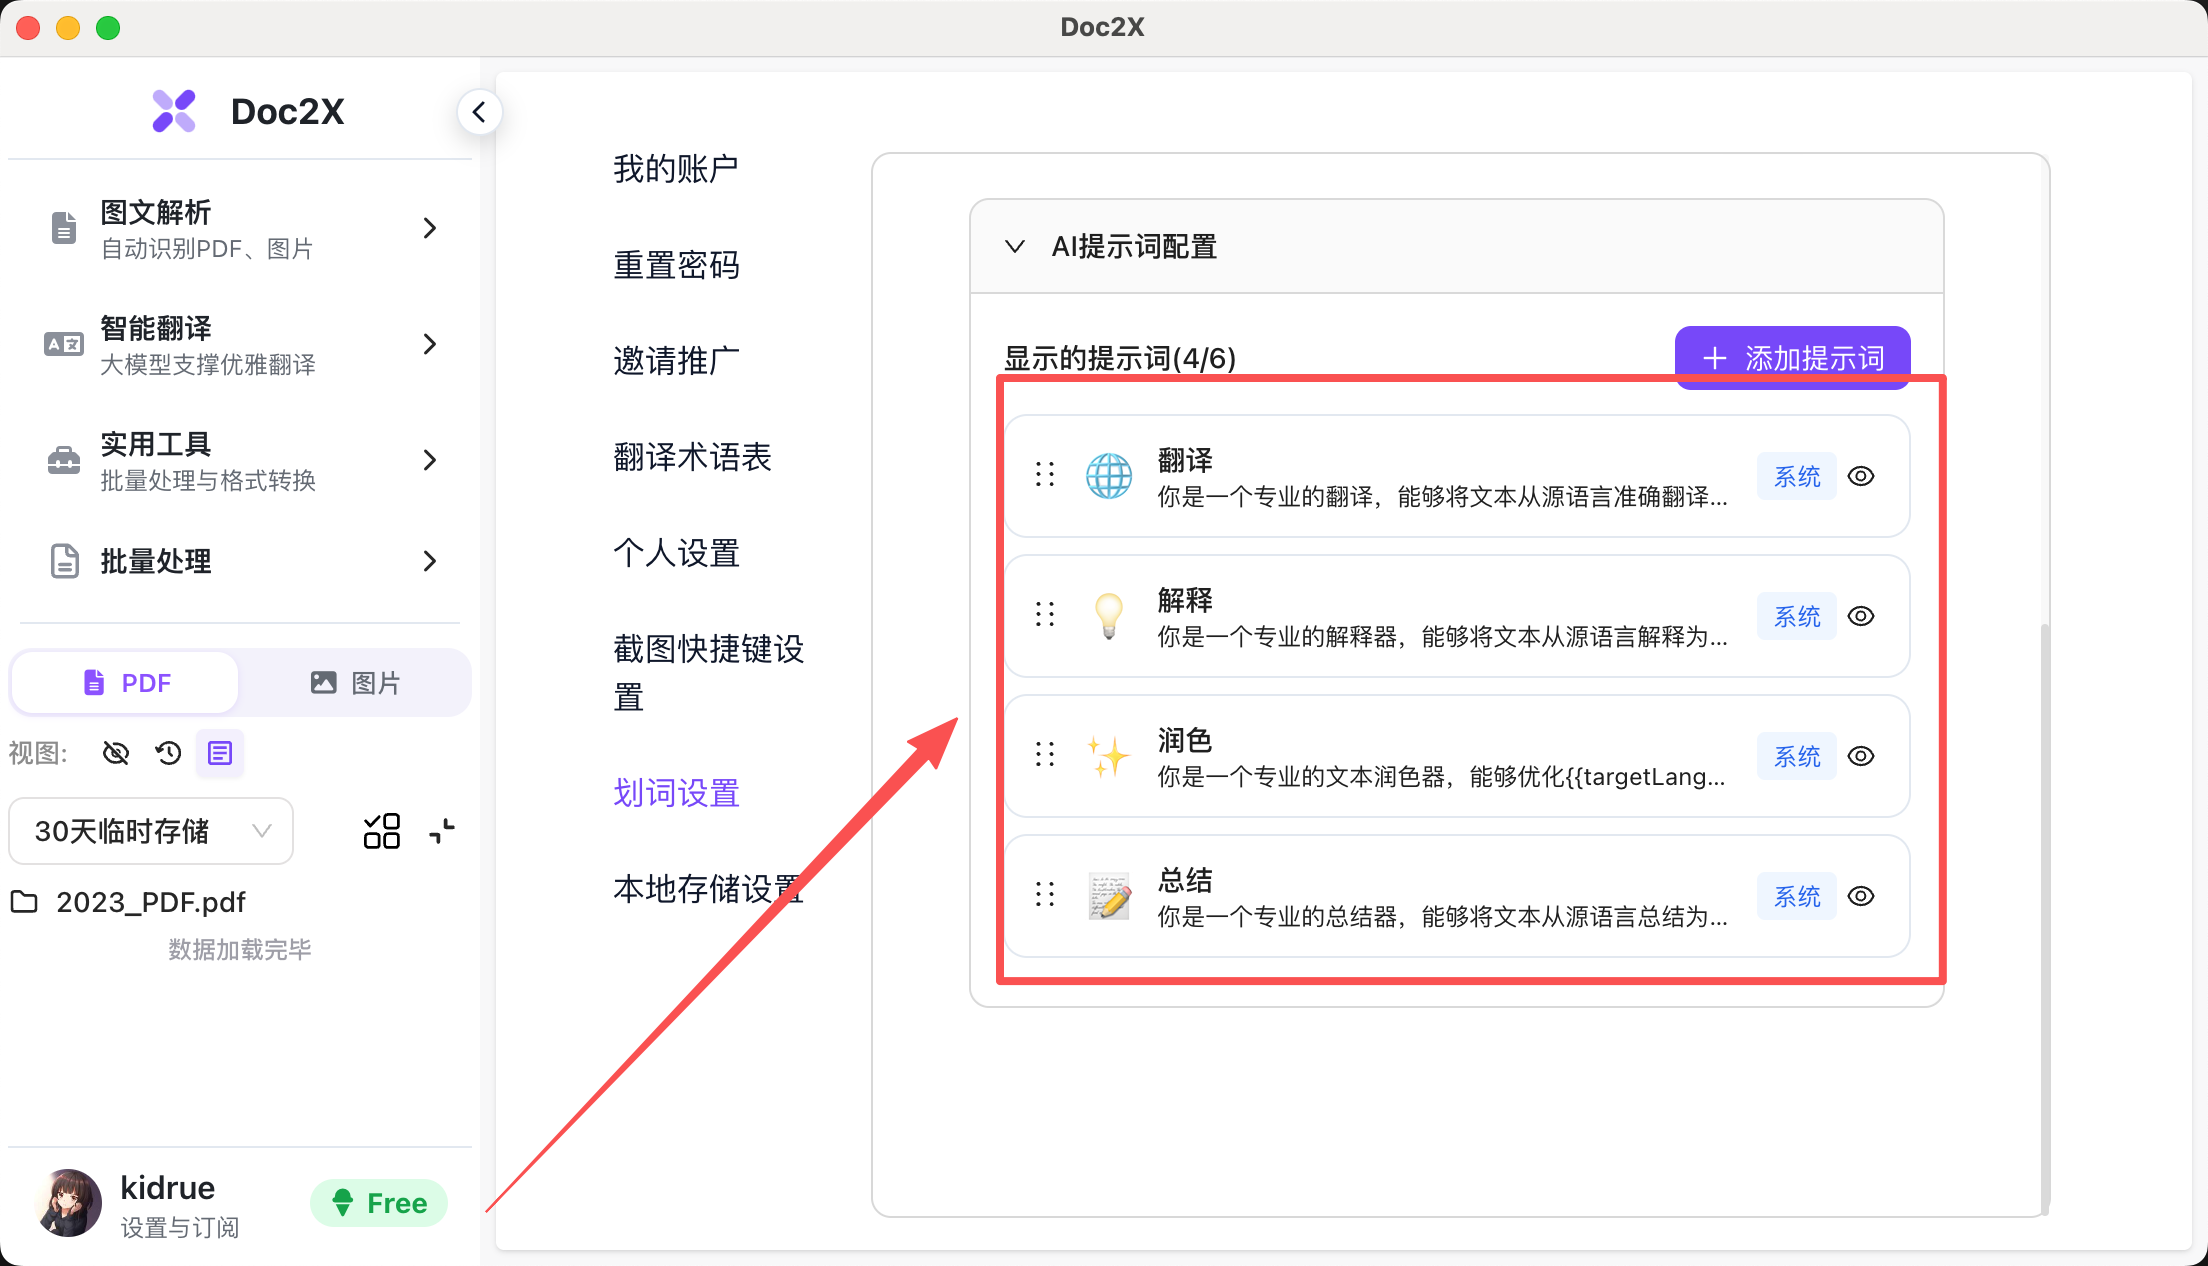
Step 5: Customize AI Prompts (Optional)
Expand "AI Prompt Configuration" in the "Text Selection Settings" page to:
- Click "Add Prompt" to create custom functions
- Edit prompt content using variables:
: Will be replaced with selected text: Will be replaced with target language
- Set prompt name, icon, and display order
- Drag to adjust prompt display order
- Hide or delete unwanted prompts
Feature Highlights
- Globally Available: Can be used in any application that supports text selection (browsers, document editors, PDF readers, etc.)
- Real-time Response: Streaming technology for real-time viewing of AI processing progress
- Multi-model Support: Supports switching between multiple large language models
- Highly Customizable: Customize prompts, shortcuts, default language, etc.
- Seamless Integration: Floating window design that doesn't interfere with normal workflow
Note
The text selection feature is currently in beta and has no usage limits. More model options and advanced features will be available after official launch.