C-End Notion Save Guide
Notion saving requires browser authorization to connect your Doc2X client with Notion.
Environment Requirements
- Platform: Doc2X Client
- Minimum Version: 1.3.14
Applicable Platform
- Notion
Applicable Objects
- Parsing results
- Bilingual translation results
Operation Steps
Step 1: Start the Save Process
Open your Doc2X client.
In the parsing results/translation results files, find the "Save to Third Party" option.
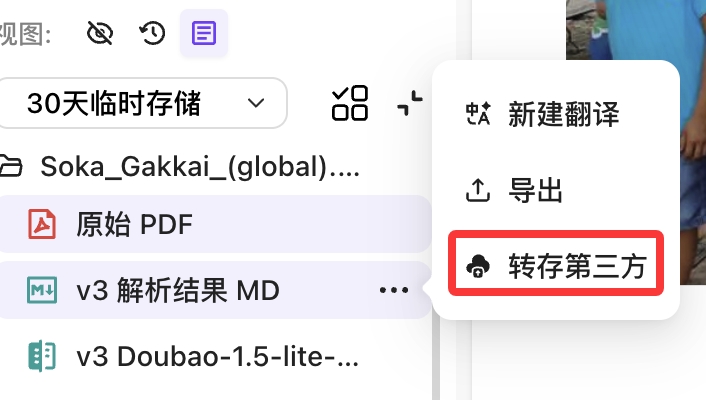
Select the platform you want to save to: "Notion".
Step 2: Save Configuration
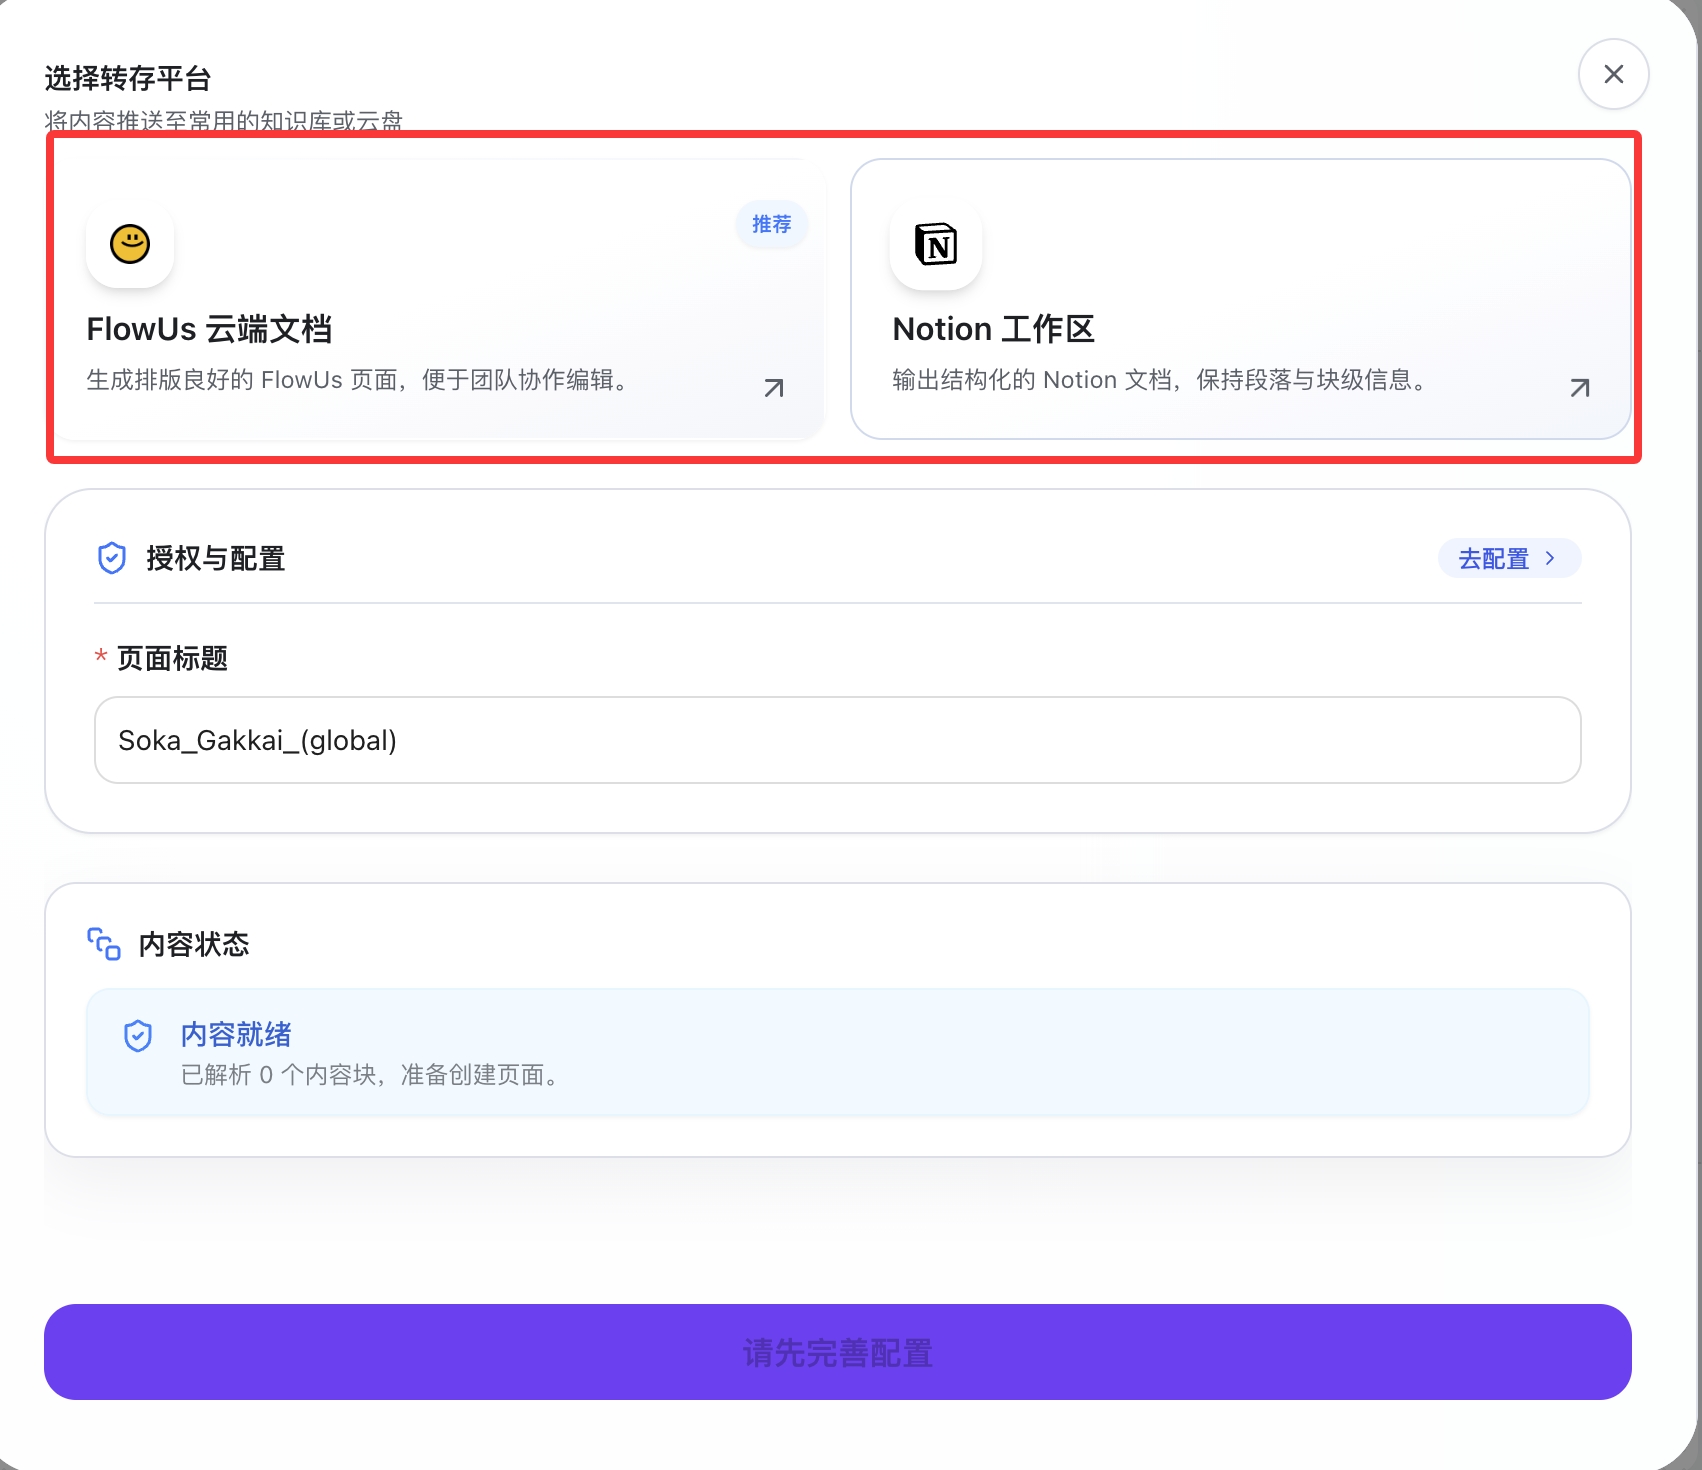
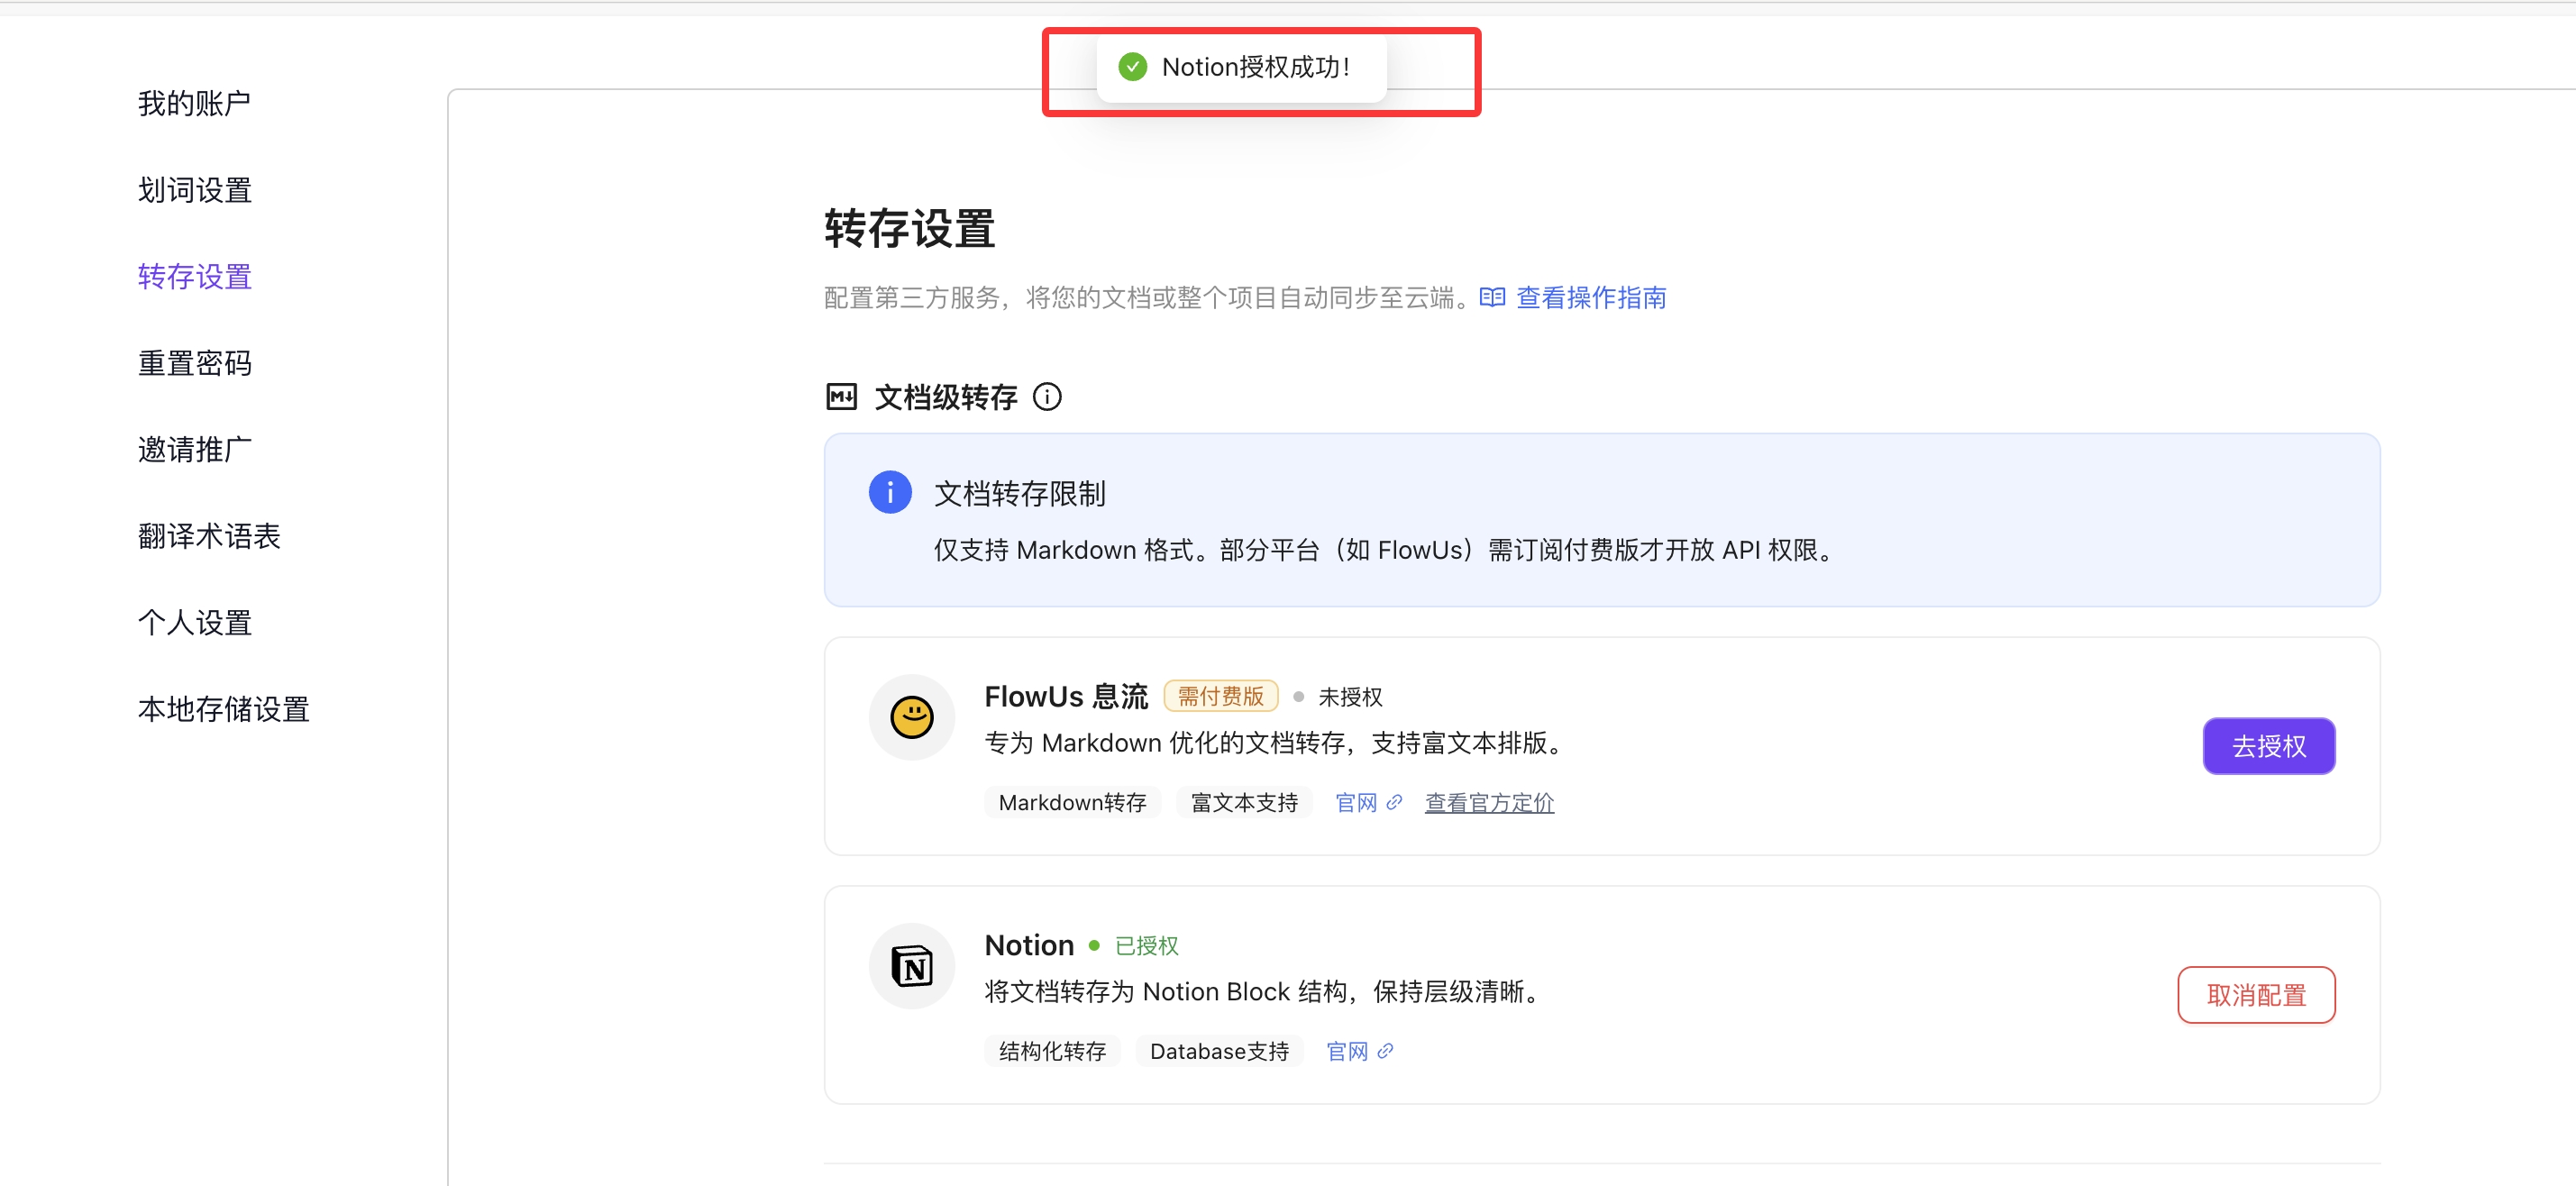
On first use, the client will prompt you that authorization needs to be completed first.
Click the "Go to Configure" tag button on the right to jump to the save configuration page.

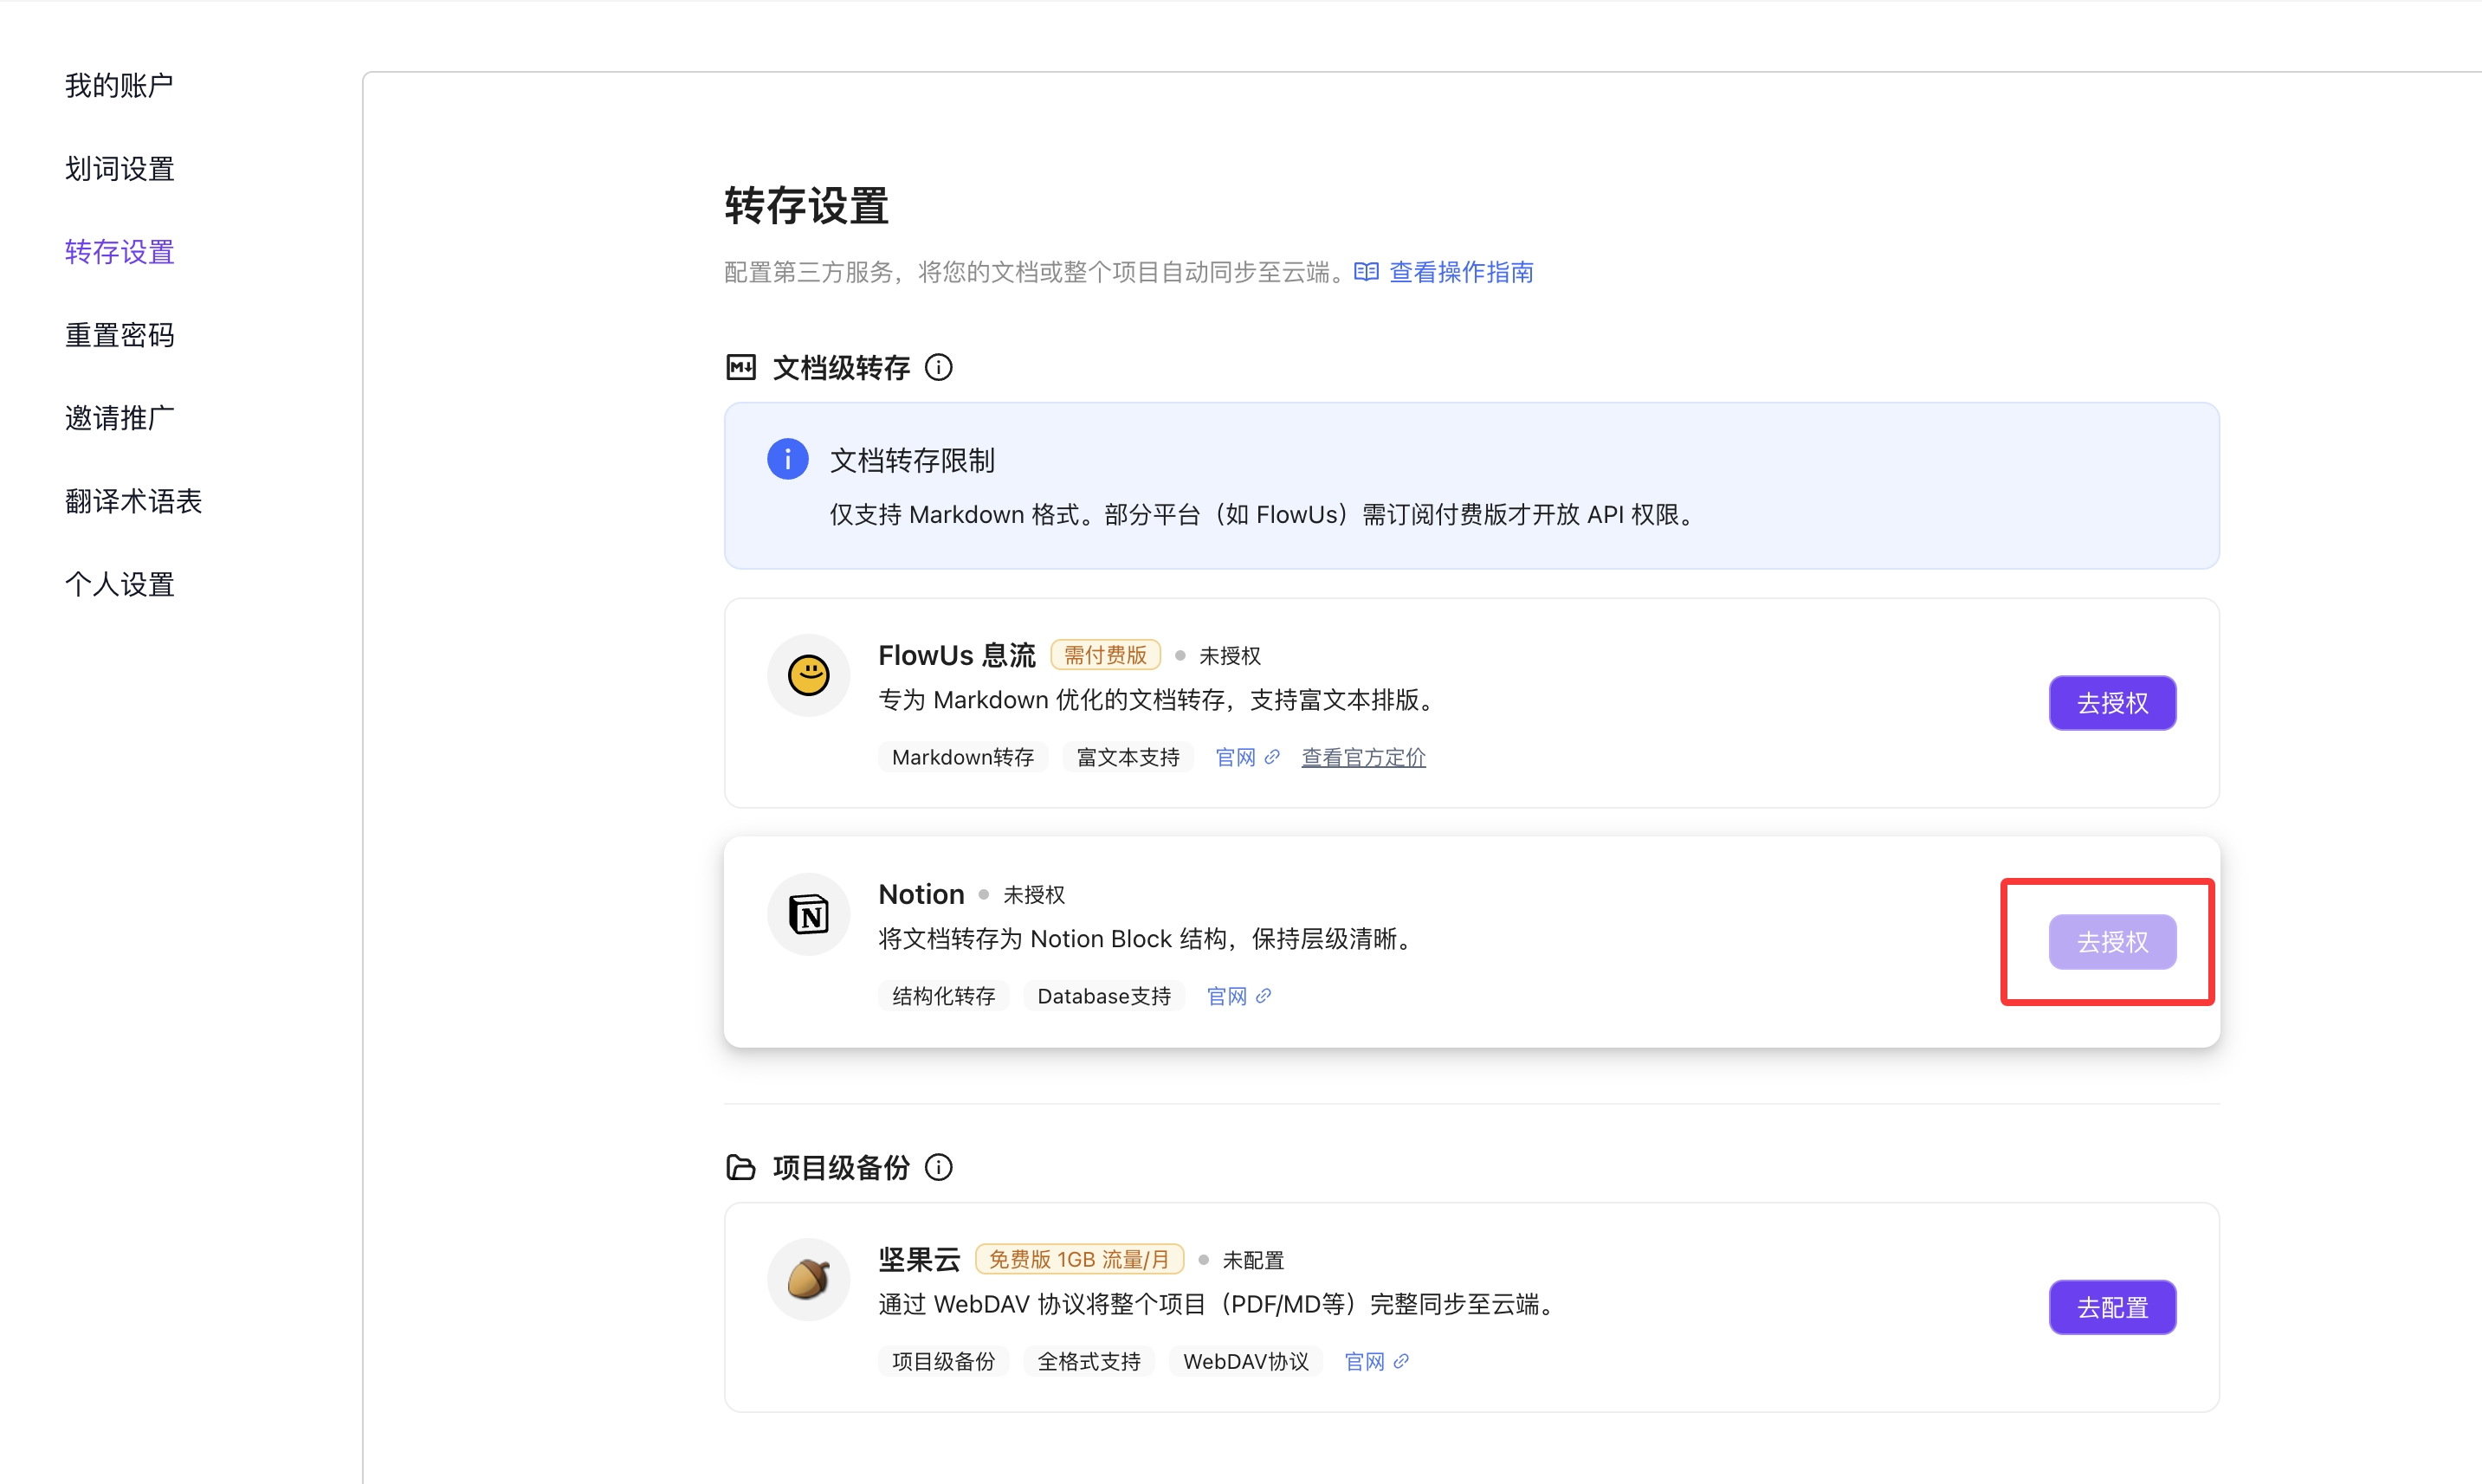
Click the "Go to Authorize" button on the right side of Notion to jump to the browser authorization page.
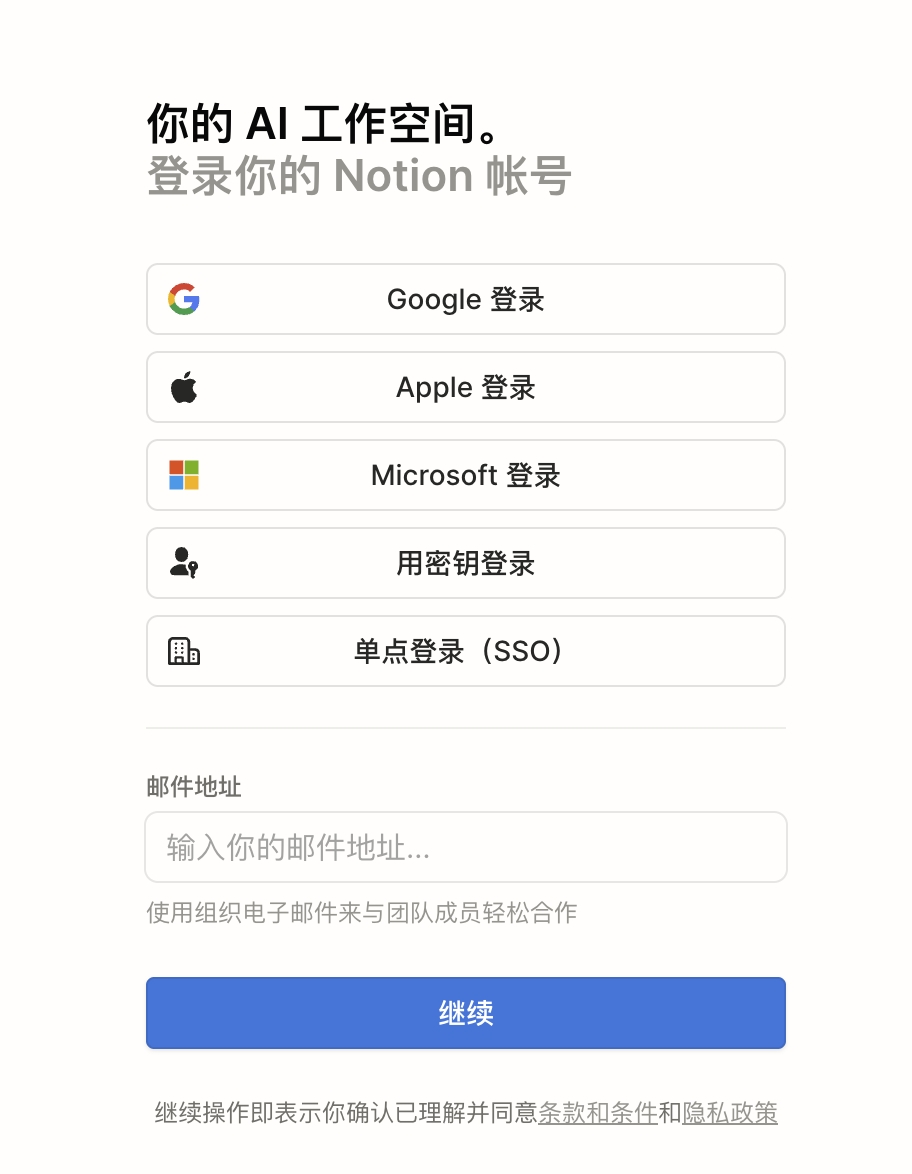
Log in to your Notion account in the browser (if not already logged in).
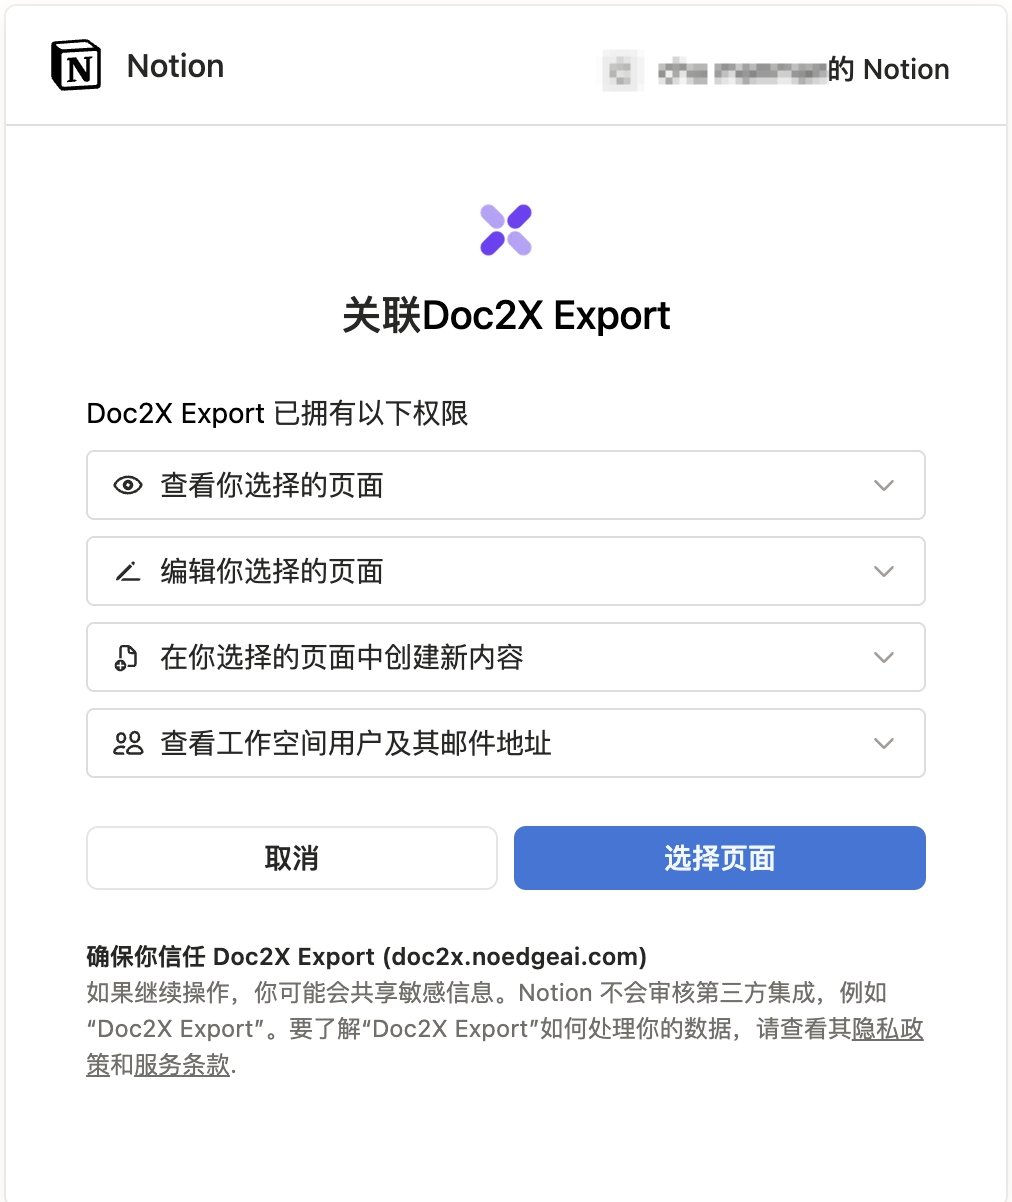
Carefully read the permission description displayed on the authorization page (e.g., which pages Doc2X will be able to access).
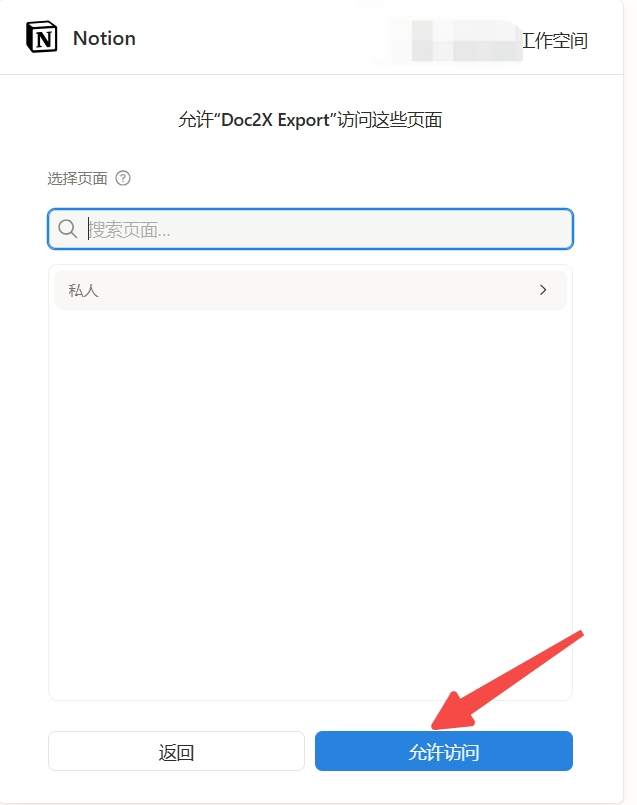
After confirming, click "Select Page" and choose the page you want to authorize.
After selecting the page, click "Allow Access" to complete the authorization.
Step 3: Return to Client and Select Files
After successful authorization, the browser will display a confirmation page and prompt you to "Click to return to Doc2X client" (or the page will automatically redirect).
The browser will reopen or switch back to the Doc2X client.
At this point, the Doc2X client should have recognized your Notion authorization information and will automatically complete the authorization and refresh the page.
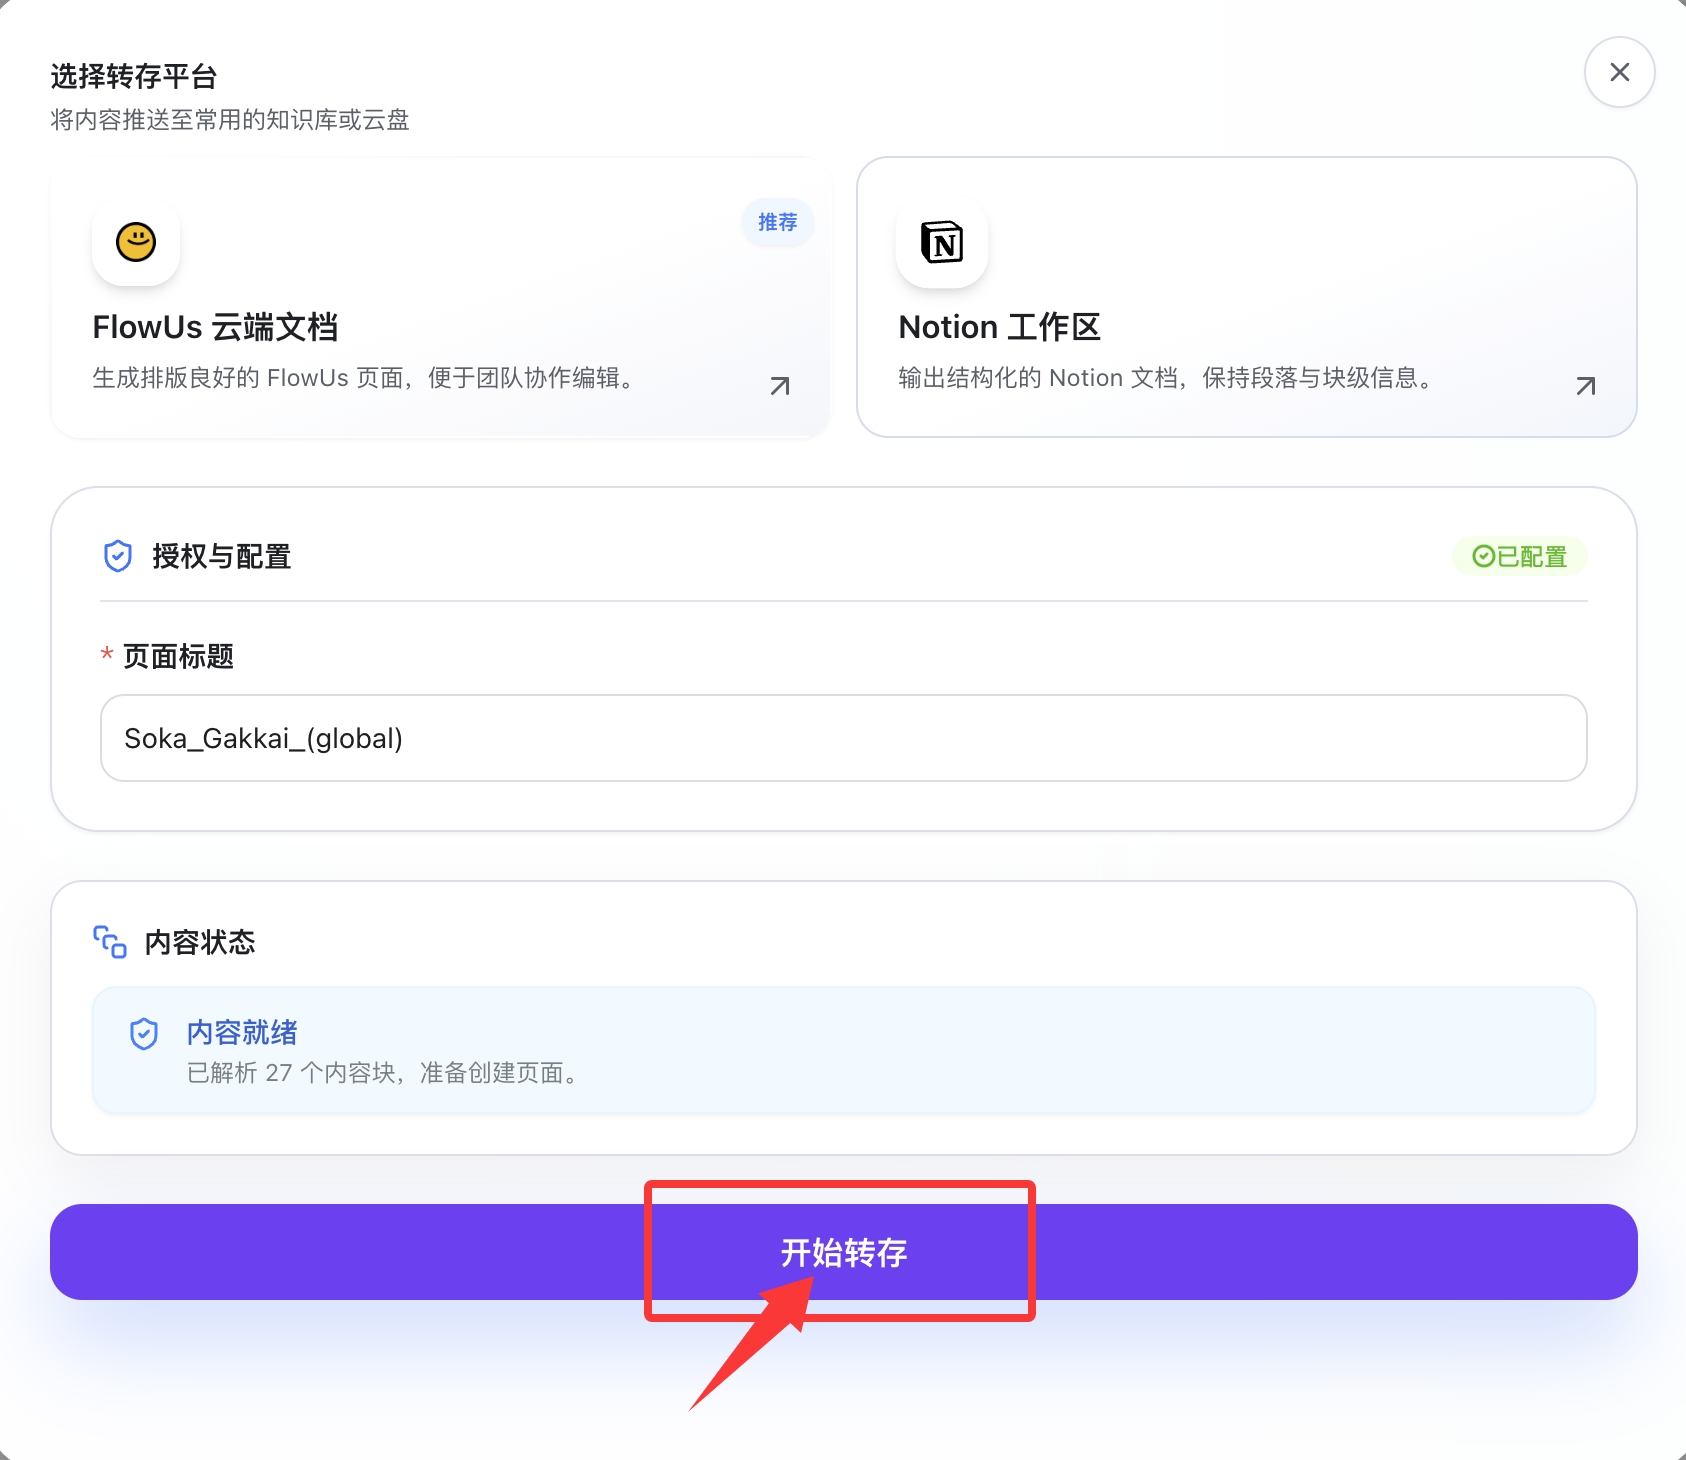
Reopen the "Save to Third Party" option, and the system will automatically recognize the save content.
If it's a translation file, you also need to select the translation type (Original, Translation Only, Bilingual Comparison, etc.).
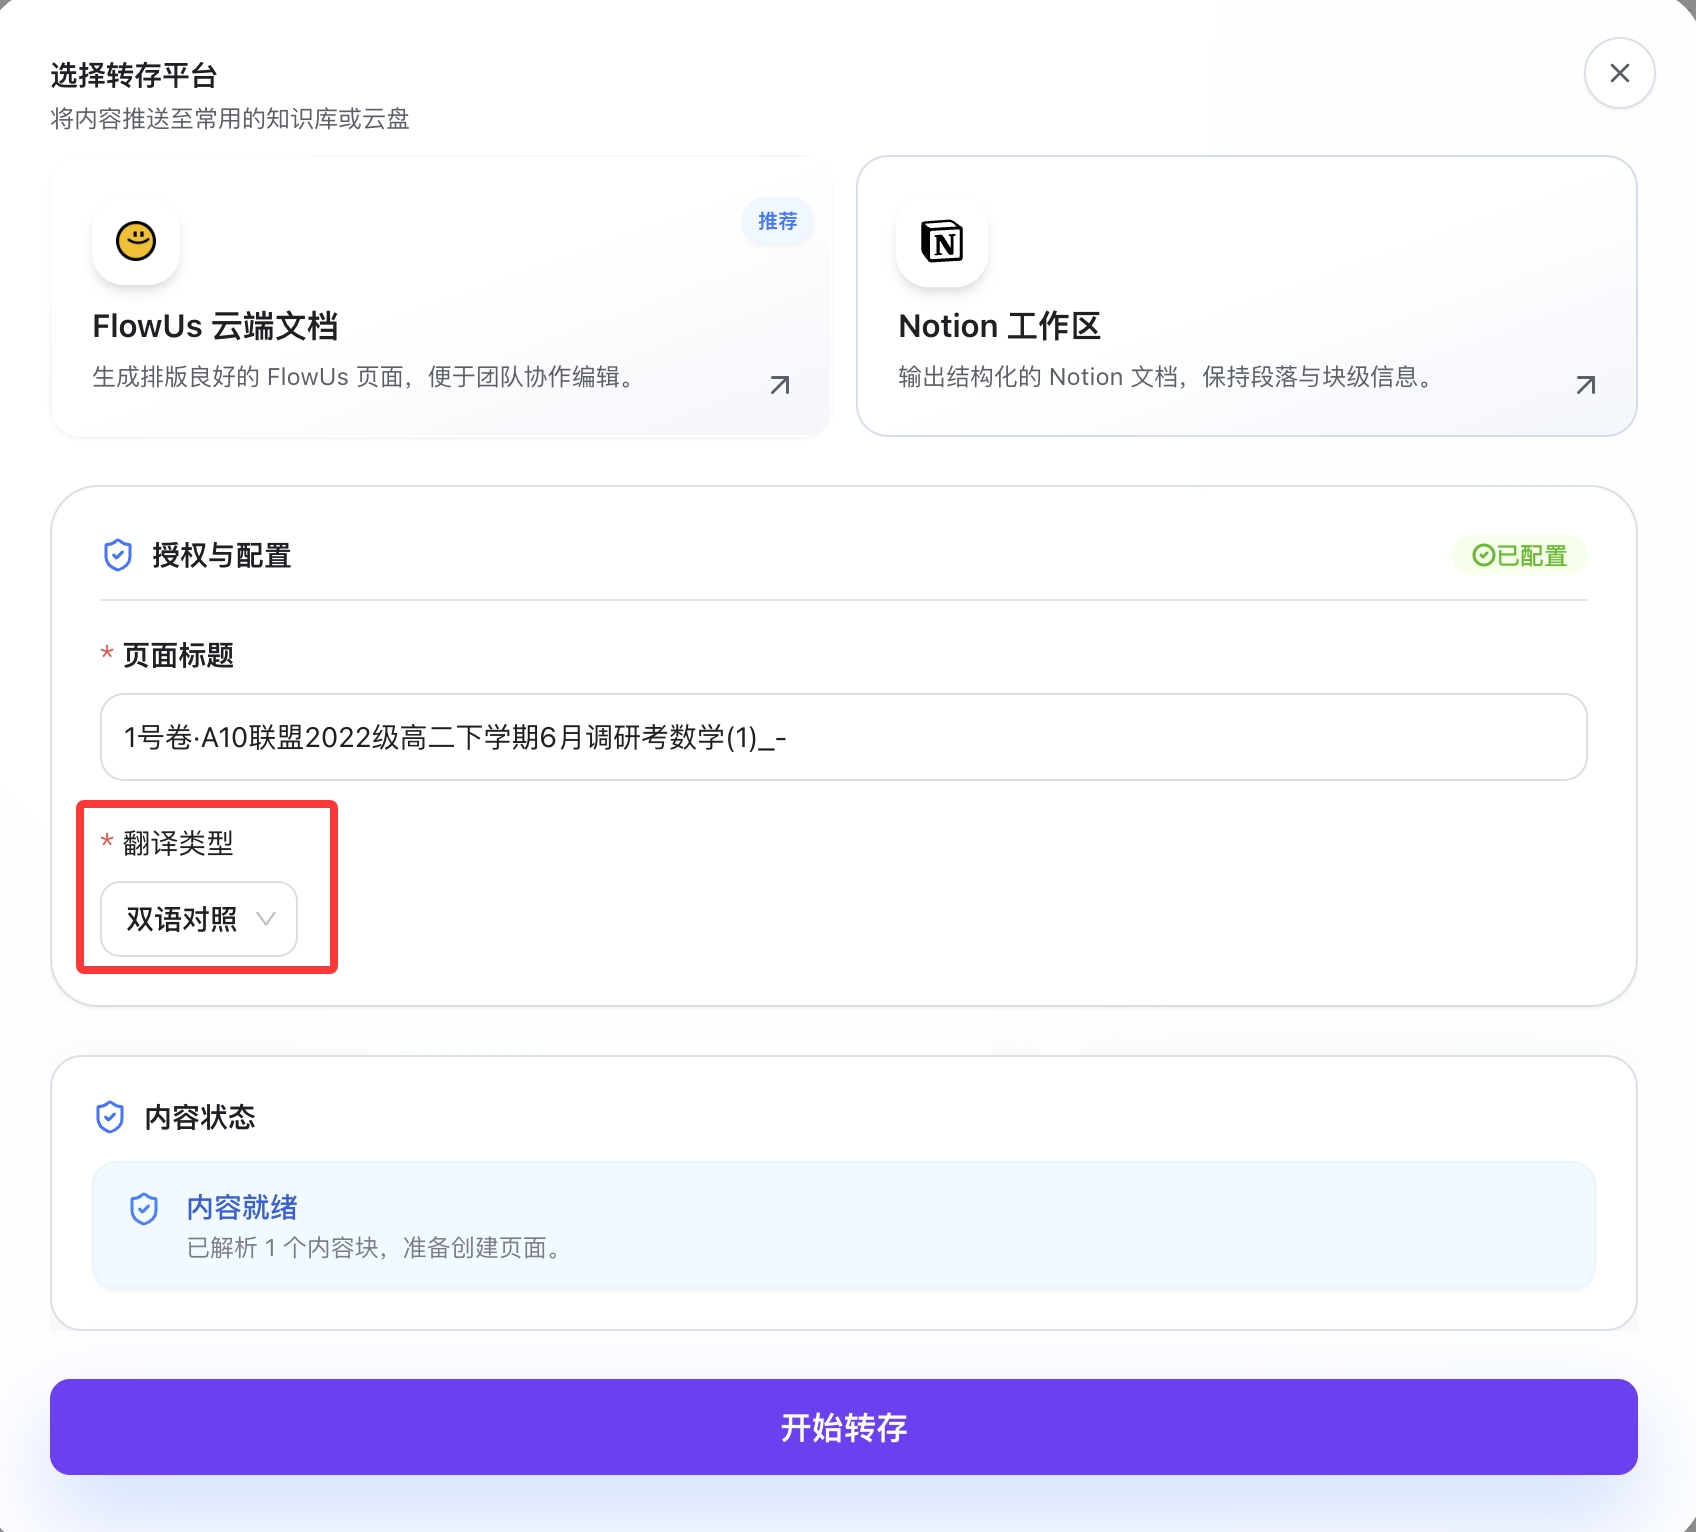
Click "Start Save" and wait for the file synchronization to complete.
Step 4: View Save Results
After saving is complete, you can view the created pages in Notion.