C-End WebDAV Save Guide
WebDAV is a file transfer protocol based on HTTP, commonly used for file synchronization and backup. Doc2X supports saving files to any file server that supports the WebDAV protocol.
Environment Requirements
- Platform: Doc2X Client
- Minimum Version: 1.3.14
Applicable Objects
- Parsing results/translation results/original PDF files
Supported Platforms
Doc2X supports the following WebDAV cloud storage platforms:
Please select the platform you need to use to view detailed configuration steps.
General Configuration Instructions
Regardless of which WebDAV platform you choose, the configuration process follows the same pattern:
- Get App Password: Generate a dedicated app password on each platform (not the login password)
- Configure WebDAV Connection: Enter the server address, account, and app password in the Doc2X client
- Select Save Files: After configuration, select the file types and save methods that need to be saved
- Start Saving: Click to start saving and wait for the file synchronization to complete
Here are the specific configuration steps for each platform:
Nutstore Configuration Guide
Nutstore is a well-known cloud storage service in China that supports the WebDAV protocol.
Step 1: Get Nutstore App Password
Open your browser and log in to your Nutstore Official Website.
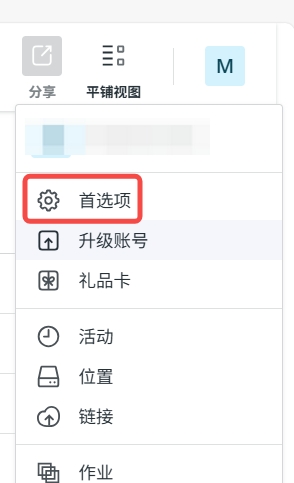
Go to the "Account Center" or "Security Settings" page (usually under your avatar/username in the upper right corner).
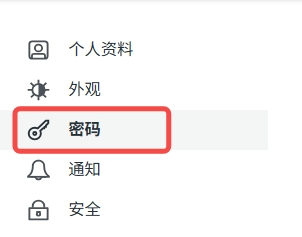
Find the "Security Options" or "App Password" related settings.
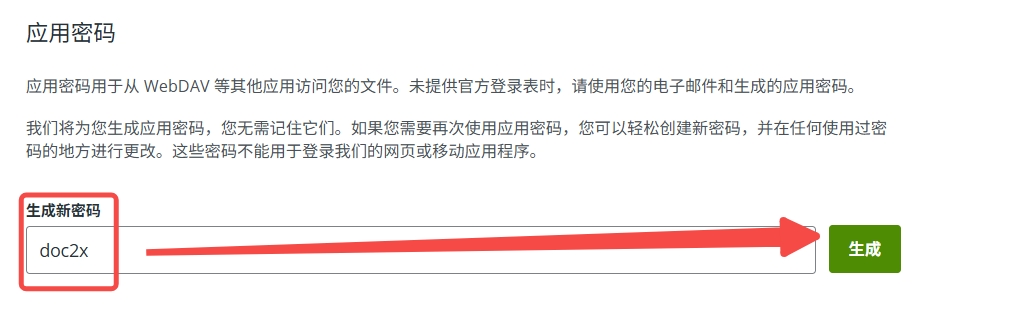
Click "Generate New App Password".
- Note: It is recommended to set a dedicated name for the Doc2X client (e.g., Doc2X) for easy management.

The system will generate a string of characters as the password. Please copy and save this "app password".
❗ Important Note: This password is different from your Nutstore login password and is specifically for third-party applications.
Step 2: Configure and Save Files in Doc2X Client
Open your Doc2X client.
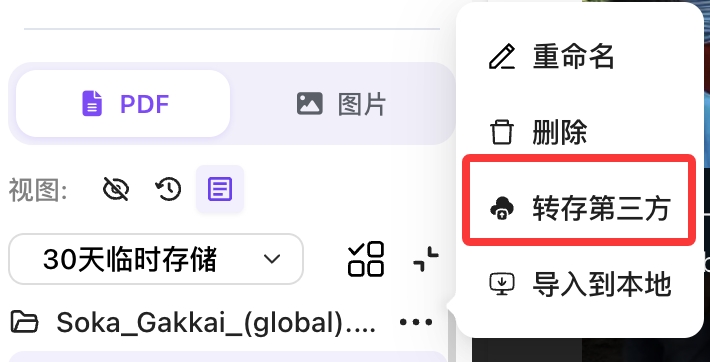
Find the "Save to Third Party" option.
On first use, the client will prompt you that you need to configure Nutstore save settings. Click the "Go to Configure" tag button on the right to jump to the save configuration page.

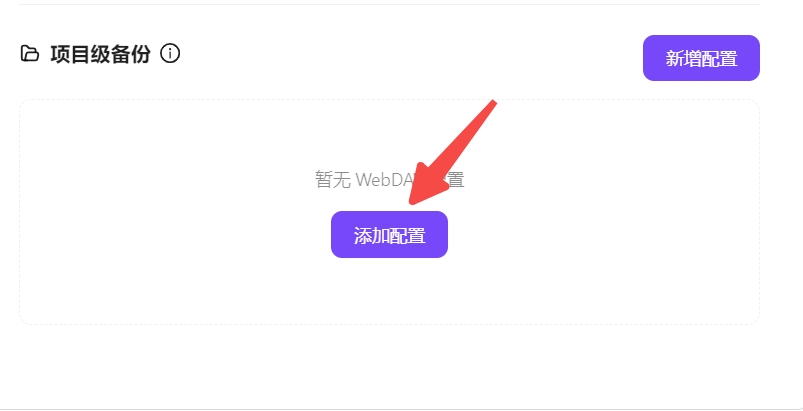
On the save configuration page, click "Add Configuration" or "New Configuration"
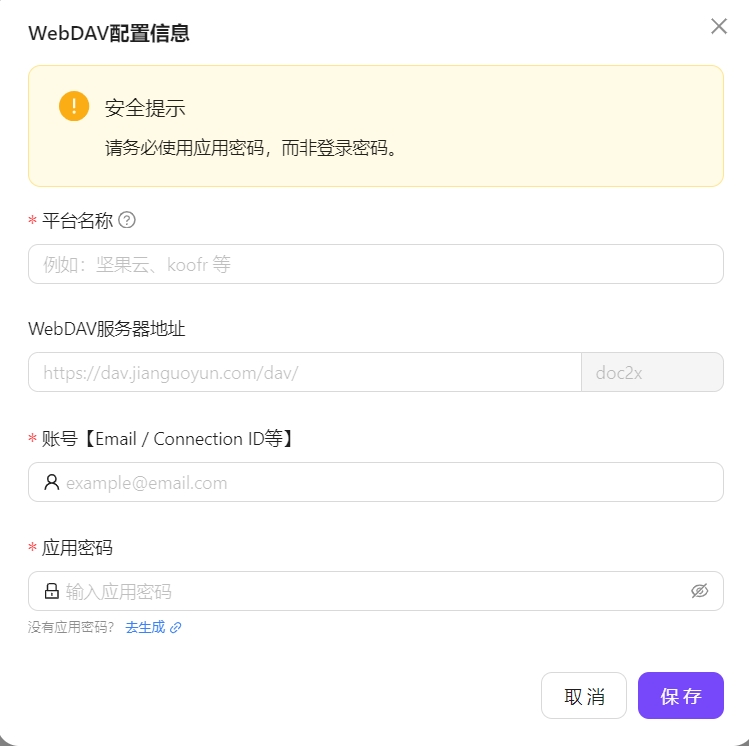
In the pop-up configuration window, enter the following information and save the configuration:
- Platform Name: Set a name for your WebDAV configuration for easy identification and management of multiple configurations
- WebDAV Server Address:
https://dav.jianguoyun.com/dav/ - Account: Usually email address or Connection ID
- App Password: Your WebDAV app password
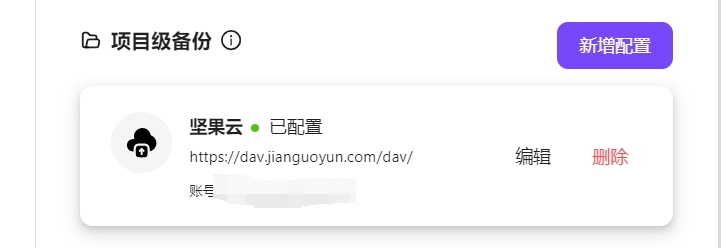
You can configure multiple WebDAV configurations, each with a different platform name for distinction.
After configuration is complete, you can see the configuration information and perform editing and other operations
After completing Nutstore-related configuration, find the "Save to Third Party" option again and select the files to be saved:
- WebDAV Platform: Select the target platform from the configured WebDAV configurations according to your save needs.
- File List: Select the files to be transferred, including file types (PDF, Markdown, etc.) and translation types (Original/Translation Only/Bilingual Comparison, etc.).
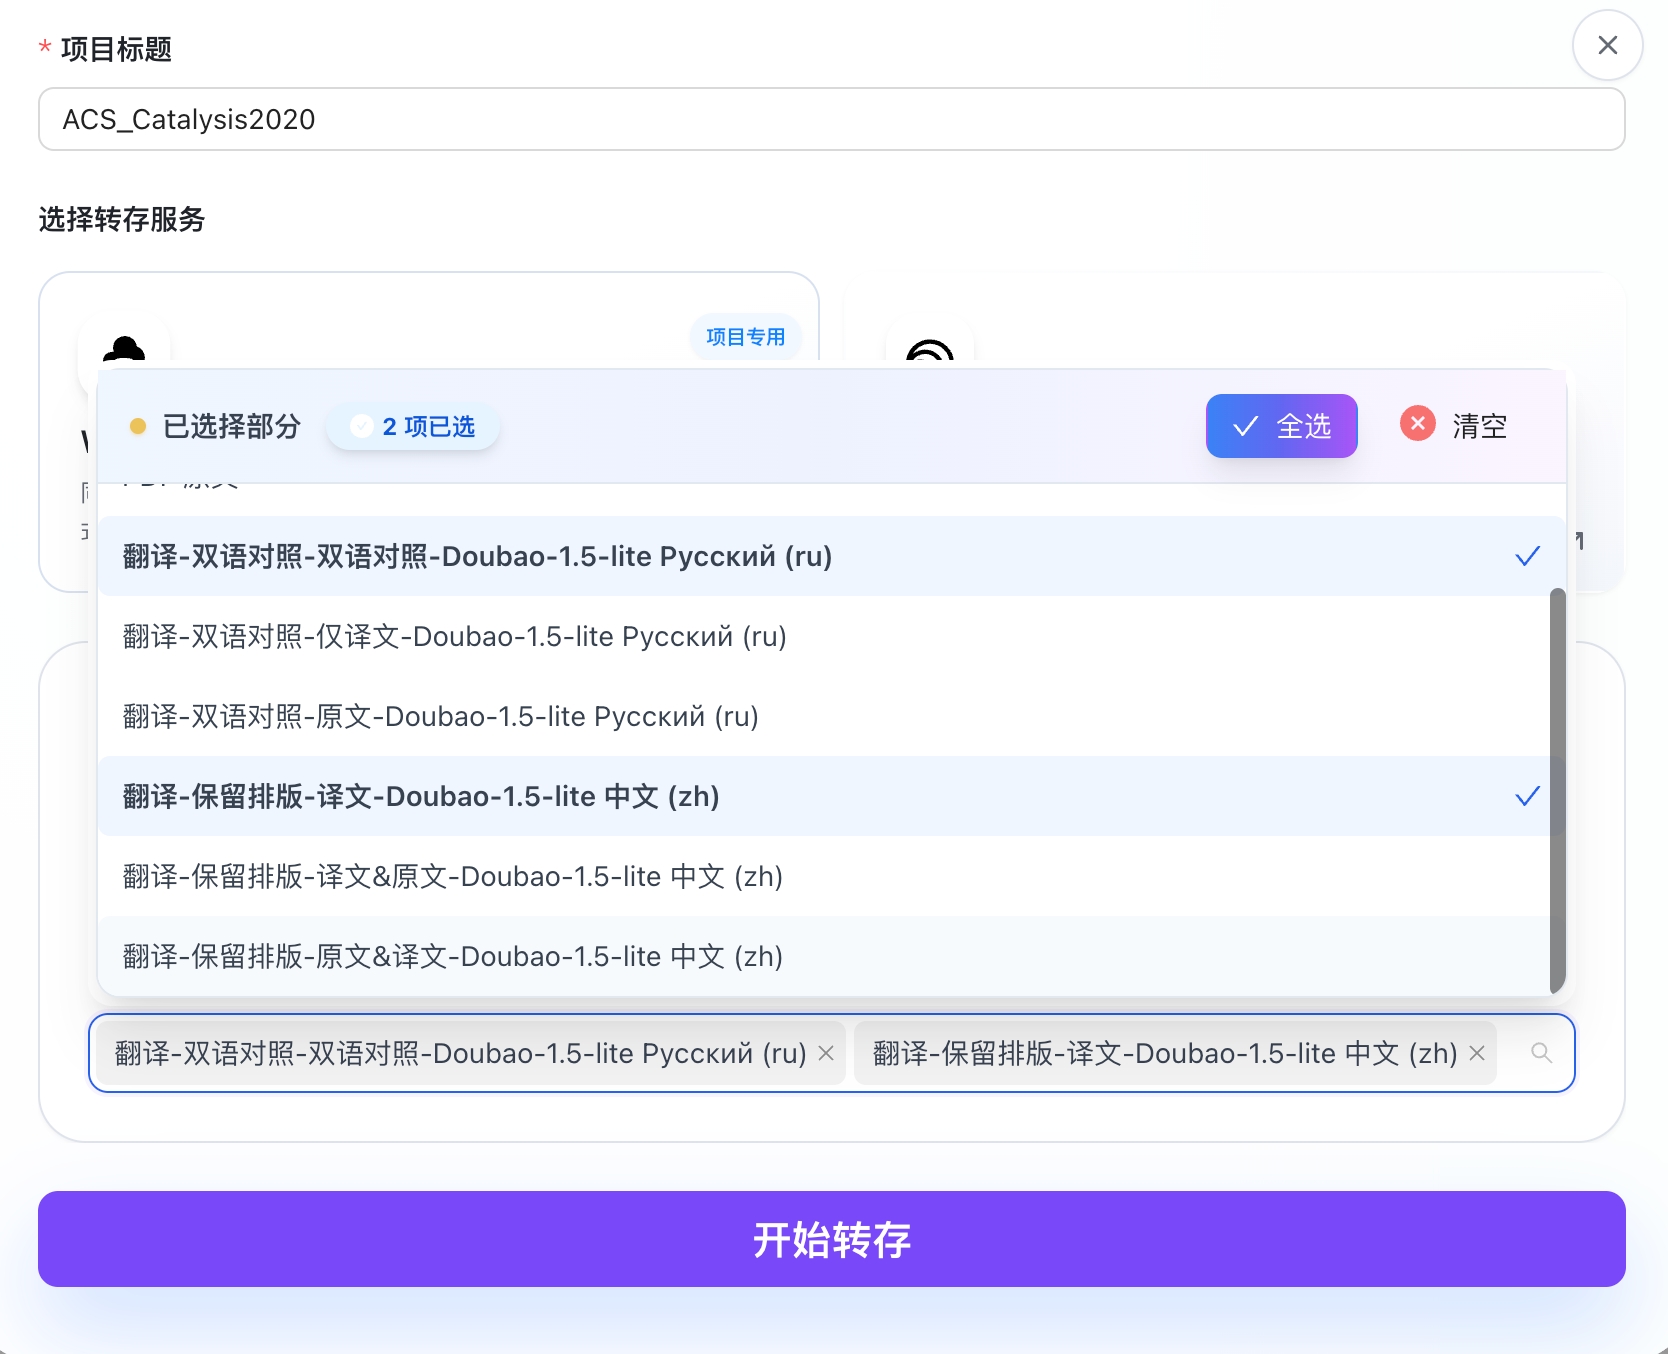
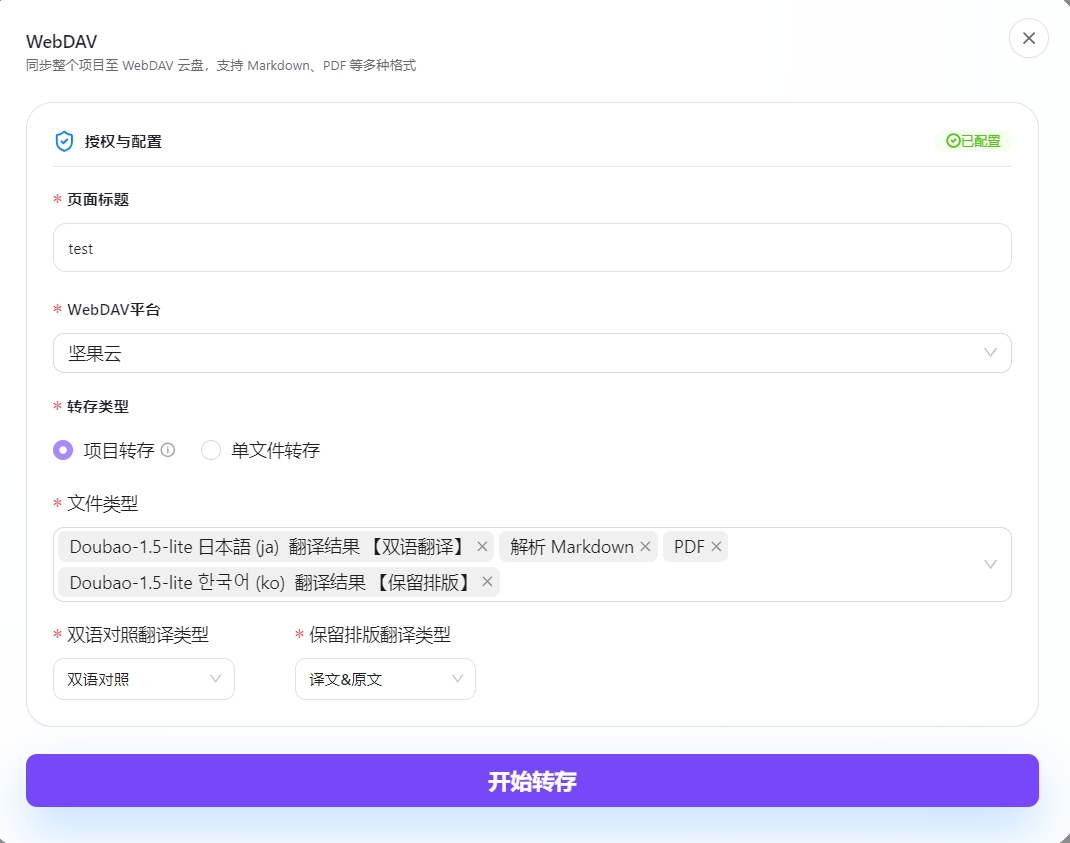
Click "Start Save" and wait for the files to be synchronized to Nutstore.
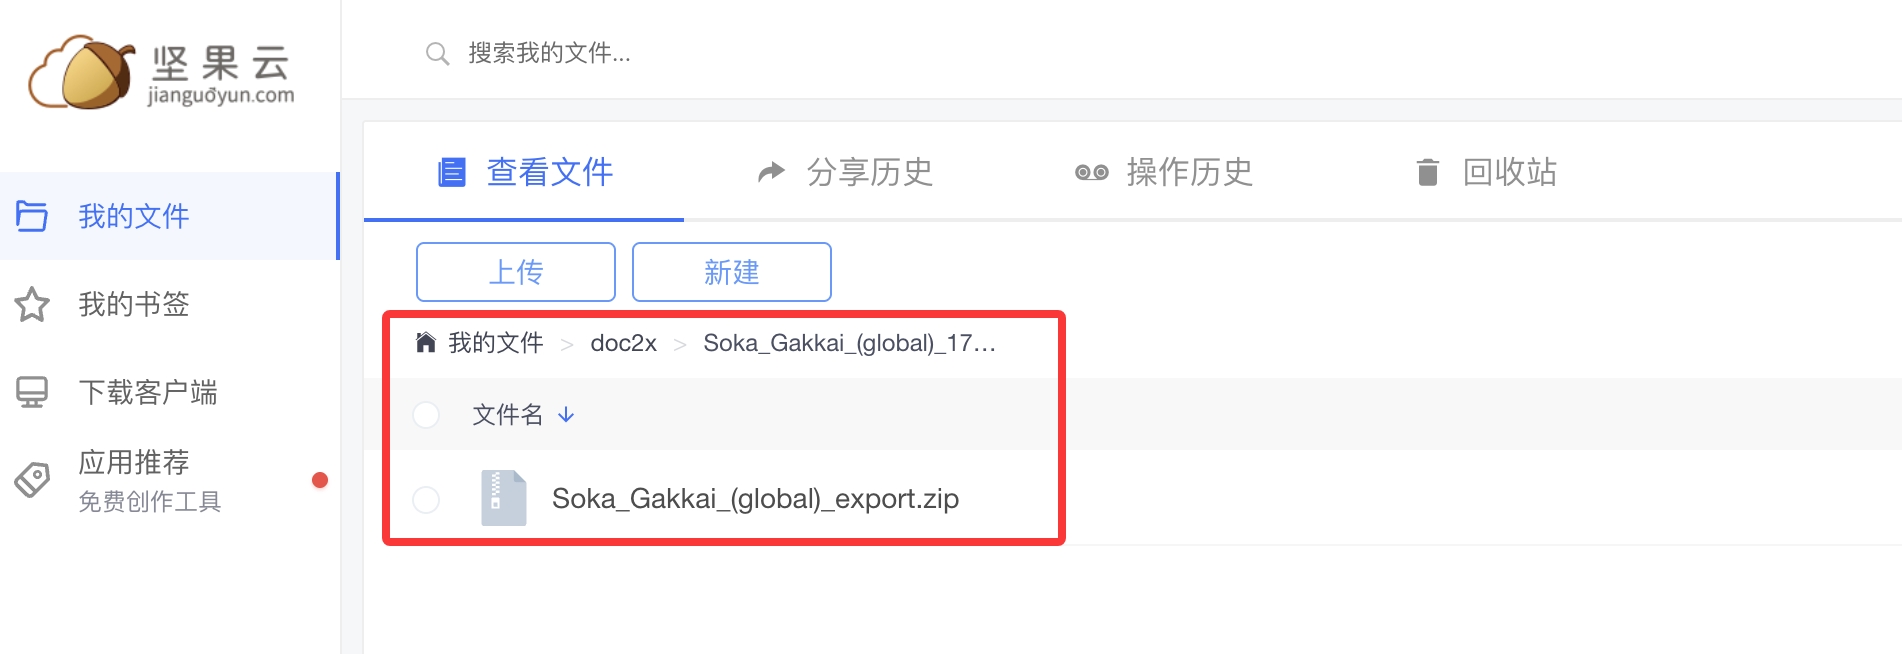
After saving is complete, you can view the saved files in Nutstore's doc2x directory.
Koofr Configuration Guide
Koofr is a European privacy-friendly cloud storage service that provides free WebDAV access.
Step 1: Get Koofr App Password
Open your browser and log in to your Koofr Official Website (https://koofr.eu).
Click on the avatar in the upper right corner and go to the "Settings" page.
Select the "Password" option in the left menu.
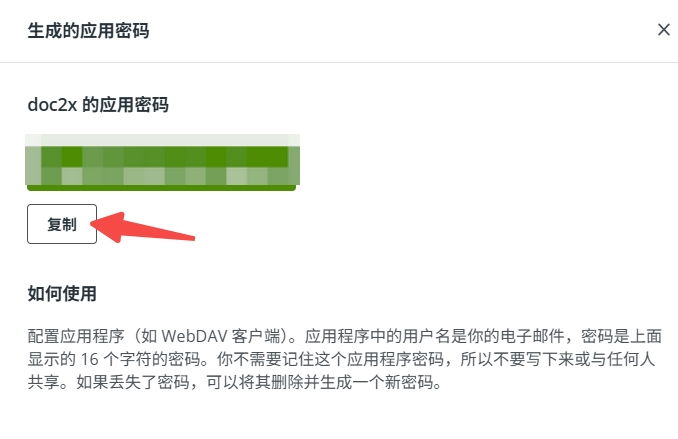
Find the "App passwords" section and click "Generate new password".
- Note: It is recommended to set a dedicated name for the Doc2X client (e.g., Doc2X) for easy management.
- Note: It is recommended to set a dedicated name for the Doc2X client (e.g., Doc2X) for easy management.
The system will generate a string of characters as the password. Please copy and save this "app password".
❗ Important Note: This password is different from your Koofr login password and is specifically for third-party applications.
Step 2: Configure and Save Files in Doc2X Client
Open your Doc2X client.
Find the "Save to Third Party" option.
On first use, the client will prompt you that you need to configure Koofr save settings. Click the "Go to Configure" tag button on the right to jump to the save configuration page.
On the save configuration page, click "Add Configuration" or "New Configuration"
In the pop-up configuration window, enter the following information and save the configuration:
- Platform Name: Set a name for your WebDAV configuration for easy identification and management of multiple configurations
- WebDAV Server Address:
https://app.koofr.net/dav/Koofr - Account: Your Koofr registered email address
- App Password: Your Koofr app password
You can configure multiple WebDAV configurations, each with a different platform name for distinction.
After configuration is complete, you can see the configuration information and perform editing and other operations

After completing Koofr-related configuration, find the "Save to Third Party" option again and select the files to be saved:
- WebDAV Platform: Select the target platform from the configured WebDAV configurations according to your save needs.
- File List: Select the files to be transferred, including file types (PDF, Markdown, etc.) and translation types (Original/Translation Only/Bilingual Comparison, etc.).
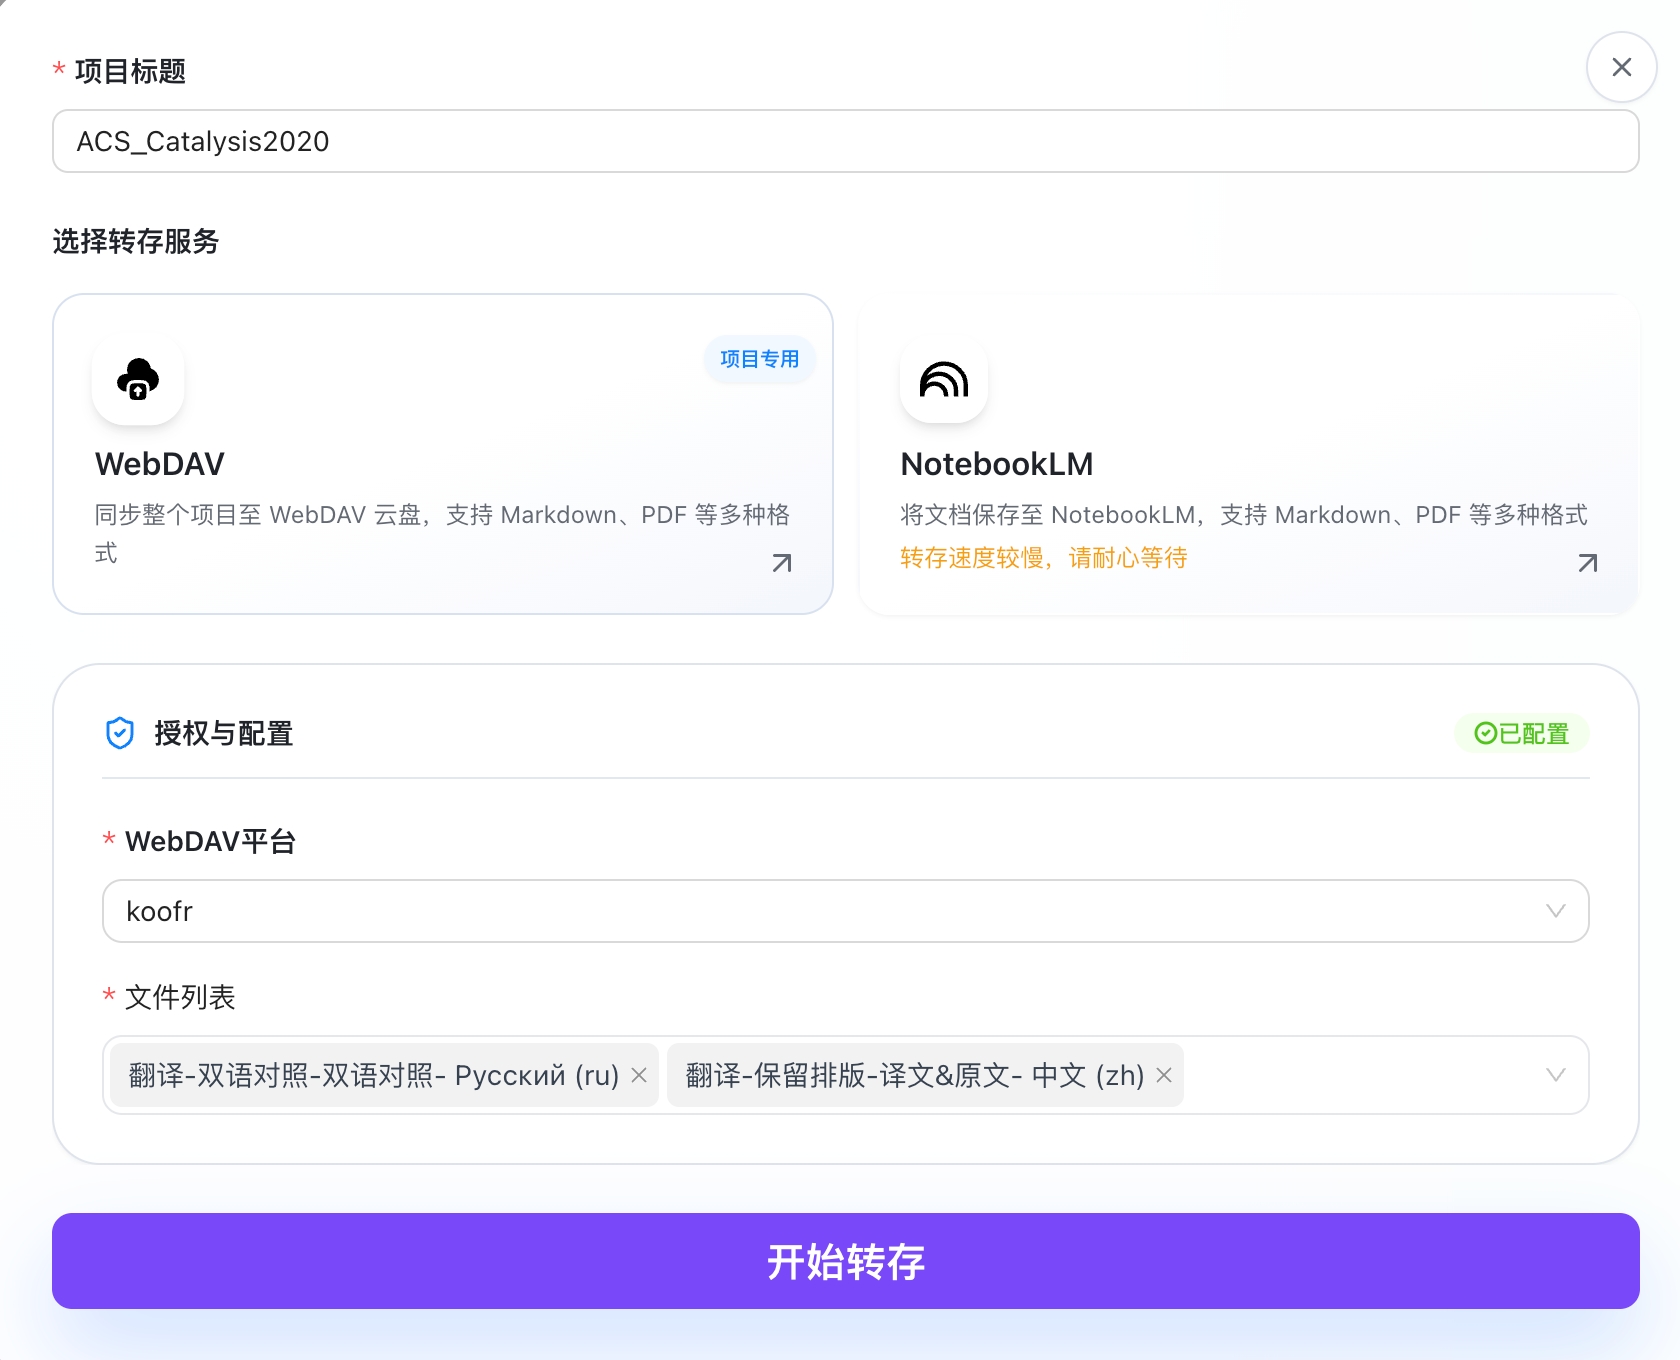
Click "Start Save" and wait for the files to be synchronized to Koofr.
After saving is complete, you can view the saved files in Koofr's doc2x directory.

InfiniCLOUD Configuration Guide
InfiniCLOUD is a high-speed cloud storage service provided by Japan that supports the WebDAV protocol.
Step 1: Get InfiniCLOUD App Password
Open your browser and log in to your InfiniCLOUD Official Website (https://infini-cloud.net).
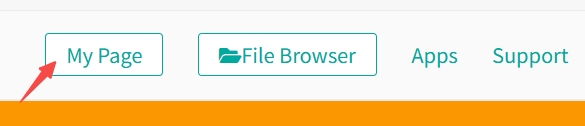
Click on the username in the upper right corner and go to the "My Page" page.
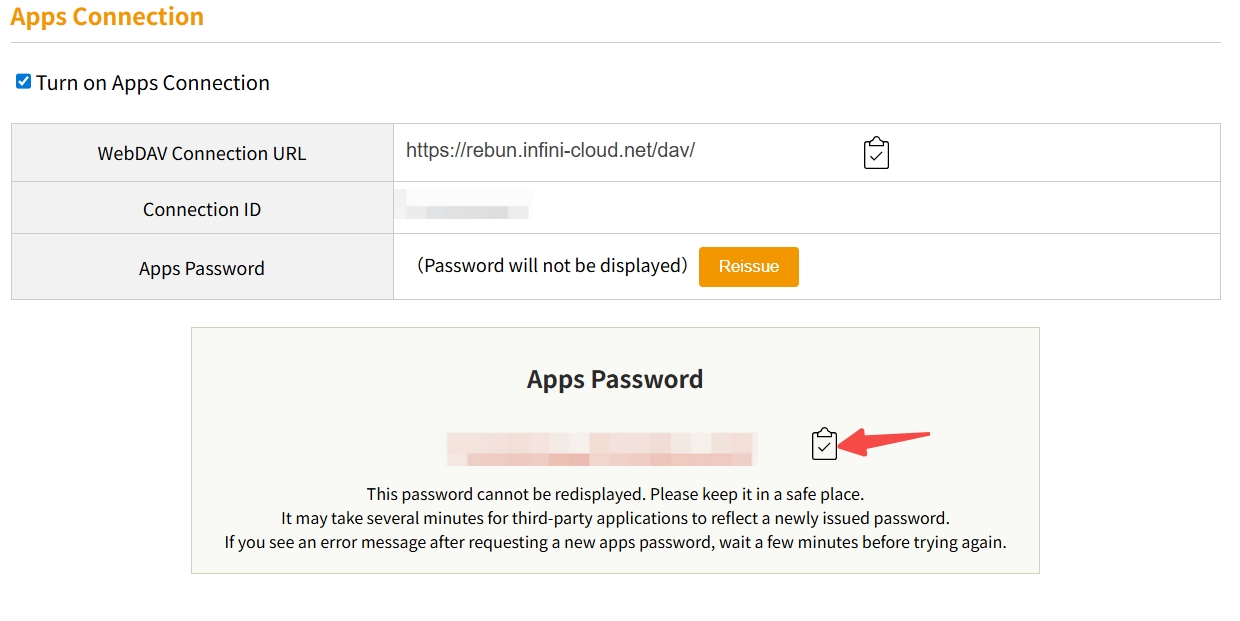
Scroll down to find the "Apps Connection" option.
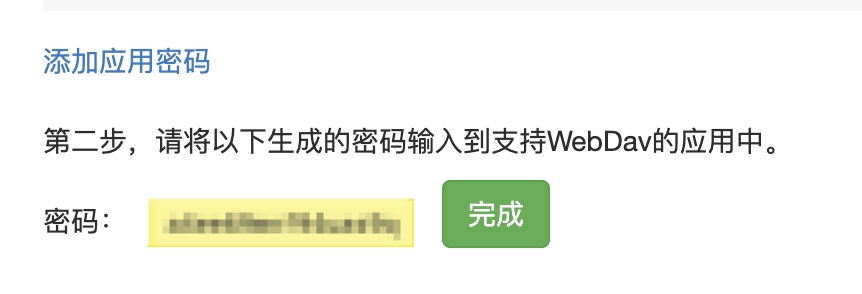
Click the "Issue" button to generate an app password.
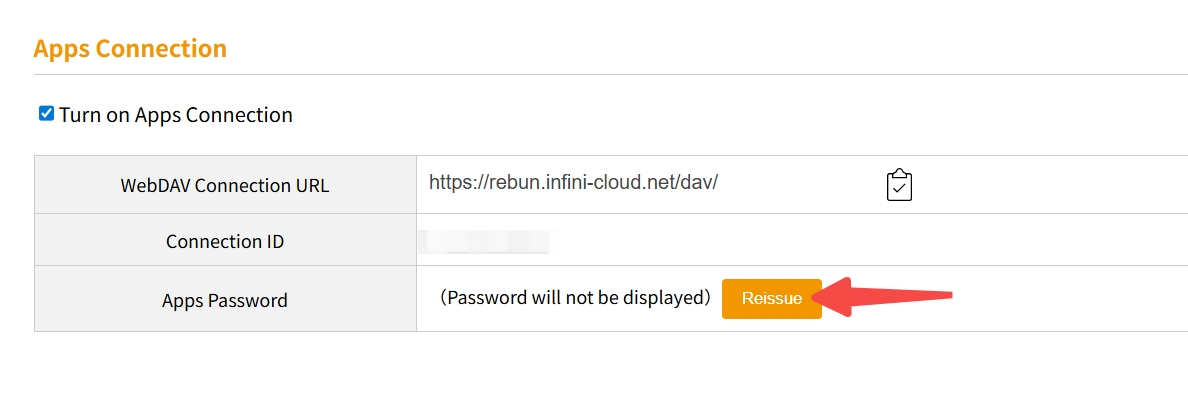
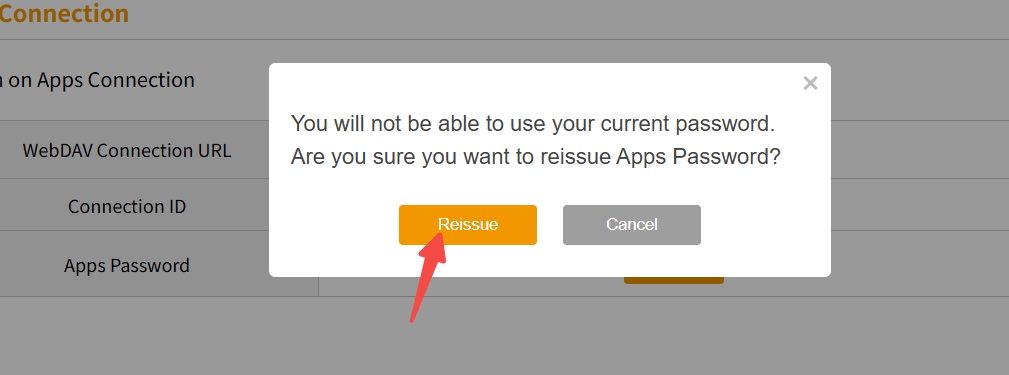
The system will generate a string of characters as the password. Please copy and save this "app password".
❗ Important Note: This password is different from your InfiniCLOUD login password and is specifically for third-party applications.
Step 2: Configure and Save Files in Doc2X Client
Open your Doc2X client.
Find the "Save to Third Party" option.
On first use, the client will prompt you that you need to configure InfiniCLOUD save settings. Click the "Go to Configure" tag button on the right to jump to the save configuration page.
On the save configuration page, click "Add Configuration" or "New Configuration"
In the pop-up configuration window, enter the following information and save the configuration:
- Platform Name: Set a name for your WebDAV configuration for easy identification and management of multiple configurations
- WebDAV Server Address:
https://rebun.infini-cloud.net/dav/ - Account: Your InfiniCLOUD username
- App Password: Your InfiniCLOUD app password
You can configure multiple WebDAV configurations, each with a different platform name for distinction.
After configuration is complete, you can see the configuration information and perform editing and other operations

After completing InfiniCLOUD-related configuration, find the "Save to Third Party" option again and select the files to be saved:
- WebDAV Platform: Select the target platform from the configured WebDAV configurations according to your save needs.
- File List: Select the files to be transferred, including file types (PDF, Markdown, etc.) and translation types (Original/Translation Only/Bilingual Comparison, etc.).
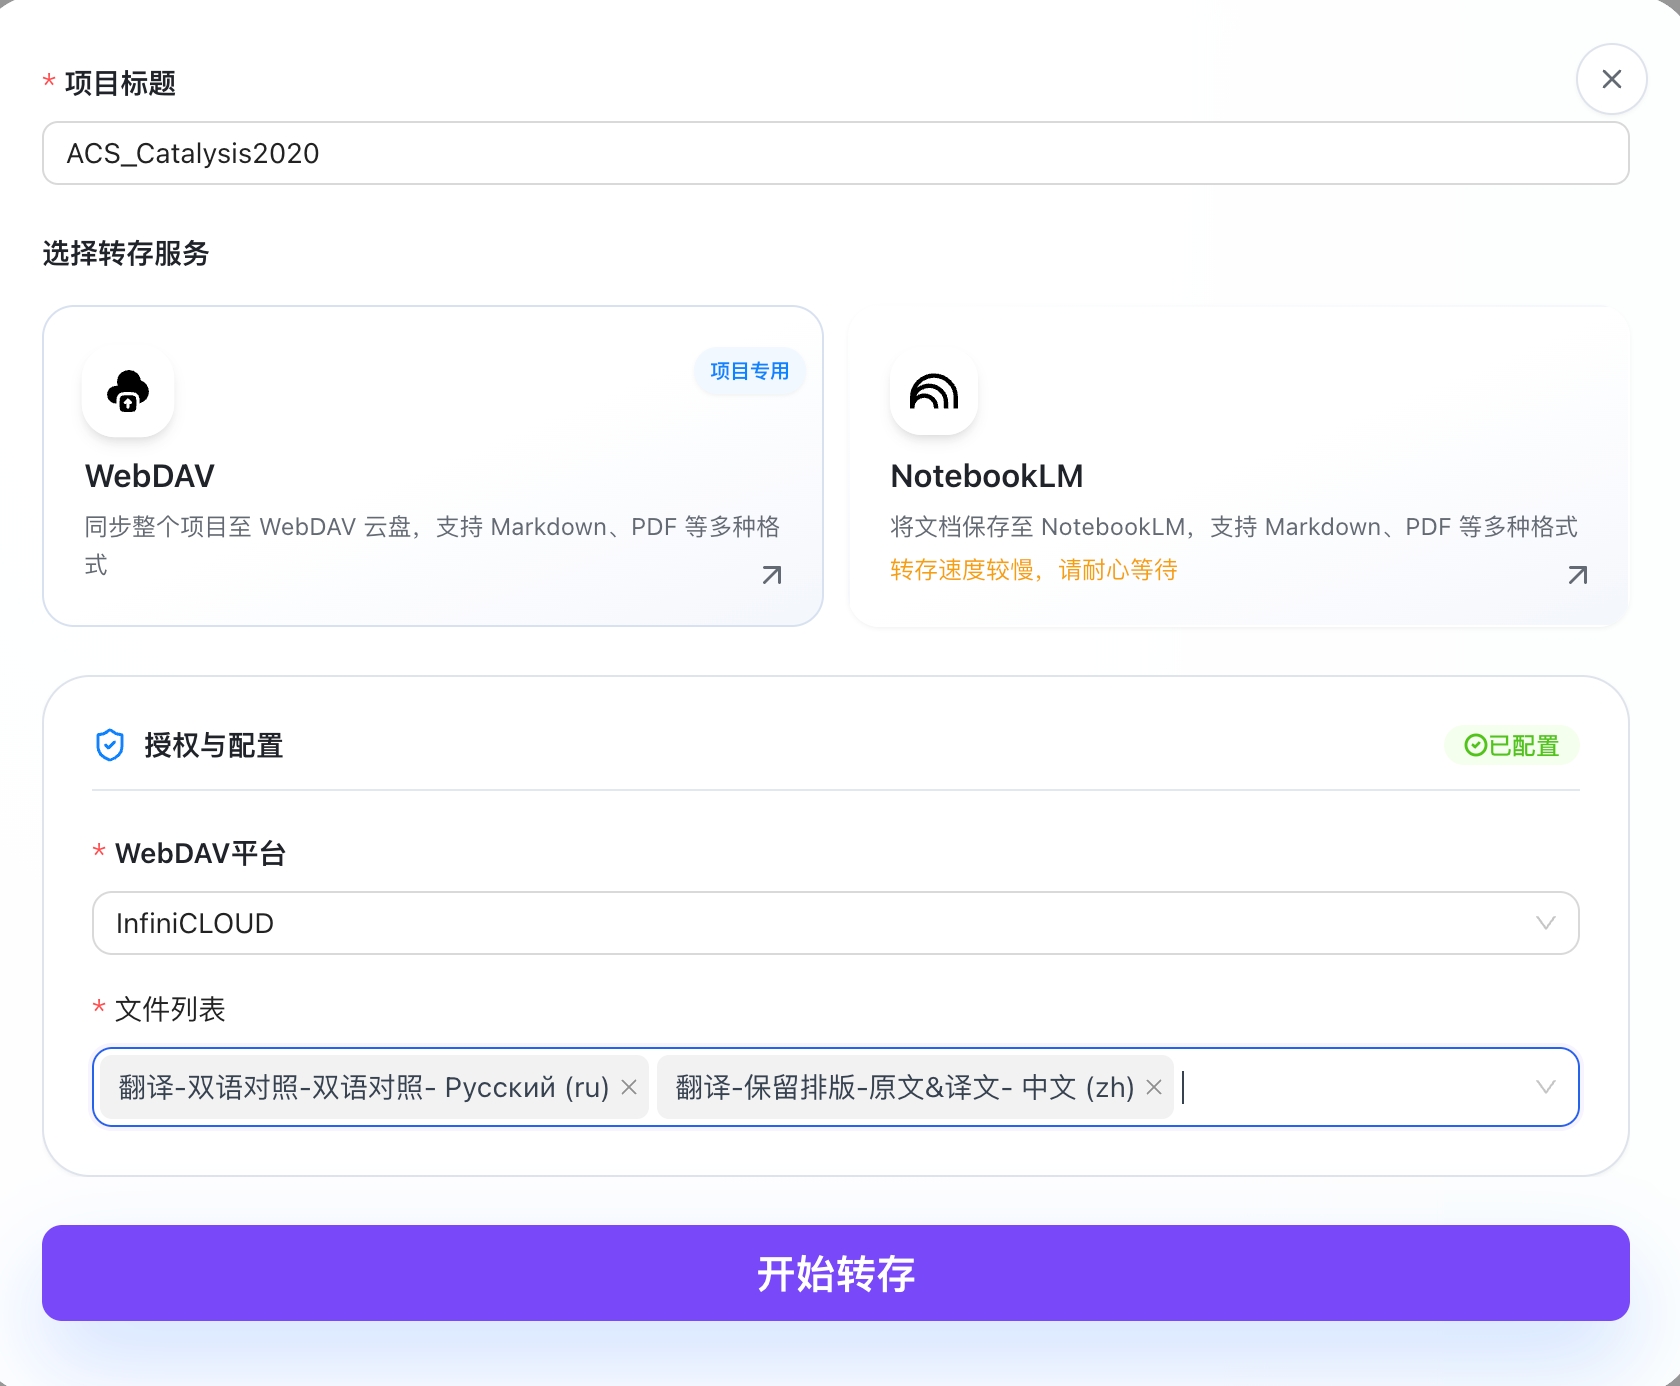
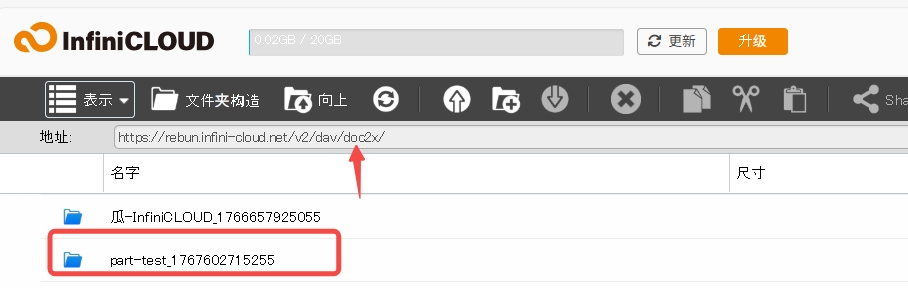
Click "Start Save" and wait for the files to be synchronized to InfiniCLOUD.
After saving is complete, you can view the saved files in InfiniCLOUD's doc2x directory.