
Image tools: crop, compress, convert, and enlarge
Open Utilities (实用工具) → Image tools (图片工具) for Crop, Compress, Convert, and the menu item called Lossless enlargement (无损放大). This guide uses a synthetic timetable PNG and a synthetic page JPG. Keep the original, then check text, dimensions, backgrounds, and clarity in the downloaded file.
The web and desktop apps open tool pages that must finish loading before use. These are separate from Magic Pic's image translation, editing, AI generation, and AI enhancement. For perspective correction, shadow removal, handwriting cleanup, or combining page photos into a PDF, use the scan workspace.
Choose a tool and prepare inputs
| Tool | Input | Main output |
|---|---|---|
| Crop (裁剪) | Browser-readable images; select several and process them individually | JPEG, PNG, WebP, or a copied result image |
| Compress (压缩) | One or more images | JPEG, WebP, AVIF, or optimized PNG; individual files or ZIP |
| Convert (转换) | One or more images | JPEG, PNG, WebP, AVIF; individual files or ZIP |
| Lossless enlargement (无损放大) | One image; start with a PNG sample | An image enlarged to 2× or 4× dimensions |
The picker accepting image files does not guarantee support for every camera or specialist format. If a file cannot be read, use an image application to save a genuine PNG/JPEG copy rather than merely renaming its extension. Large images and batches depend on available device memory; reduce dimensions or batch size if needed.
On narrow phone screens, settings are often behind the purple menu button. Open it to find options and processing/download controls. Adding a file to a tool does not overwrite the original on disk.
Crop: keep the required region
- Open Crop, then click or drag to add images. When several images are present, select the one to process from the list.
- Under Crop settings (裁剪设置), select Free crop (自由裁剪) or a fixed ratio: 1:1, 4:3, 16:9, 3:2, or 9:16. For a landscape slide illustration, start with 16:9.
- Drag the crop frame and corners without cutting off questions, legends, or page numbers. Rotate an incorrectly oriented image with the left/right 90° controls, or use Horizontal flip (水平翻转) for a mirrored image.
- Enable Grid snapping (网格吸附) for alignment, or try EXIF orientation correction (EXIF 自动矫正) when camera metadata affects orientation.
- Choose the output format and quality, then apply the crop. The tool processes the current image; after selecting another image, check its frame and process it separately.
- Inspect the result and its dimensions. Download it, or copy and paste it into an application that accepts clipboard images.
Explicitly choose JPEG, PNG, or WebP when the format matters. The current Original (原样) option encodes JPEG, so it does not guarantee the original encoding or transparency. The crop canvas uses a white background; inspect transparent images after downloading. The current page has no custom width/height input. Dimensions follow the crop region and canvas limits; check the downloaded dimensions.
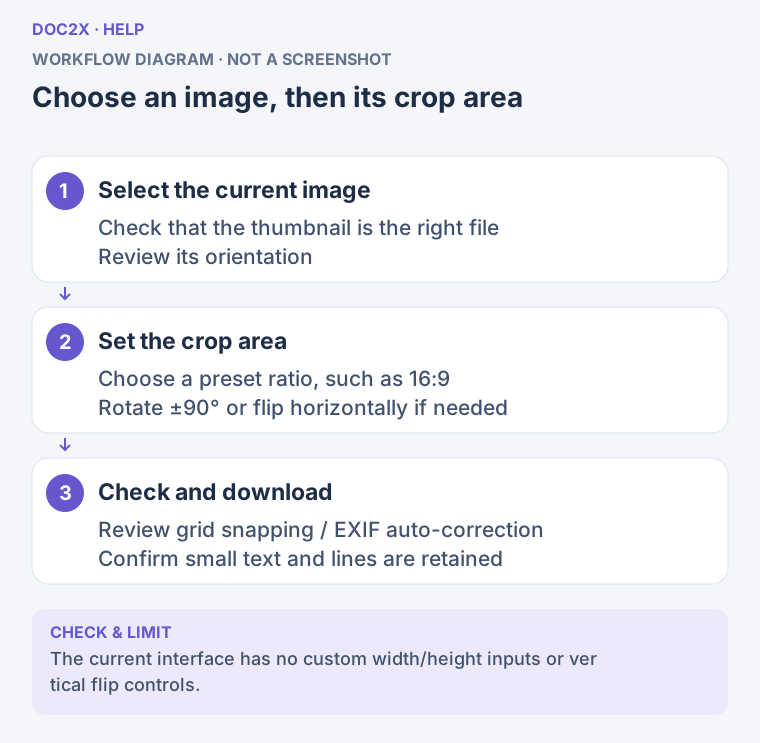
Choose the crop for the selected image and check the downloaded result. (workflow diagram). Open the image in a new tab to enlarge it.
Compress: reduce file size
- Open Compress and add the sample images. Add more in the workspace if needed; split the batch when the interface reaches its limit.
- Choose By quality or By target size. Quality mode gives direct control over the clarity/size trade-off; target size is useful for upload limits.
- Choose JPEG, WebP, AVIF, or PNG optimization. Try JPEG/WebP for photos; for transparency, choose a supporting format and verify the result.
- In quality mode, select high, standard, medium, low, or an available custom value. In size mode, select the desired size.
- Start compression and wait for individual results. Compare original size, compressed size, and previews; zoom in on small text and thin lines.
- Download successful images individually or download all as ZIP. Extract the archive and inspect its contents before removing any original files.
Target size is approached by trying compression parameters; the final size depends on the image and encoder. Check the actual downloaded size. If text becomes blurry, raise the quality or size target and try again. If the output is larger, retain the original or compare another format.
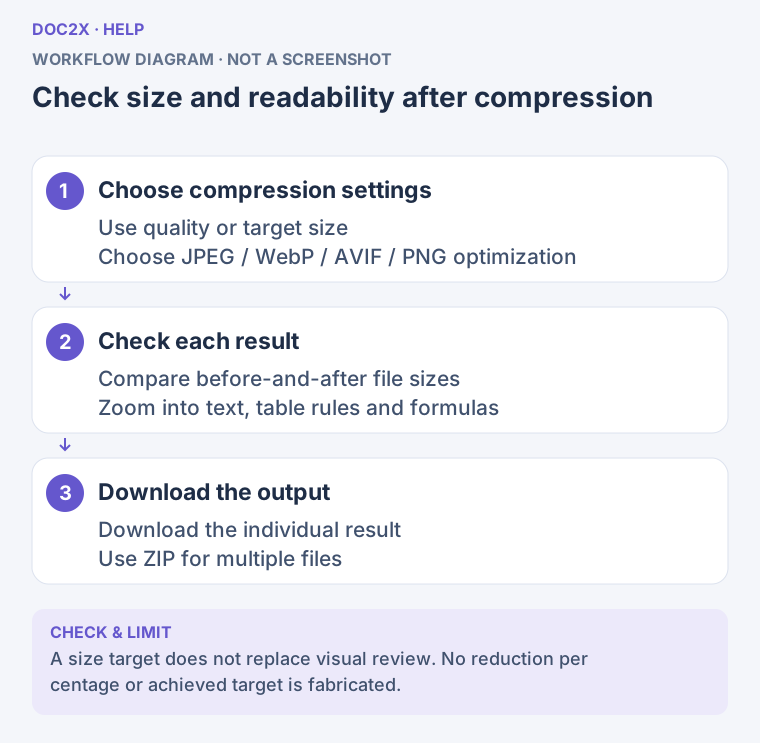
Compare file size and small-text clarity before downloading. (workflow diagram). Open the image in a new tab to enlarge it.
Convert: change image format
- Open Convert, upload one or more images, and check the file list.
- Select JPEG, PNG, WebP, or AVIF as the output. SVG output is not currently available.
- Review Keep EXIF (保留 EXIF) and Convert to sRGB (转换为 sRGB) where shown. Turn off EXIF preservation if you do not need camera metadata. Compare colors in the output rather than relying on the sRGB switch alone.
- Start conversion and wait for each file's result or error. Use the completed, downloadable file rows to confirm success.
- Download individual files or a ZIP. Check the extension and open the result in the intended application to confirm compatibility.
JPEG does not preserve transparency, so inspect the background when converting transparent images. The receiving application must also support WebP/AVIF. Choose PNG/JPEG when that application cannot open newer formats.
If one file fails, preserve successful results and retry the failed image on its own. If processing components fail to initialize, wait for loading or reopen the tool; download completed files before reopening.
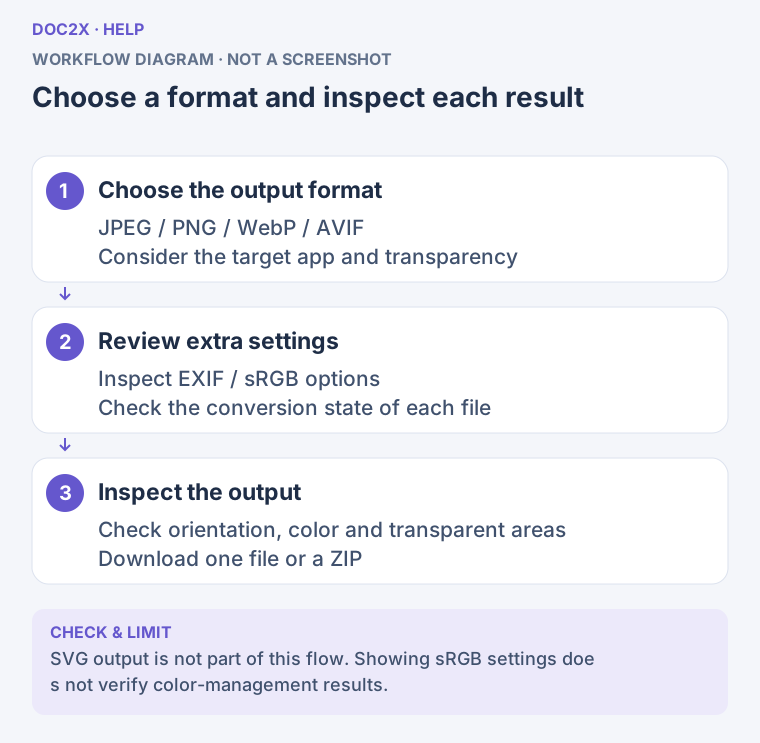
Select the target format and check each converted image. (workflow diagram). Open the image in a new tab to enlarge it.
Enlarge: increase dimensions to 2× or 4×
Although the menu calls this Lossless enlargement, the current tool performs ordinary image resizing. Increasing the pixel dimensions cannot guarantee recovery of missing text or detail. Magic Pic's separate Image enhancement (图片高清化) provides AI processing with its own terms and result checks.
- Open Lossless enlargement and upload a PNG sample.
- Select 2× or 4×. An 800 × 600 image becomes 1600 × 1200 at 2×.
- Start enlargement, wait for the result, and compare text edges and diagram lines with the original.
- Download the image and open it in your presentation or layout application to confirm the required dimensions.
The current page has no active sharpening, denoising, or quality slider. If a JPEG input fails, first convert it to PNG with Convert, then retry. For larger images, begin with 2× to reduce memory demands.
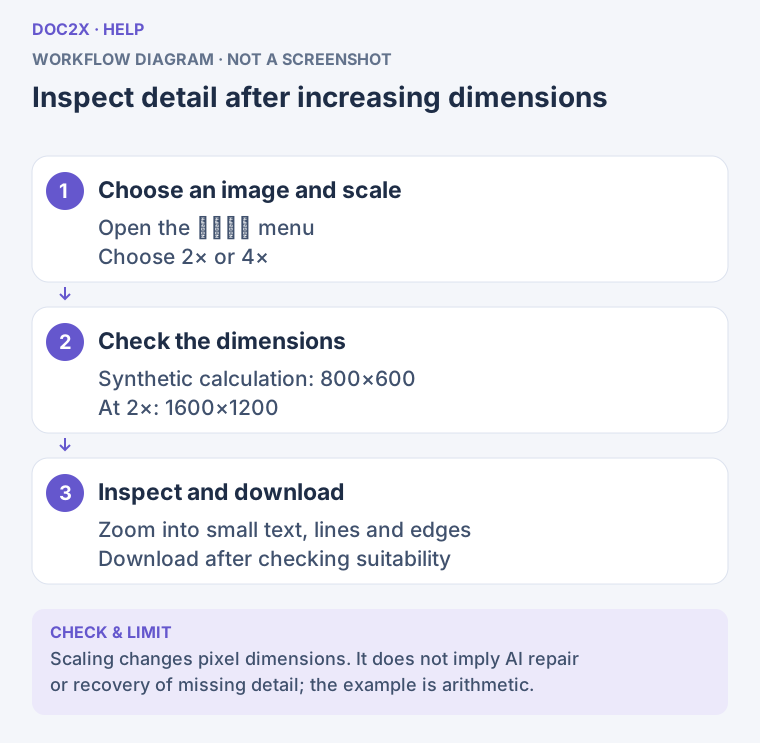
2× and 4× increase image dimensions; inspect the enlarged detail. (workflow diagram). Open the image in a new tab to enlarge it.
Downloads and recovery
Browser downloads appear in the download list or the location you select. In the desktop app, follow the actual download/save prompt. Previews and queues are temporary work areas; download required results before refreshing, closing, or replacing files.
| Problem | Recovery |
|---|---|
| Image cannot be read | Save a genuine PNG/JPEG copy in an image app, then retry; check that the source is not damaged |
| Copying or pasting fails | Download the image and insert the file instead |
| No result appears | Wait for individual file completion, inspect errors, then reduce batch size or dimensions |
| Transparency becomes white | Cropping fills the background white; preserve the original and check PNG/WebP conversion results when transparency is needed |
| ZIP cannot be inserted as an image | Extract it first, then select an image file inside |
| Tool or settings fail to open | Check connectivity and reopen the tool; on a narrow screen, use the purple menu button |