
Image Workspace: Translation, Layers, AI Images and Enhancement
This tutorial uses a self-made “Saving Water at School” poster to explain Magic Pic's image workflows. Prepare a PNG with SAVE WATER, Close the tap after use. and a tap illustration. Use an image you made or are entitled to use, so you can compare the text and artwork with the result.
The current workspace includes Chinese controls; key labels below help you match the instructions to the interface.
1. Choose the Right Tool
Open Utilities → Magic Pic and select a tool for your task:
| Goal | Entry | Main result |
|---|---|---|
| Translate text inside an image and adjust its layout | Image translation/editing/layers (图片翻译/编辑/分层) with translation enabled | An editor with text layers; image, PDF and PPTX exports |
| Keep the source language while editing text, formulas or the background | The same entry with translation disabled | An editable layered image and exports |
| Generate artwork from a description or revise an image | AI image generation (AI 生图) | A new image to download, revise, recognize or edit |
| Improve blurry text and lines in images | Image enhancement (图片高清化) | One PNG or a ZIP containing multiple PNGs |
For ordinary cropping, compression, format conversion and the menu's “Lossless Upscale” tool, see Image Tools. Ordinary resizing and the editor's export scale are separate from AI enhancement. For perspective correction, shadow removal and scan super-resolution, see Scanning Workspace.
2. Translate an Image: Configure Before Uploading
Prepare the File and Translation Settings
- Sign in to Doc2X. If the entry asks for phone information, complete the sign-in prompt.
- Open Image translation/editing/layers. It processes one image at a time and does not accept PDF files.
- Enable Translation (翻译开关) and choose the Translation language (翻译语言). The sample poster translates from English to Chinese.
- Choose an available Translation model (翻译模型). This editor currently supports free translation models only; paid models are marked as unavailable for the editor.
- Select a Glossary (术语表) when you need consistent wording, such as translating
water conservationas “节约用水.” Otherwise, leave it unselected. - Click Select file, or drag/paste one image onto the page, and wait for parsing and translation.
- The editor opens when processing finishes. Compare every translated passage with the original, especially numbers, units, names and formulas.
The entry supports JPEG, PNG and WebP, up to 10 MB per image, with neither side exceeding 16,384 pixels and no more than 25 million pixels in total. Conversion of other formats depends on browser decoding support. If reading fails, actually save the file as JPEG/PNG in an image application before retrying.
“Free translation model” describes that model option; it does not mean all parsing, image generation or enhancement has unlimited free usage. Check the account and task notices for each action.
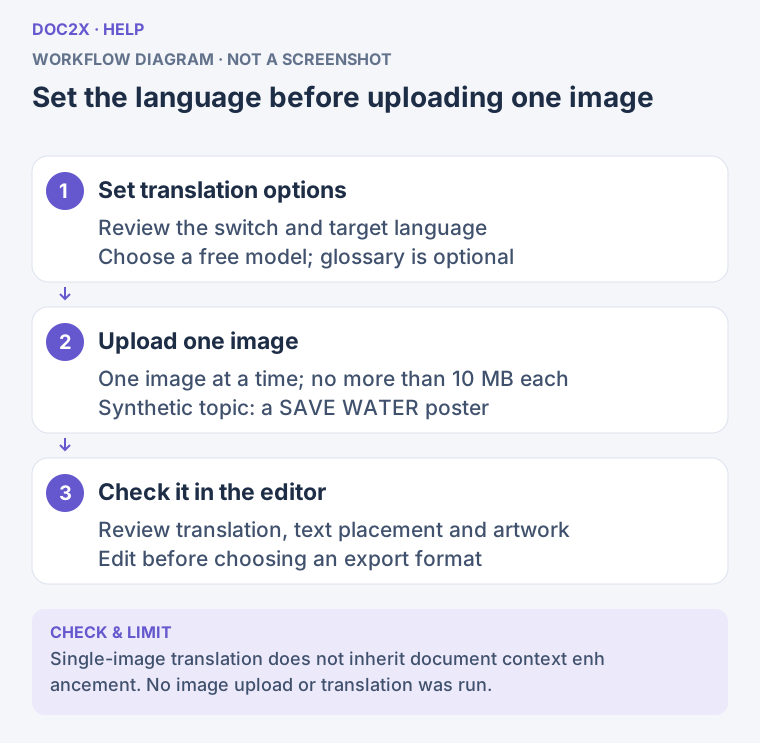
Image-translation workflow: set the language and model, upload one image, then check the translation in the editor. (workflow diagram). Open the image in a new tab to enlarge it.
Uploading Through Smart Translation
Smart Translation also accepts images. Uploading one image enables image translation and opens the same editor using the image-translation settings. To control the language, model or glossary explicitly, configure them in Image translation/editing/layers first.
Upload images separately from PDF/Office documents. If you select both together, documents take priority and the page asks you to upload images separately. Adding several images does not create a batch translation task; use the one-image workflow for each.
3. Edit Text, Formulas and Artwork Separately
To edit source text without translating it, turn Translation off before uploading. The editor separates editable text from the artwork. In this example, change the heading to “Save Water, Starting at School.”
Correct Text and Style
- Use the selection tool to select a text box, enter text-editing mode and correct the recognized or translated content.
- Leave text-entry mode, then use the floating toolbar to adjust font, size, text color and outline.
- Move and resize the text box. Check that text remains within the box and does not cover the artwork.
- Click New text box (新建文本框) for a new caption. Use Delete text (删除文本) to remove an unwanted box.
- Toggle Hide text / Show text (隐藏文字 / 显示文字) to inspect the background for remaining source lettering. Use Import preview (导入预览) to compare the original image.
- For consistent headings, open Text style clusters (文本样式聚类), select the appropriate group, and use the batch controls to adjust size, color and other available properties.
- Choose an Alignment snapping (对齐吸附) mode: off, guides only, or guides with snapping.
Some actions, including adding a new box, are unavailable while entering text. Finish that edit first. The canvas Zoom in / Zoom out controls change the viewing scale only.
Edit or Insert a Formula
- Open formula editing for an existing formula. To add one, enter text-editing mode and click Insert formula (插入公式) in the floating toolbar.
- Enter LaTeX, for example
Q = v t. - Check the Live preview (实时预览) for subscripts, fractions and brackets.
- Enable Display Mode (独立行公式) if needed, then confirm.
⌘/Ctrl+Entersaves andEsccancels. - Use Remove formula (移除公式) in the same dialog to delete it.
Repair or Revise the Artwork
| Tool | Purpose | How to use it |
|---|---|---|
| Eraser and restore → Background erase (背景抹除) | Remove local marks from the background | Choose a brush, rectangle or circle and limit the affected area |
| Eraser and restore → Local restore (局部还原) | Restore a processed region | Select brush, rectangle or circle restoration and apply it to that region |
| Magic erase (魔法消除) | Online repair of a local area | Sign in, select the tool, adjust brush size, paint the target and wait for processing |
| Edit by description (描述改图) | Redraw the artwork layer from instructions | Enter requirements → Generate preview → Compare original/result → Apply artwork |
For example, enter “Make the background light blue, keeping the tap's position and size. Do not add text.” Edit by description replaces the artwork layer while editable text and formulas remain in place. Compare Original / Result (原图 / 结果) before clicking Apply artwork (应用配图). Cancel or regenerate if needed. The current interface shows 100 points per generated/edited image; the entitlement and price shown at submission take precedence.
Use Undo, Redo and History (撤销、重做、历史记录) at the bottom to return to an earlier state. Editing after returning to an older state starts a new editing path; export a version first if you want to keep it.
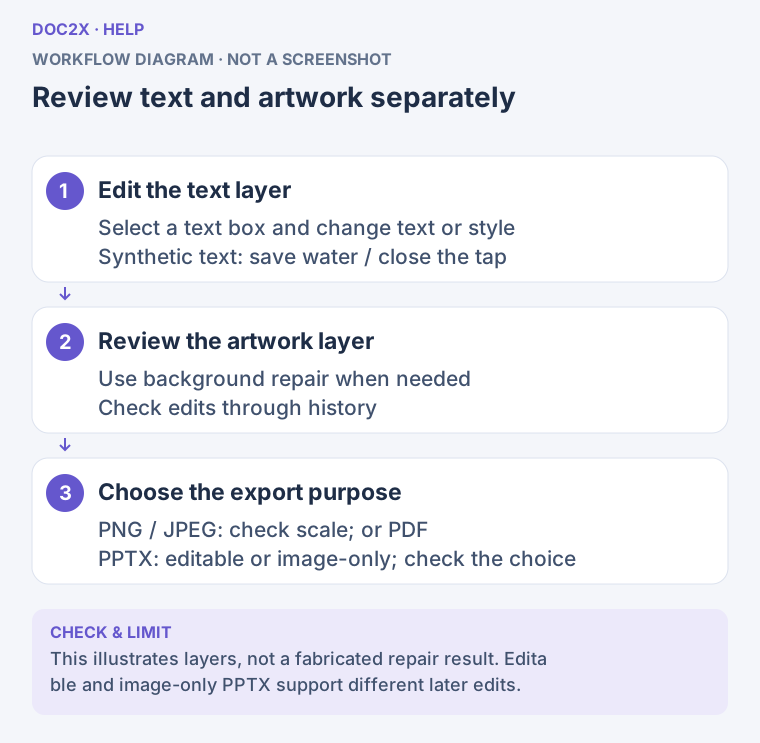
Layer editing and export: edit text and artwork separately, then choose an image, PDF or PPTX for the next step. (workflow diagram). Open the image in a new tab to enlarge it.
4. Export the Editor Result
Click Export result (导出结果) near the top of the toolbar:
| Export | Steps | Typical use |
|---|---|---|
| PNG | Select PNG → Set export scale → Export | Posters, presentation artwork and images with text or lines |
| JPEG | Select JPEG → Set export scale → Export | General image sharing and photographic artwork |
| PPTX → Editable (可编辑) | Click Editable | Continue modifying text and page elements in PowerPoint |
| PPTX → Image (纯图) | Click Image | Use the current appearance as a slide image |
| Export PDF (导出PDF) | Click Export PDF | Save the page's appearance for viewing or sharing |
PNG/JPEG scale ranges from 10% to 3000%, with 100% as the default. Scaling changes output dimensions; it does not automatically recover missing image detail. Large scales can require substantial memory. PDF exports the page appearance; it is not a Word document or a text-recognition result.
Open the downloaded file and check fonts, formulas and boundaries. Use the browser's download/save prompt, or the client's current save interface. Editing history is cached on the current device and should not be treated as cross-device synchronization or a permanent backup.
5. AI Images: Generate, Reference and Revise
Generate from a Description
- Open Utilities → Magic Pic → AI image generation, then click New creation (新建创作).
- Sign in and check membership and points. Platform image generation requires membership. The current interface shows 100 points per image; use the price shown when sending.
- Enter the subject, composition, colors and purpose in Image description (图片描述). For example:
A flat illustration about saving water at school: a closed tap and one drop in the center.
Use blue and green with a bright, pale background and space on the right for a classroom caption added later.
Landscape composition, with no text, numbers or logos.- Check the Image model (图片模型) and select Square 1:1, Landscape 3:2 or Portrait 2:3. Requested sizes are 1024×1024, 1536×1024 and 1024×1536 respectively.
- Click Send or press
Enter; useShift+Enterfor a new line. Click Stop (停止) if you need to stop generation. - Enlarge the completed result to check details, then use Download image (下载图片). It saves as JPG or PNG according to the returned format.
Descriptions support up to 14,000 characters. Use this prompt (使用此提示词) on a sample fills the input; review it before sending.
Upload a Reference or Continue Editing
- Click Upload reference image (上传参考图片) and select a PNG, JPEG or WebP, up to 20 MB.
- Check the reference shown above the input, then describe what to keep and what to change.
- Send and inspect the new result. Continue editing (继续修改) uses that result as a reference for the next request, such as “Keep the subject and change the background to pale green.”
- Use Generate another (再生成一张) for another generated result. This starts generation again; it does not simply download the existing image.
- Click Remove reference image (移除参考图片) when you want to start without that reference.
Choose the Next Action
| Action | What happens next |
|---|---|
| Download image | Saves the generated image |
| Continue editing | Uses this result for another image-editing request |
| Generate another | Generates another result from that request |
| Image recognition (图片识别) | Opens an OCR result for reviewing and using text |
| Edit text (编辑文字) | Parses text and layout, then opens the image editor for changes and export |
Edit text applies the editor's 10 MB, 16,384 pixels per side and 25-million-pixel limits. A 20 MB reference allowance does not mean every downstream tool accepts 20 MB. Edit text checks membership access; Image recognition checks sign-in and follows its own recognition quota.
Creation history (创作记录) on the left explicitly says it is saved on the current device. Use the same account to reopen a local conversation and continue editing. An in-progress record attempts to resume its existing processing state. Deleting a creation removes its local images and conversation, so download any results you want to keep first.
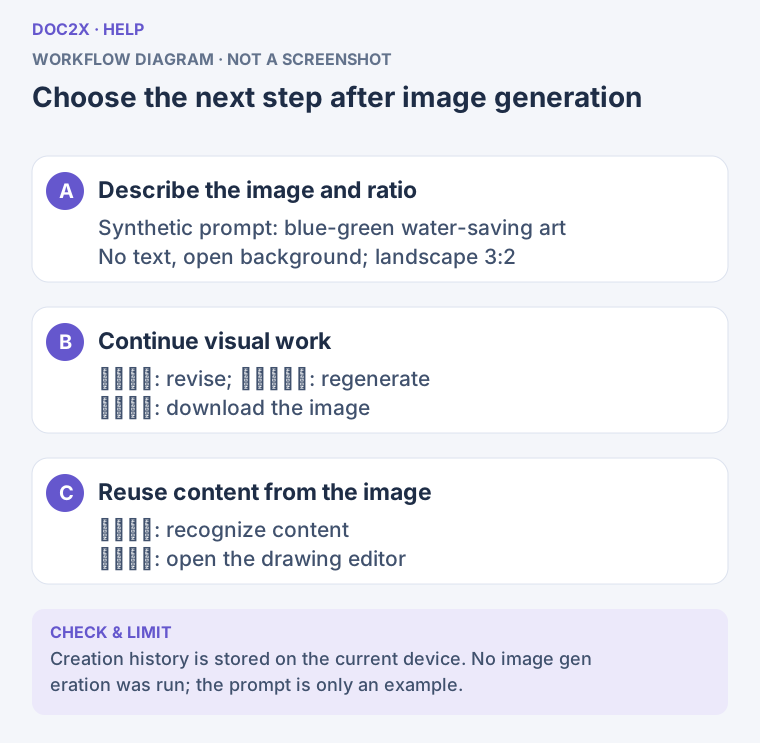
After AI image generation: download, revise, recognize the content, or open the editor to change text. (workflow diagram). Open the image in a new tab to enlarge it.
6. Enhance One or Many Images
Select Images and Review the Quote
- Open Utilities → Magic Pic → Image enhancement (图片高清化).
- Select, drag or paste PNG, JPG, WebP, GIF or BMP files. The standalone tool accepts up to 300 images at once.
- Check thumbnails and remove unwanted images, or click Clear (清空) to start again.
- Click View cost and start (查看费用并开始). After signing in, review the filtering results, eligible image count, estimated points and available balance.
- Members can confirm a batch. Eligible non-members can select one image for a free trial. Availability follows the current account notice.
- Click Start enhancement (开始高清化) after checking the quote. Previously processed images with reusable results are identified and do not incur the same processing charge again.
Current defaults are 8 MB per image and 512 MB per upload batch; the quote and validation messages take precedence. Images with a longest side below 32 pixels are skipped. Unsupported, oversized or unreadable files show a reason. The current default notice is 10 points per image; use the price shown at confirmation rather than treating it as permanent.
Compare and Download
- Check completed and failed counts. Once one image finishes, you can compare it; select a completed thumbnail to change images.
- Compare small text, units, formulas and fine lines. AI processing can change details, so check question diagrams carefully.
- To stop, click Stop; completed results are retained (停止(已完成的照常保留)) and wait for the result.
- Click Download enhanced images (下载高清图). One completed image downloads as PNG; multiple images download as
高清图片.zip, containing the individual PNG files. - After partial failure or cancellation, save completed results before processing the remaining images.
This enhancement targets illustrations. The current processing target is 2× enlargement with a longest side of about 1024 pixels; larger source images may be reduced to that size. It therefore does not preserve every source image's original resolution, and it is separate from scan super-resolution.
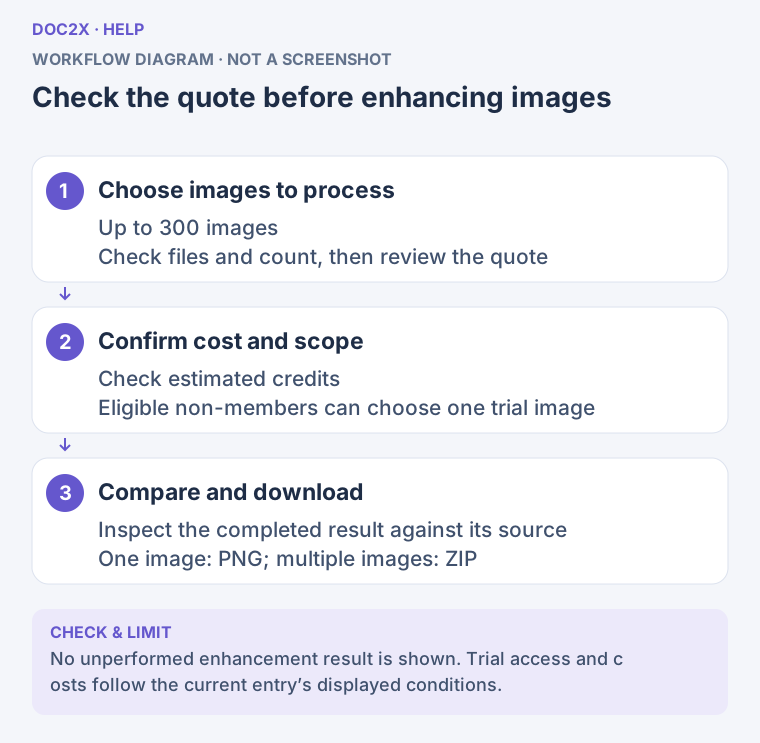
Image-enhancement workflow: check the quote before processing; download one completed image as PNG or multiple images as ZIP. (workflow diagram). Open the image in a new tab to enlarge it.
Enhance Images Inside Documents
- During export: Enable Enhance images before export (导出前把图片变高清) in a supported document export dialog. Once export content is prepared, review the image count and estimated points before confirming enhancement. Current server export support includes Word, Markdown with local images, LaTeX and Typst; unsupported formats disable the switch.
- Replace in the Markdown editor: Use Enhance and replace (变高清并替换) on an image in preview. After confirmation, the enhanced image replaces it in the document. Multiple occurrences of that same image are replaced together; review and save the document afterward. See Markdown Toolbox.
These entries share enhancement processing but place results differently: the standalone tool downloads images, document export places them back in the file, and Markdown updates image references in the text. The image editor's export scale is separate.
7. Saving and Troubleshooting
| Symptom | Cause and next step |
|---|---|
| Upload says the file is not an image | Use document tools for PDF/Office files; save unreadable images as JPEG/PNG in an image application |
| A file below 10 MB exceeds the dimension limit | Bytes and pixels have separate limits; reduce both side length and total pixels |
| WebP conversion exceeds the limit | Re-encoding can increase size; compress it or save it as JPEG before retrying |
| Translation options are missing | Sign in and enable the translation switch; leave it off when only editing text |
| Paid translation models are unavailable | The image editor currently accepts the free models enabled in that interface |
| Translated text covers artwork | Shorten text or adjust its font size, box size and position, then check the export |
| Magic erase or description-based editing fails | Check the network and specific error, preserve the current result, then retry the required change |
| AI generation did not finish | Check the error, account access and points before retrying; a download failure does not require generating a new image |
| Another enhancement task is running | Wait for it to finish or stop it before starting a new one |
| History disappears after clearing cache | Local history is not a permanent file library; continue from downloaded files |
Web and desktop clients share these workspaces, while service requests require a network connection. Download important results as files instead of relying only on a workspace link or preview.